Dine In & Delivery
The Dine In & Delivery menu helps brands serve online orders through an order link that can be accessed by customers. In this menu, brands can manage categories, menus, delivery methods, and outlet operations for dine in, takeaway, and delivery services.
Each order placed by a customer will be linked to its respective outlet, so menu availability may differ for each store based on the configurations set by the brand in the dashboard.
In addition, brands can determine the delivery methods used, either through internal couriers or available courier partners.
How to Create a Dine In & Delivery Program
1. Open the “Dine in & Delivery” menu, then select the “Program” sub menu.
2. Fill in the “Delivery Link”. This link will be used by customers to access the dine in & delivery program.
Note: The delivery link can use either a Tada domain or the brand’s own domain.
- If using a Tada domain, select the “Use TADA domain” option and enter the slug in the provided field. Click “Check availability” to check the availability of the selected domain.
- If using the brand’s own domain, select the “My brand own domain” option, then enter the domain and slug in the provided fields. Click “Check availability” to check the availability of the selected domain.
 3. Turn on the “Enable tax” toggle if the program applies tax. Enter the tax amount in the provided field.
 4. Upload the brand logo in “Brand Logo” with a 1:1 ratio and a maximum size of 500 KB.
 5. Determine whether customers who make transactions will automatically become members. There are 3 available options:
- No: Customers will not be registered as members after completing a transaction.
- Add member only: Customers will automatically become members after completing a transaction.
- Add member & give rewards: Customers will automatically become members and receive rewards after completing a transaction. Select the program and wallet that will be given as rewards.
 6. If customers are allowed to use vouchers during checkout, enable the “Do you want to allow customer use their voucher?” toggle.
 7. Upload images that will be displayed on the customer dine in & delivery page. The recommended ratio is 9:16 with a maximum size of 1 MB and a maximum of 3 images.
 8. Determine the delivery methods available for customers. The available options are as follows:
a. Internal courier: The user/brand will provide their own delivery service with 2 options:
- Set Shipping Fee: Customers must pay a delivery fee. Define the cost per km (required), minimum delivery fee (optional), maximum delivery fee (optional), and maximum delivery distance (optional).
- Free of charge: Free delivery service.
b. Courier: Tada provides various courier options that customers can use to deliver their orders. Some available options are Gosend and Lalamove. Tentukan metode pengiriman yang tersedia untuk customer. Terdapat beberapa pilihan seperti sebagai berikut:
 9. Click “Save” to complete the program creation process.
How to Create a Menu in Dine In & Delivery
1. Open the “Dine in & Delivery” menu, then select the “Menu” sub menu.
2. In the “Item” tab, select the category where the menu will be created by clicking one of the “Category” options, then click the “Add menu” button.
 3. Fill in all the provided parameters:
- Name: Enter the name of the menu to be created.
- Description: Enter a short description of the menu. This description will help customers understand the menu offered by the brand.
- SKU: Enter the SKU of the menu to be created. The SKU must be unique and can contain a maximum of 100 characters.
- Price: Enter the price of the menu being offered. Isi seluruh parameter yang telah disediakan:

- Enable promo: If the user wants to create a promotion for the menu, enable the “Enable promo” toggle. In the “Promo Price” field, the user can enter the final price that customers need to pay to purchase the menu. Promotional information can be entered in the “Promo Info” field.

- Image: Upload a menu image. The maximum image size is 500 KB with a 1:1 ratio.
- Availability: Determine menu availability. If the toggle is turned off, the menu cannot be purchased by customers. Customers can only purchase the menu when this toggle is enabled.
- Limit fulfillment period: Used when the menu is only available during a specific period. Enable the “Limit fulfillment period” toggle when a menu should only be available within a certain period and enter the dates.
- Available store: Determine which outlets can sell the menu.
- Select variant: Select the variant of the menu being created.
 4. Click “Save” to complete the menu creation process.
How to Create a Category
1. Open the “Dine in & Delivery” menu, then select the “Menu” sub menu.
2. Click “Add New Category”.
 3. Enter the category name in the category list.
 4. Click the checkmark icon to save the new category.

How to Change Menu Position
1. Open the “Dine in & Delivery” menu, then select the “Menu” sub menu.
2. Select the category where the menu position will be changed by clicking one of the “Category” options, then click the “Edit menu position” button.
 3. Enter the desired menu order in the “Position” field.
 4. Click “Cancel” to cancel the menu position changes.
 5. Click “Done Editing” to save the menu position changes.
 If there are many menus, users can also click “Page” or “Next Page” to save the menu position changes and move to the next page to continue the process.


How to Change Dine In & Delivery Store Operating Hours
1. Open the “Dine in & Delivery” menu, then select the “Store” sub menu.
2. Select the store whose operating hours will be changed, then click “See details” in the Operation Hour column.
 3. Select the day and enter the operating hours in the provided fields. If the store is closed on a specific day, disable the toggle located on the right side of the field.
 4. Click “Save” to complete the operating hours update.
How to Manage Store Menus
1. Open the “Dine in & Delivery” menu, then select the “Store” sub menu.
2. Select the store whose menu will be managed, then click “See menu” in the Menu column.
 3. Click “+Assign Menu” to add menus to the selected store.
 4. Check the menus to be added, then click “Add menu”.
 5. Click “Remove” to remove menus from the selected store.
How to View Dine In & Delivery Orders
1. Open the “Dine in & Delivery” menu, then select the “Order” sub menu.
2. Enter filters to make it easier to search for orders. Available filters are order number, start date, end date, status, and outlet.
3. Click “Apply filter”.
 4. The system will display orders according to the selected filters.

Steps to Download Dine In & Delivery Order Data
1. Open the “Dine in & Delivery” menu, then select the “Order” sub menu.
2. Enter filters to make it easier to search for orders.
3. Click “Apply filter”.
4. Click “Download”.
 5. Enter the email address to receive the report.
 6. Click “Send to email” to send the downloaded report.
Order Report Data Definitions
- ID: Order ID
- Kind: Type of order created (delivery/dine in/take away)
- Delivery type: When the order will be delivered, applicable only for delivery orders.
- Deliver at: When the order will be delivered, applicable only for the “Later” delivery type.
- Invoice number: Invoice number.
- Notes: Notes included in the order created by the member.
- Currency: Currency used in the transaction.
- Tax percentage: Tax percentage applied.
- Total before tax: Total order amount before tax.
- Shipping cost: Delivery fee.
- Discount: Discount amount applied to the order.
- Total tax: Total tax amount applied to the order.
- Total price: Total order amount (including tax).
- Voucher used: Name of the voucher used in the order.
- Voucher number: Voucher number used in the order.
- Payment method: Payment method used by the member.
- Delivery method: Delivery method used.
- Status: Order status. Available statuses are:
a. Unpaid: Order has not been paid.
b. New: New order that has been paid by the member.
c. On process: Order is being processed by the restaurant.
d. Ready: Order has been completed and is waiting for delivery.
e. On delivery: Order is being delivered to the member.
f. Completed: Order has been successfully delivered.
g. Expired: Unpaid order that has expired.
- Set pickup time: Scheduled delivery time if the delivery type is “Later”.
- Created date: Date and time when the order was created by the member.
- Paid date: Date and time when the payment was completed.
- Process date: Date and time when the order started being processed.
- Completed date: Date and time when the order status changed to completed.
- Customer name: Name of the customer who placed the order.
- Customer email: Email address of the customer who placed the order.
- Customer phone: Phone number of the customer who placed the order.
- Customer address: Delivery address of the order.
- Item purchased: Name of the purchased item.
- Outlet name: Name of the outlet where the transaction occurred.
- Rejected date: Date and time when the order was rejected.
How to View UTM Source
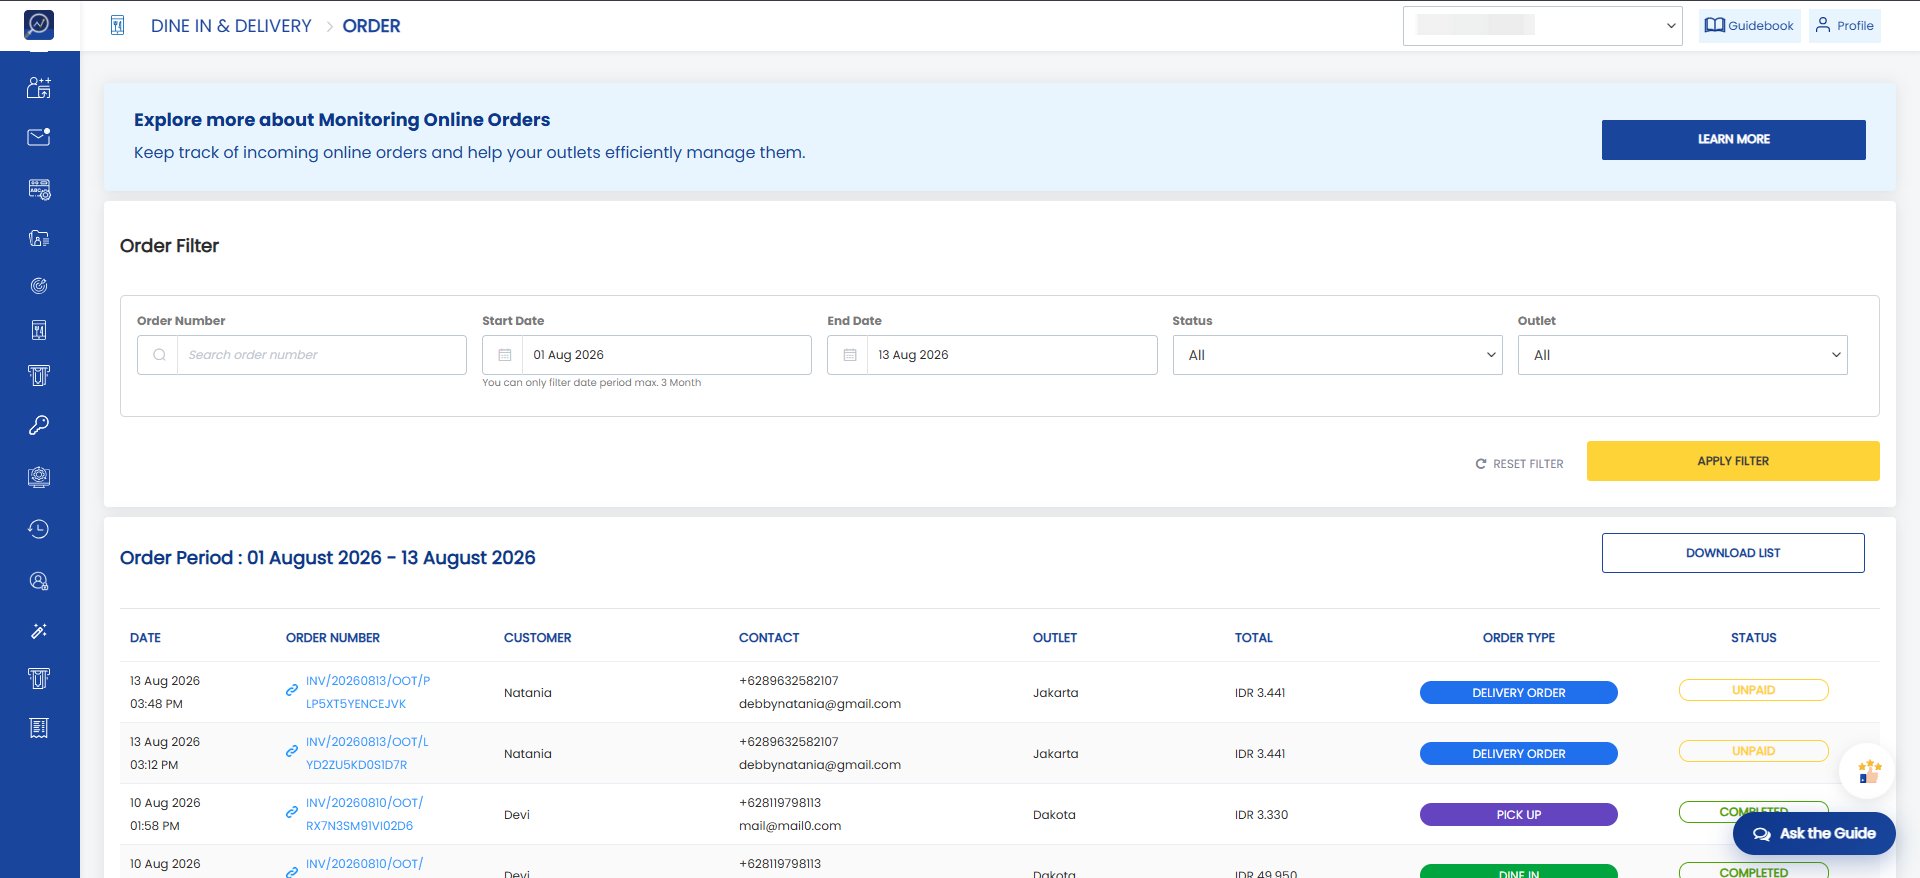
1. Navigate to the Dine in & Delivery > Orders menu.
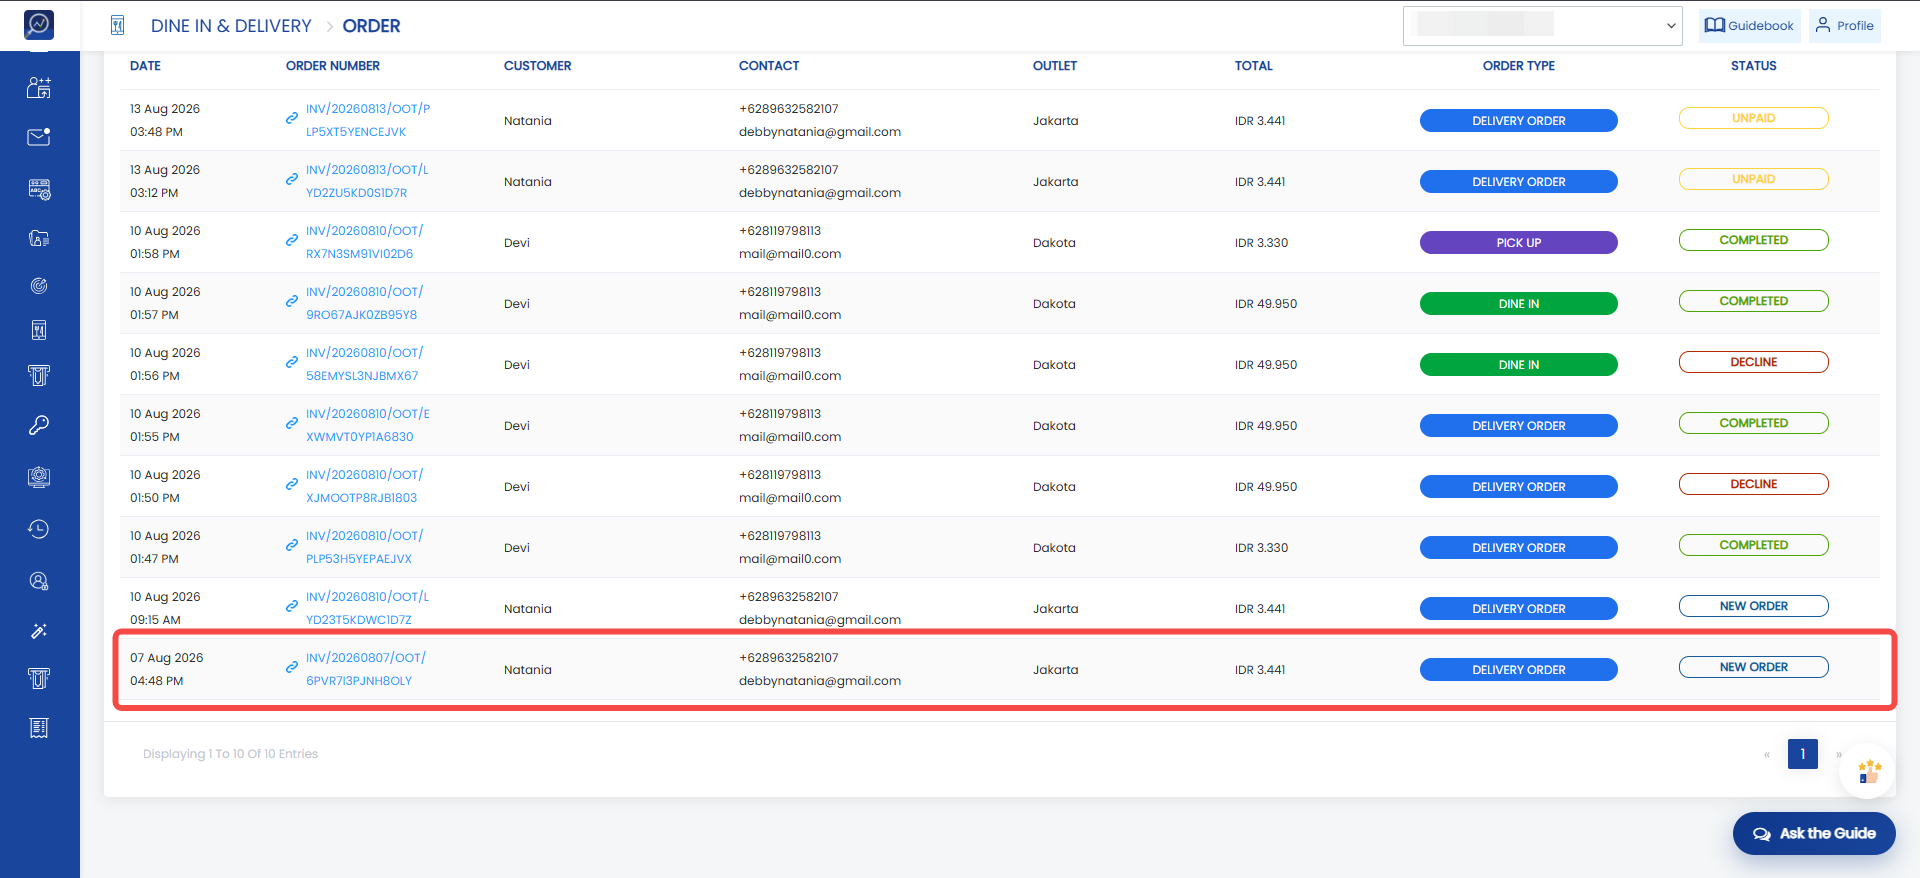
 2. Select the order you want to check the UTM source for.
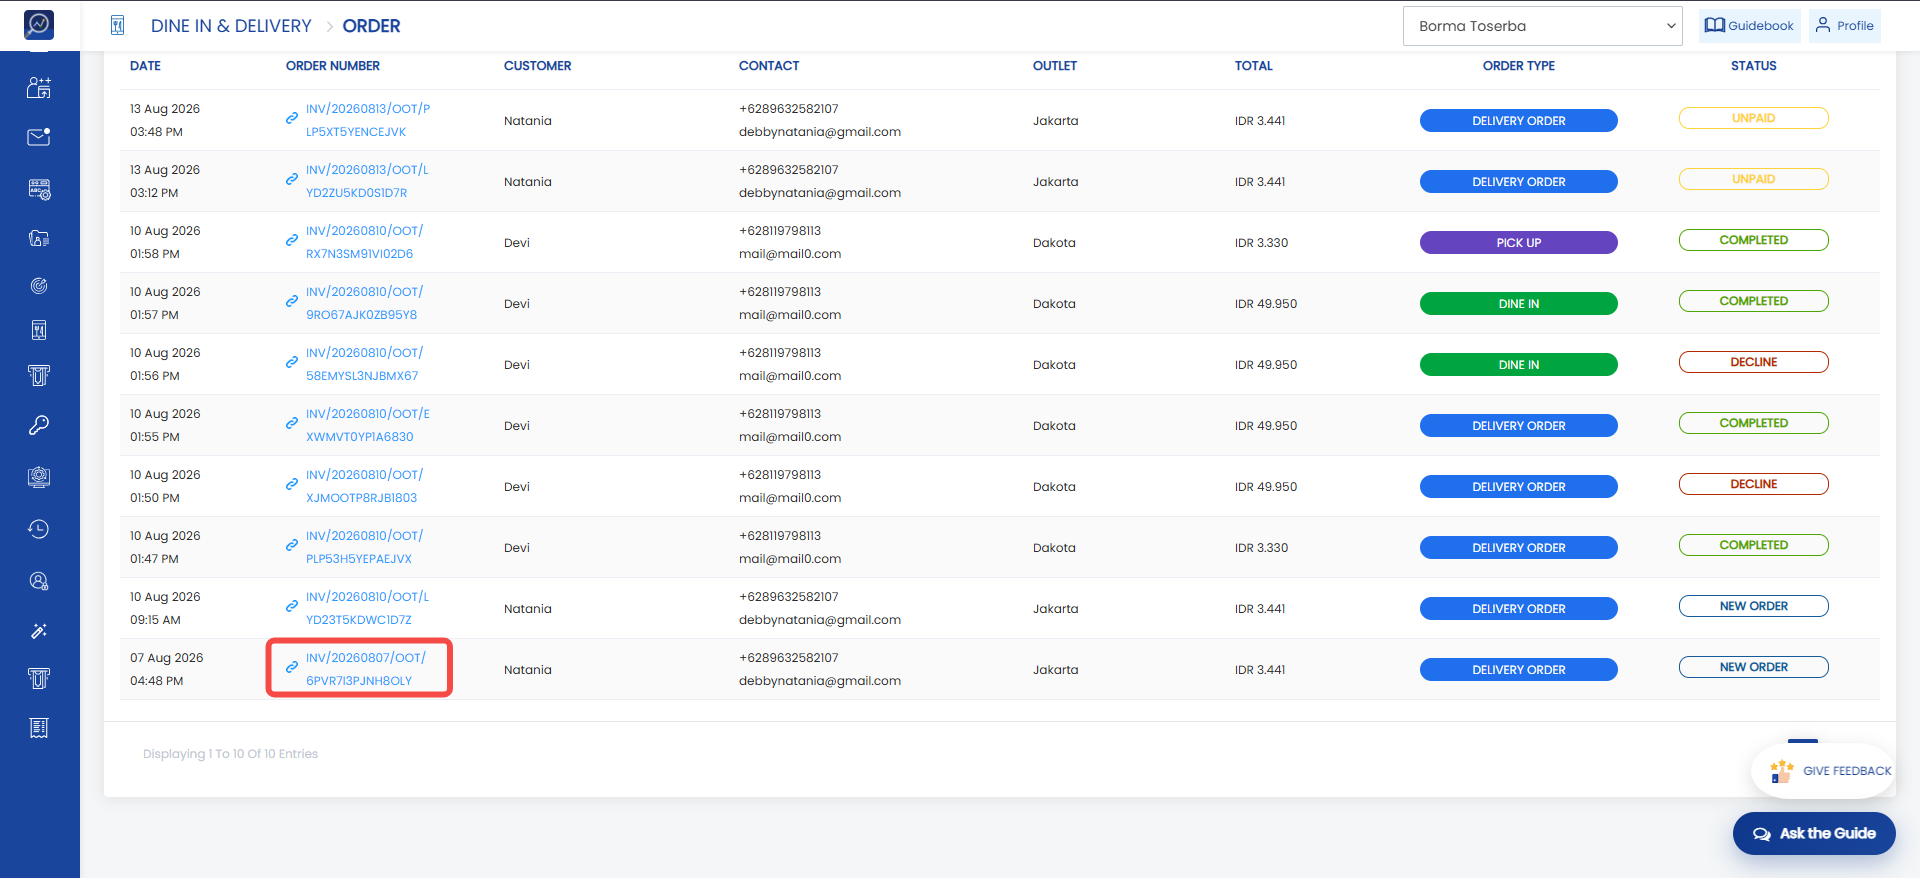
 3. Click the Order Number.
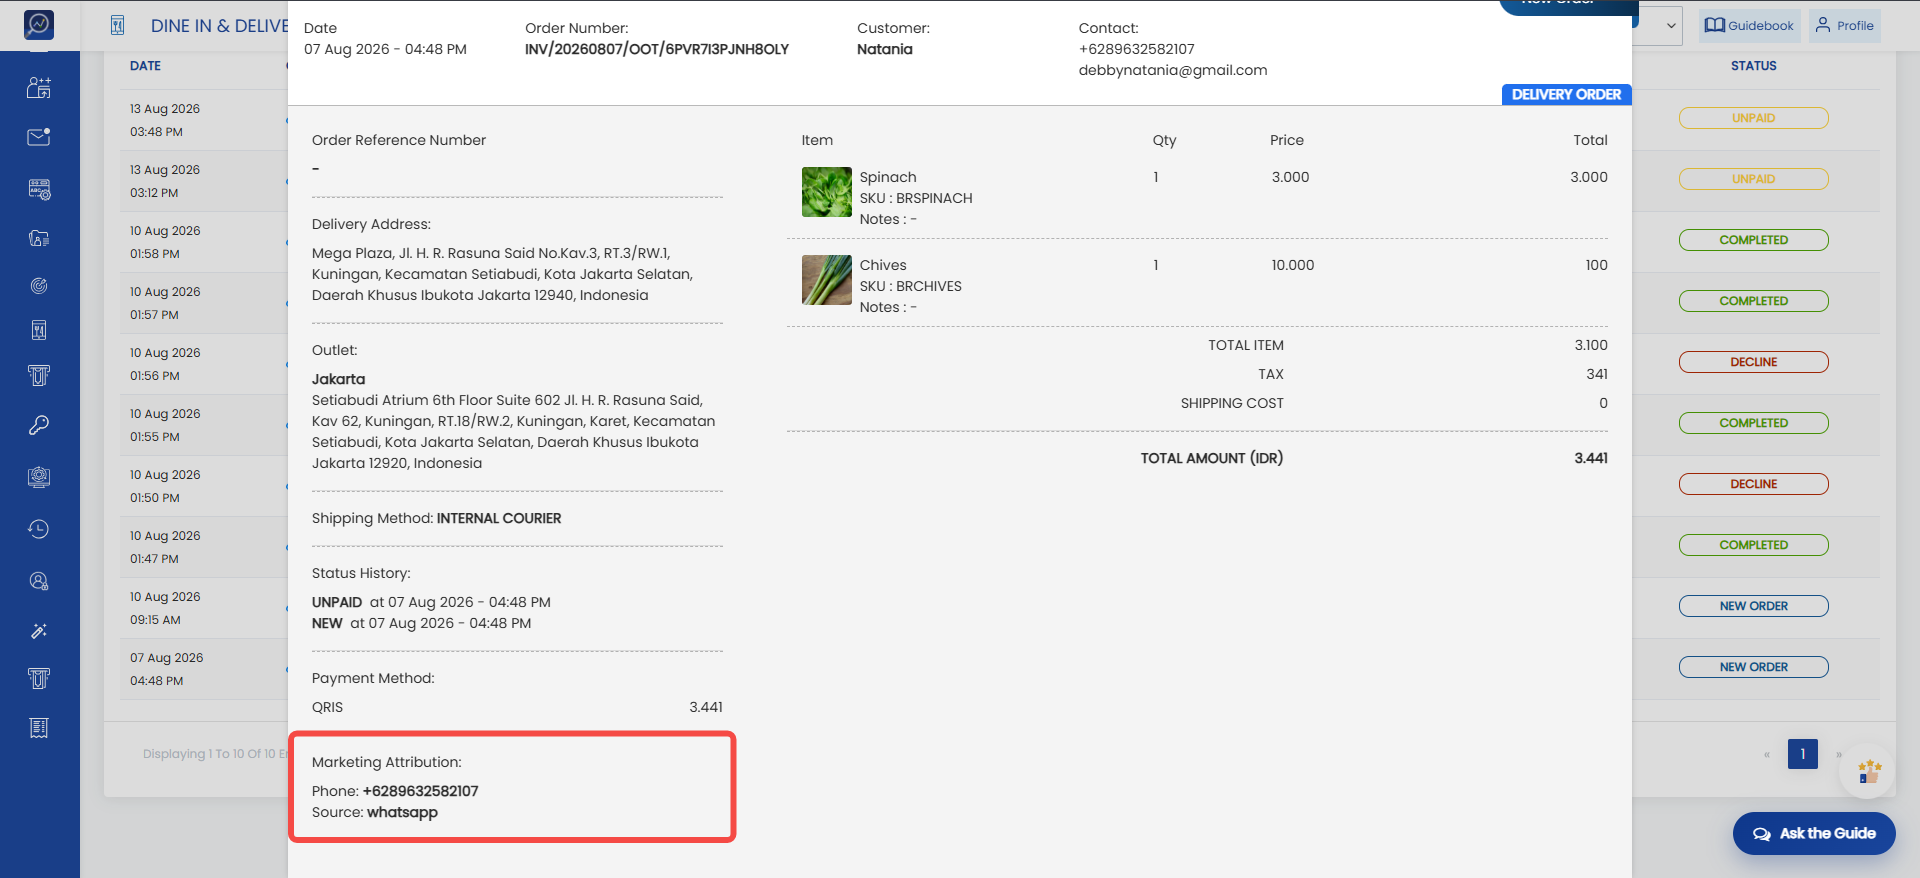
 4. In the bottom-left section, locate the Marketing Attribution section to view the UTM source information.