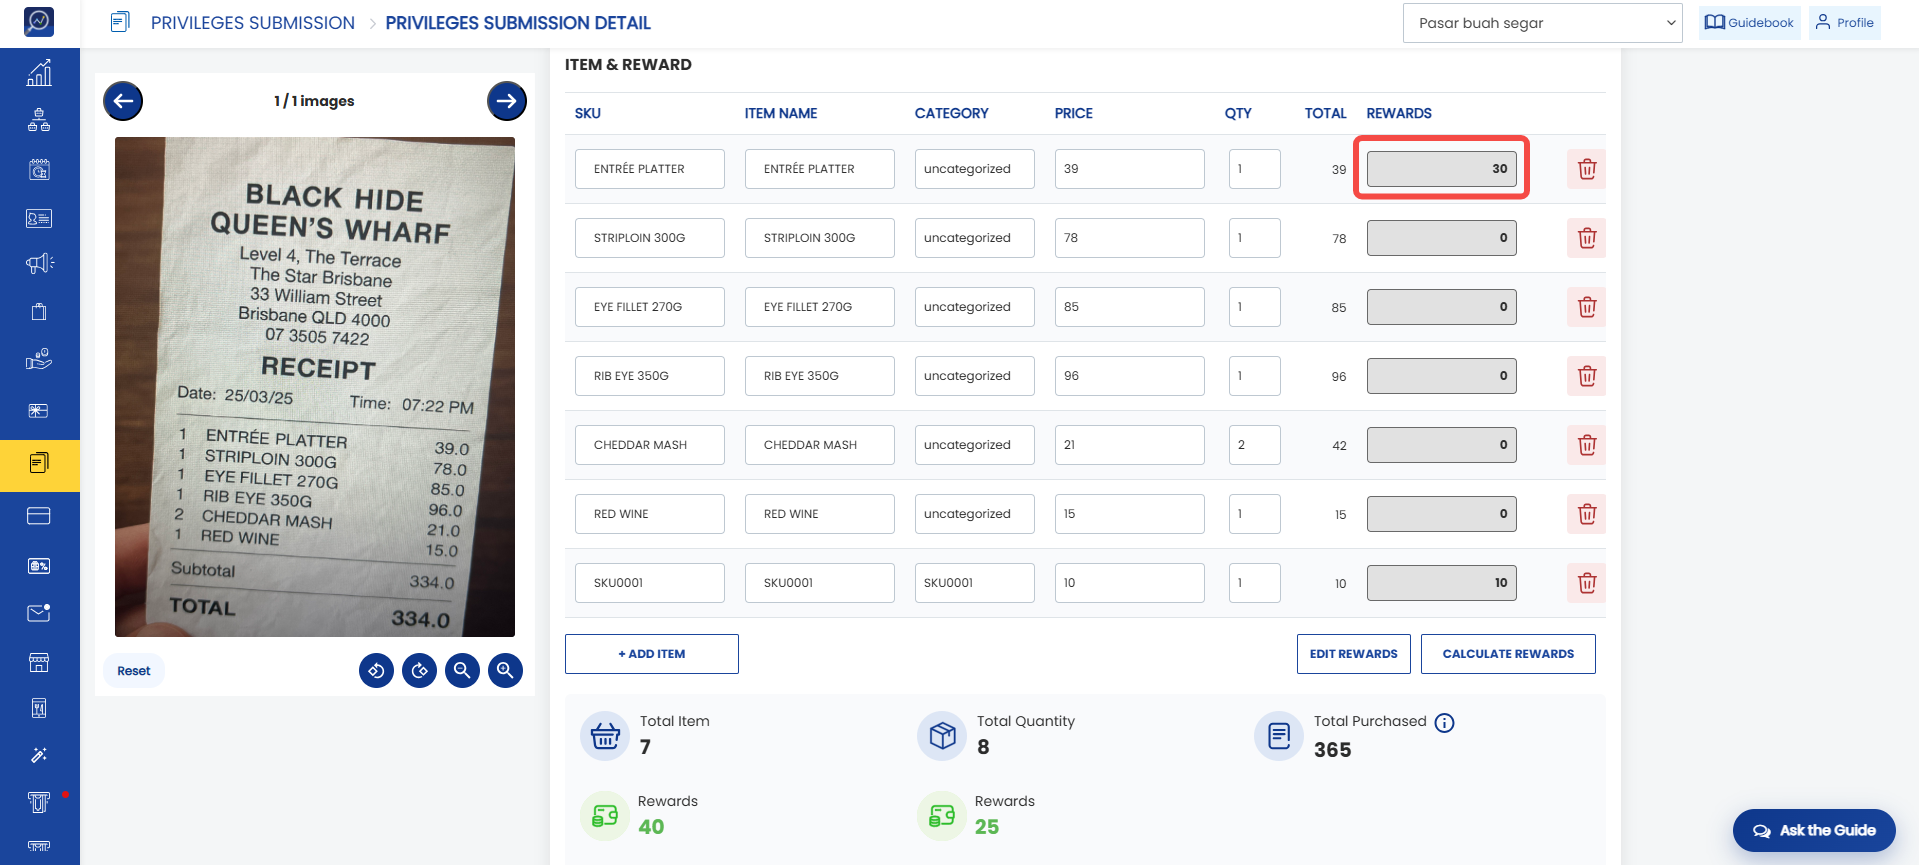
Privileges Submission
The Privileges Submission menu is used to view and manage submissions submitted by members through privilege features, such as surveys and snap receipts. Through this menu, users can:
- View survey responses submitted by members
- Approve or reject submissions
- Edit submission data
- Manage AI OCR reading results from snap receipts
- Manage rewards from submissions
All submission activities performed by members will be recorded in this menu, along with the details of the questions and answers provided.
How to Search for Submissions
1. Open the “Privileges Submission” menu.
2. Enter filters to make it easier to search for submissions. The following parameters can be used as filters:
- Start date
- End date
- Program ID
- Privileges
- Display type
- Status
- Verification
- Customer name
- Card number
- Phone number
3. Click “Filter” to apply the selected filters.
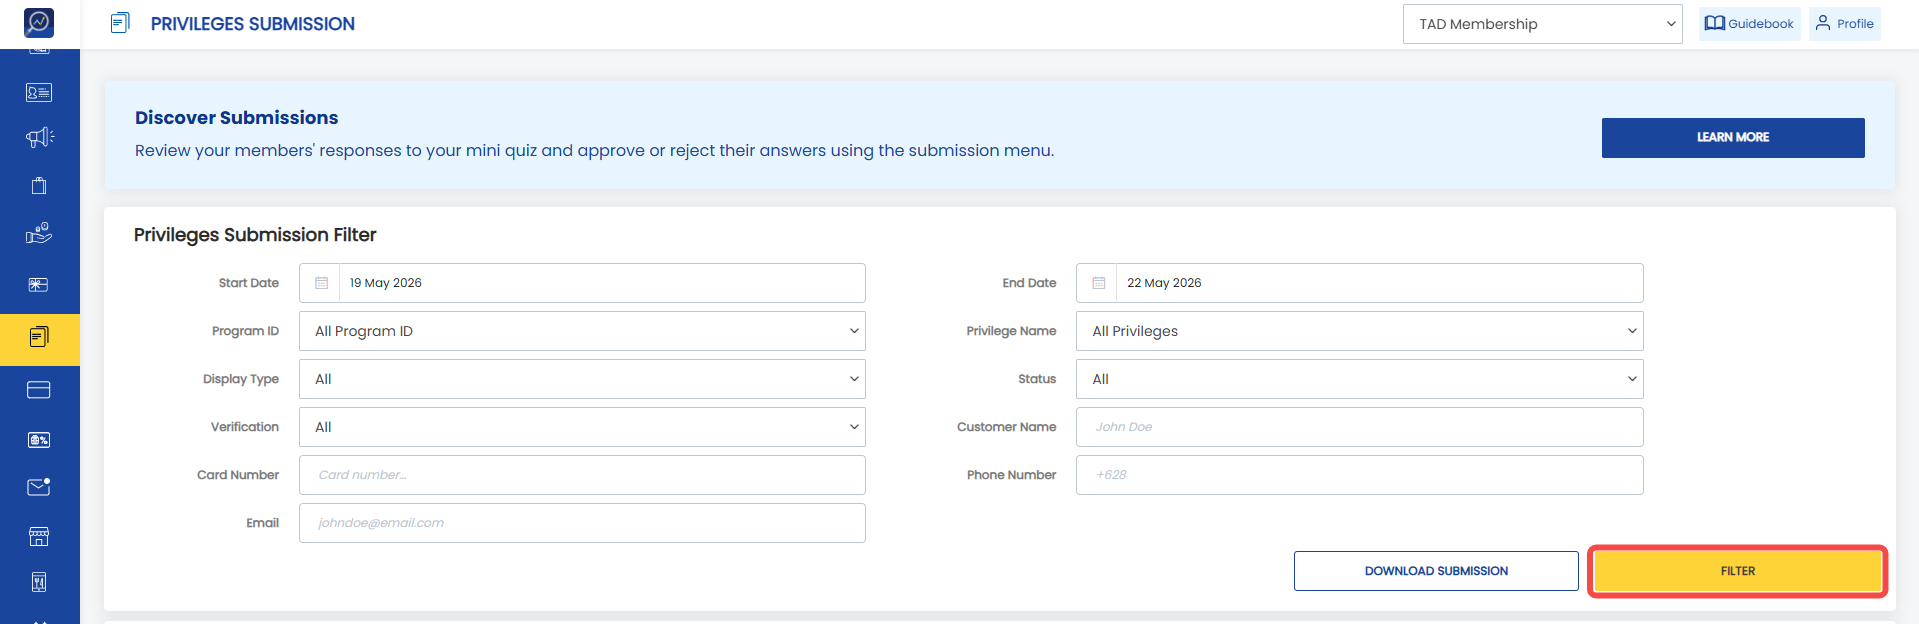 4. The system will display data according to the selected filters.
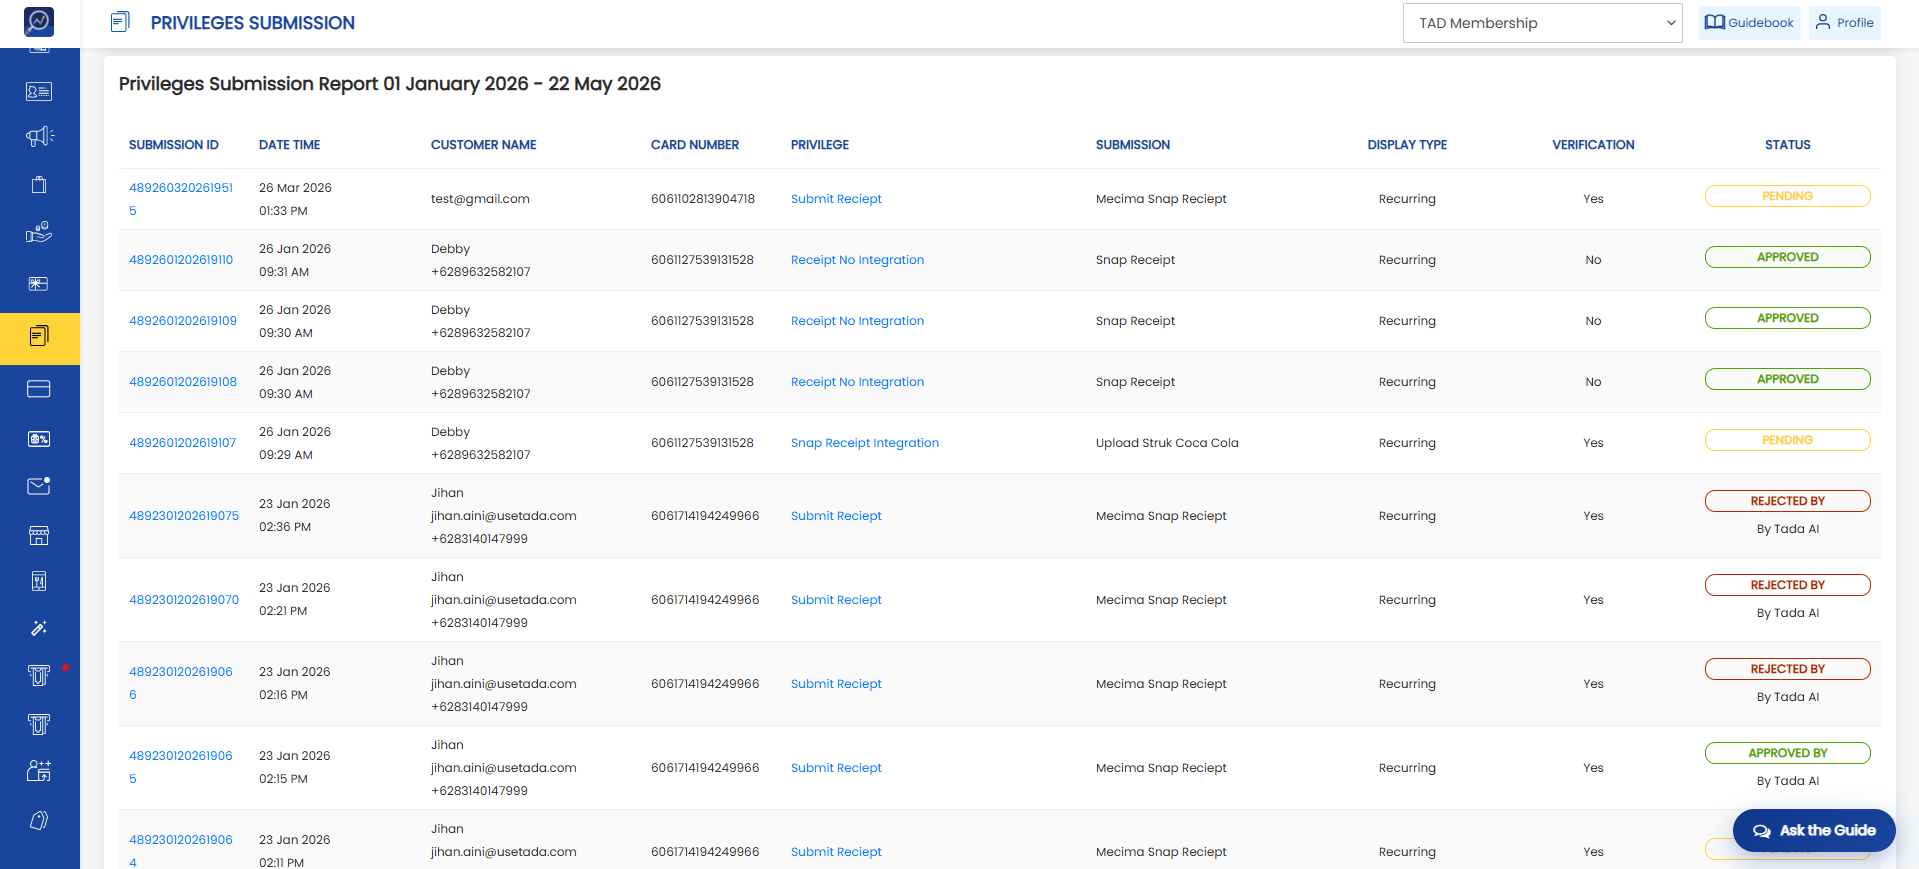
Steps to Download Privileges Submission
1. Open the “Privileges Submission” menu.
2. Enter filters to make it easier to search for submissions.
3. Click “Filter” to apply the selected filters.
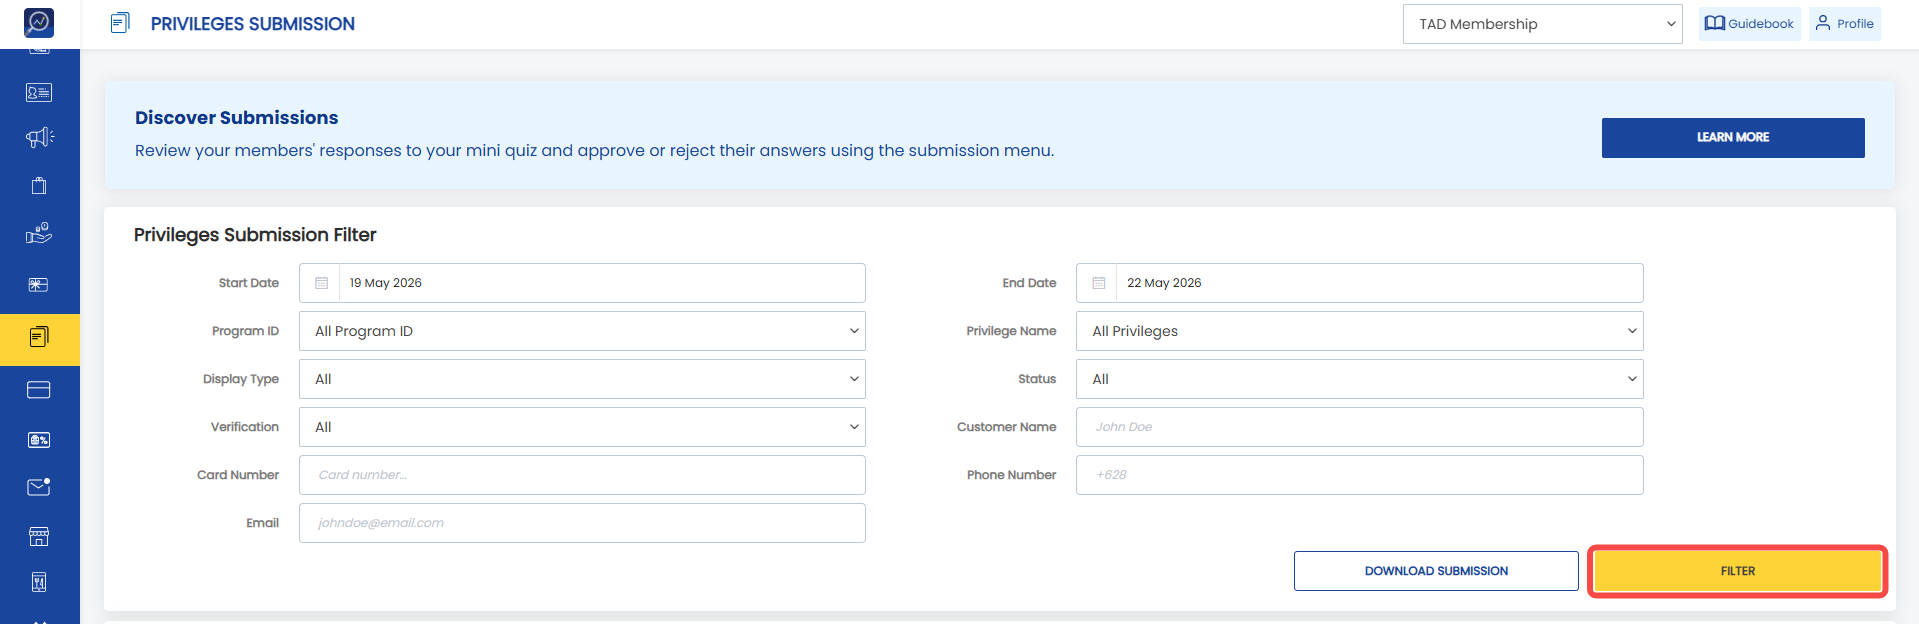 4. Click “Download submission”
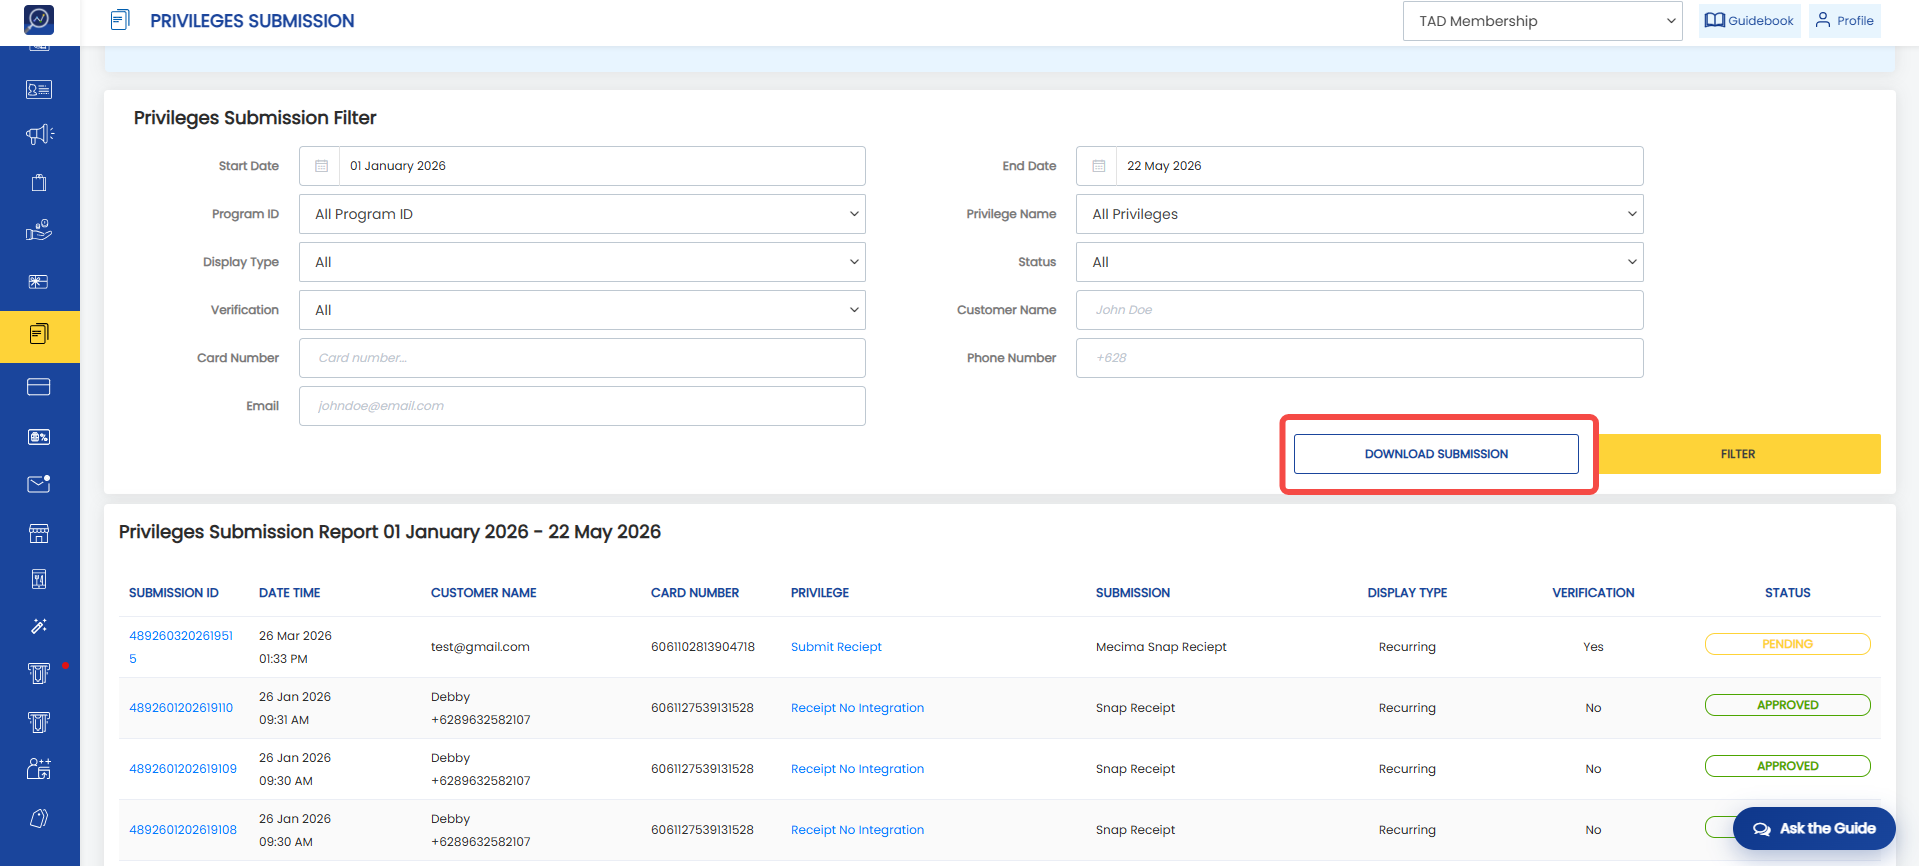 5. The system will display a pop-up. Select the data format to download, either clean or raw data format.
Note:
- Clean format : The downloaded data will be displayed in a cleaner and more organized format. However, this format has limitations on the amount of data that can be processed during download (maximum 10,000 rows).
- Raw format : The downloaded data will be displayed in its original raw format as stored in the system. We recommend this format for large-volume downloads to ensure optimal download performance.
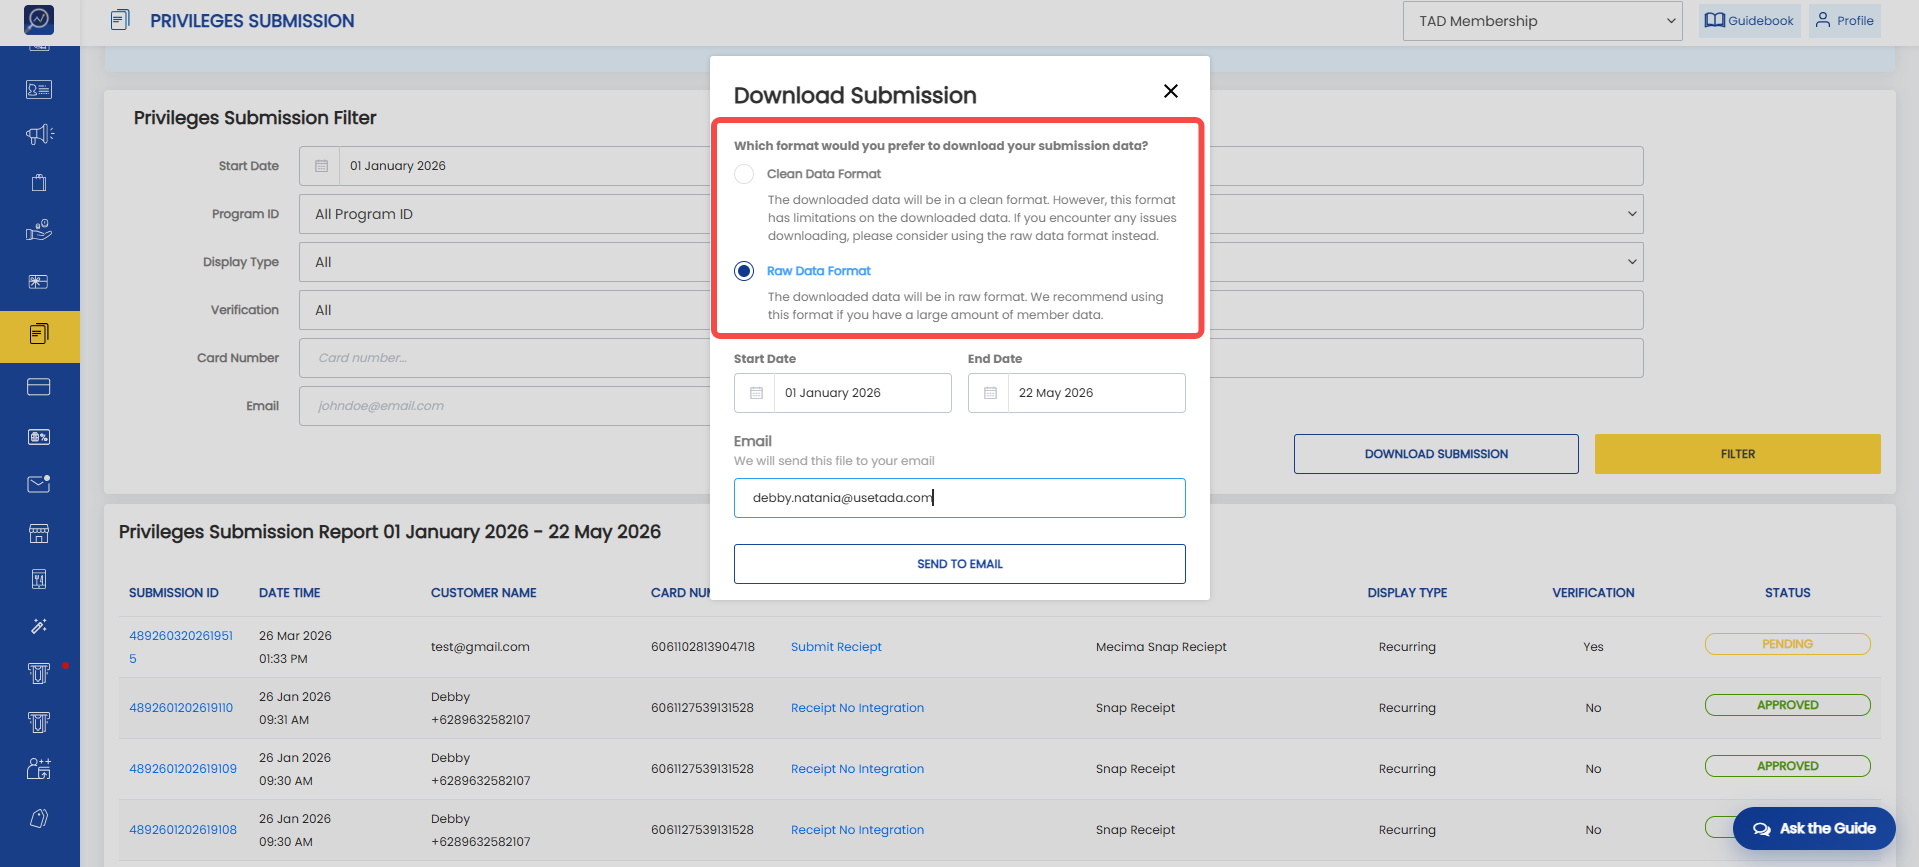 6. Select the report date range and enter the recipient’s email address.
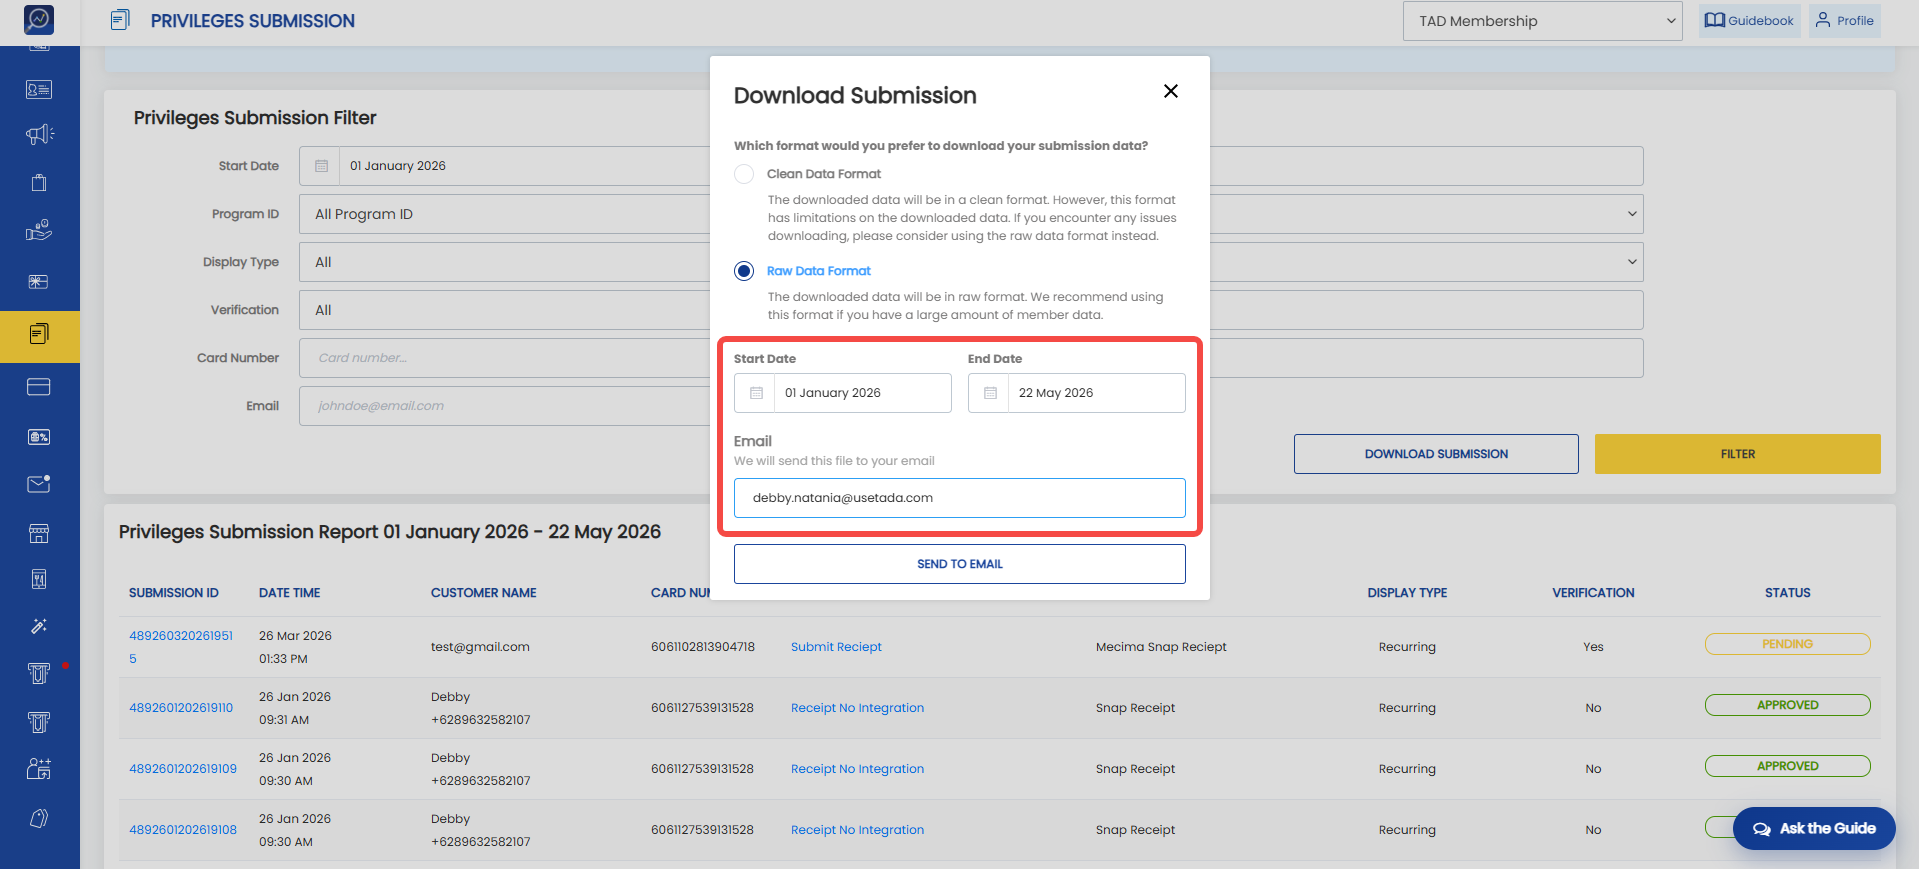 7. Click “Send to email”
8. The report will be sent as a file attachment to the registered email address.
Data Definitions in Download Submission
- Date time: Date and time when the member submitted the submission.
- Submission ID: Unique identifier of the submission.
- Customer name: Name of the member who submitted the submission.
- Email: Member’s email address.
- Phone number: Member’s phone number.
- Card number: Member’s card number.
- Privilege name: Name of the submitted privilege.
- Status: Submission status (approved/rejected).
- Reason: Reason entered by the user when approving or rejecting the submission.
- Other columns: Questions included in the submission and the corresponding answers.
How to Approve a Submission (Survey)
1. Open the “Privileges Submission” menu.
2. Search for the submission using filters.
3. Click the Submission ID.
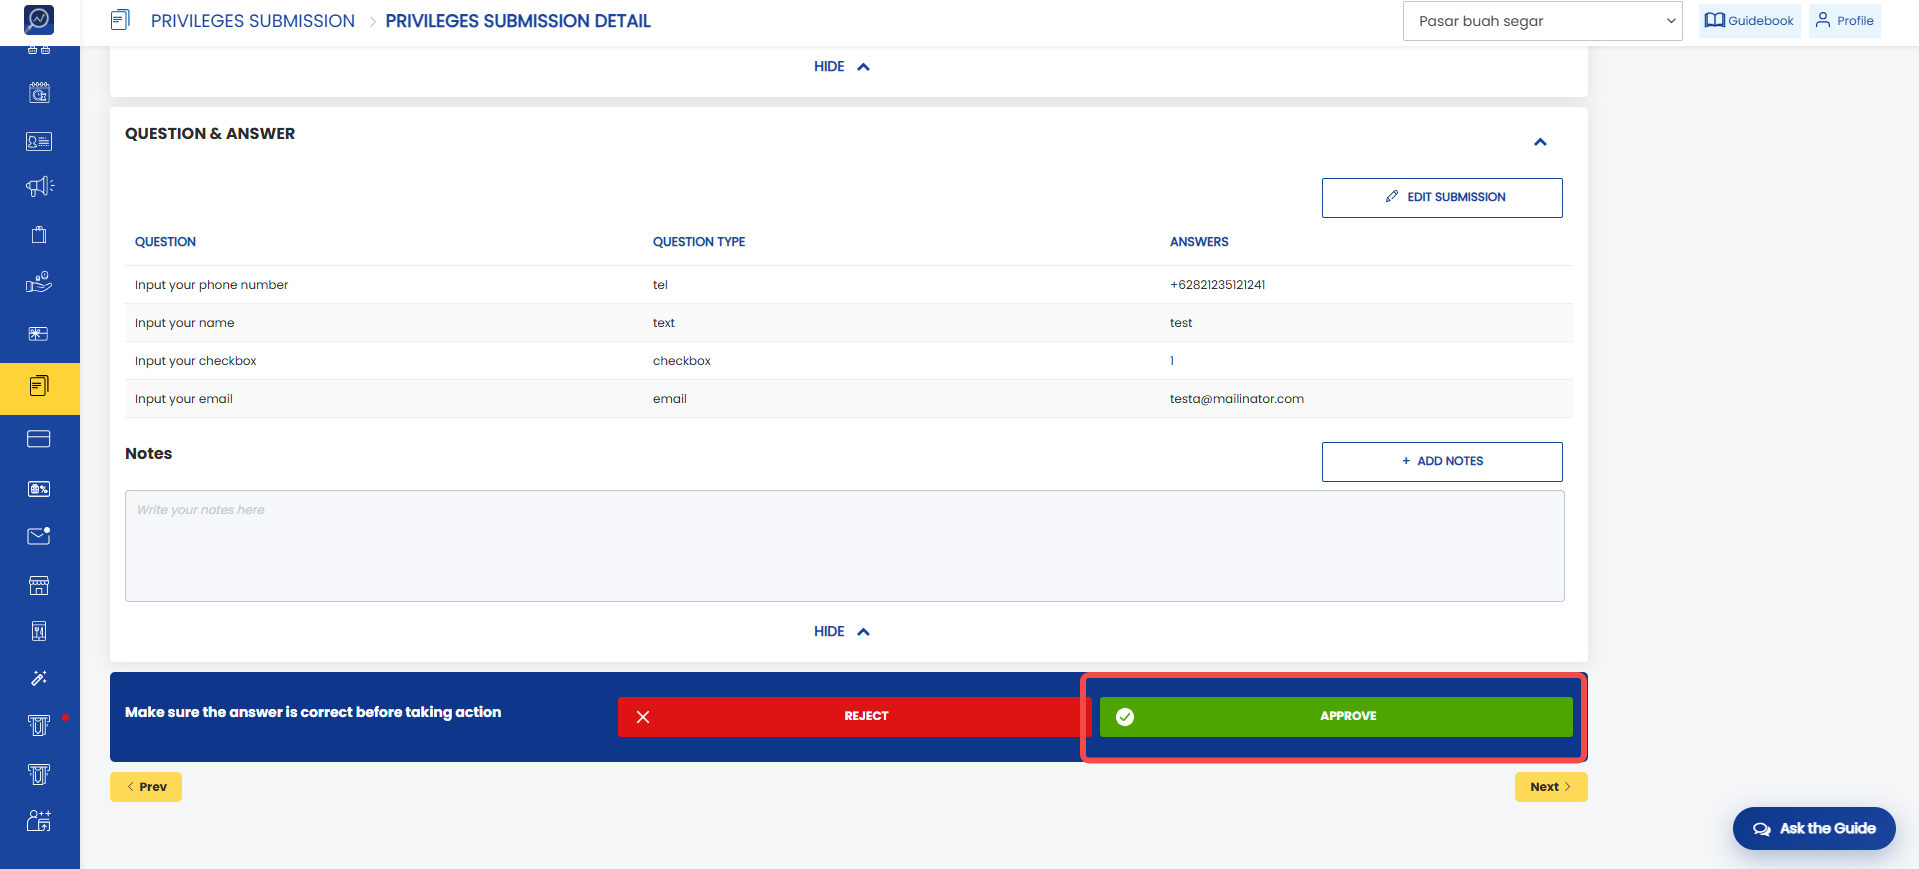
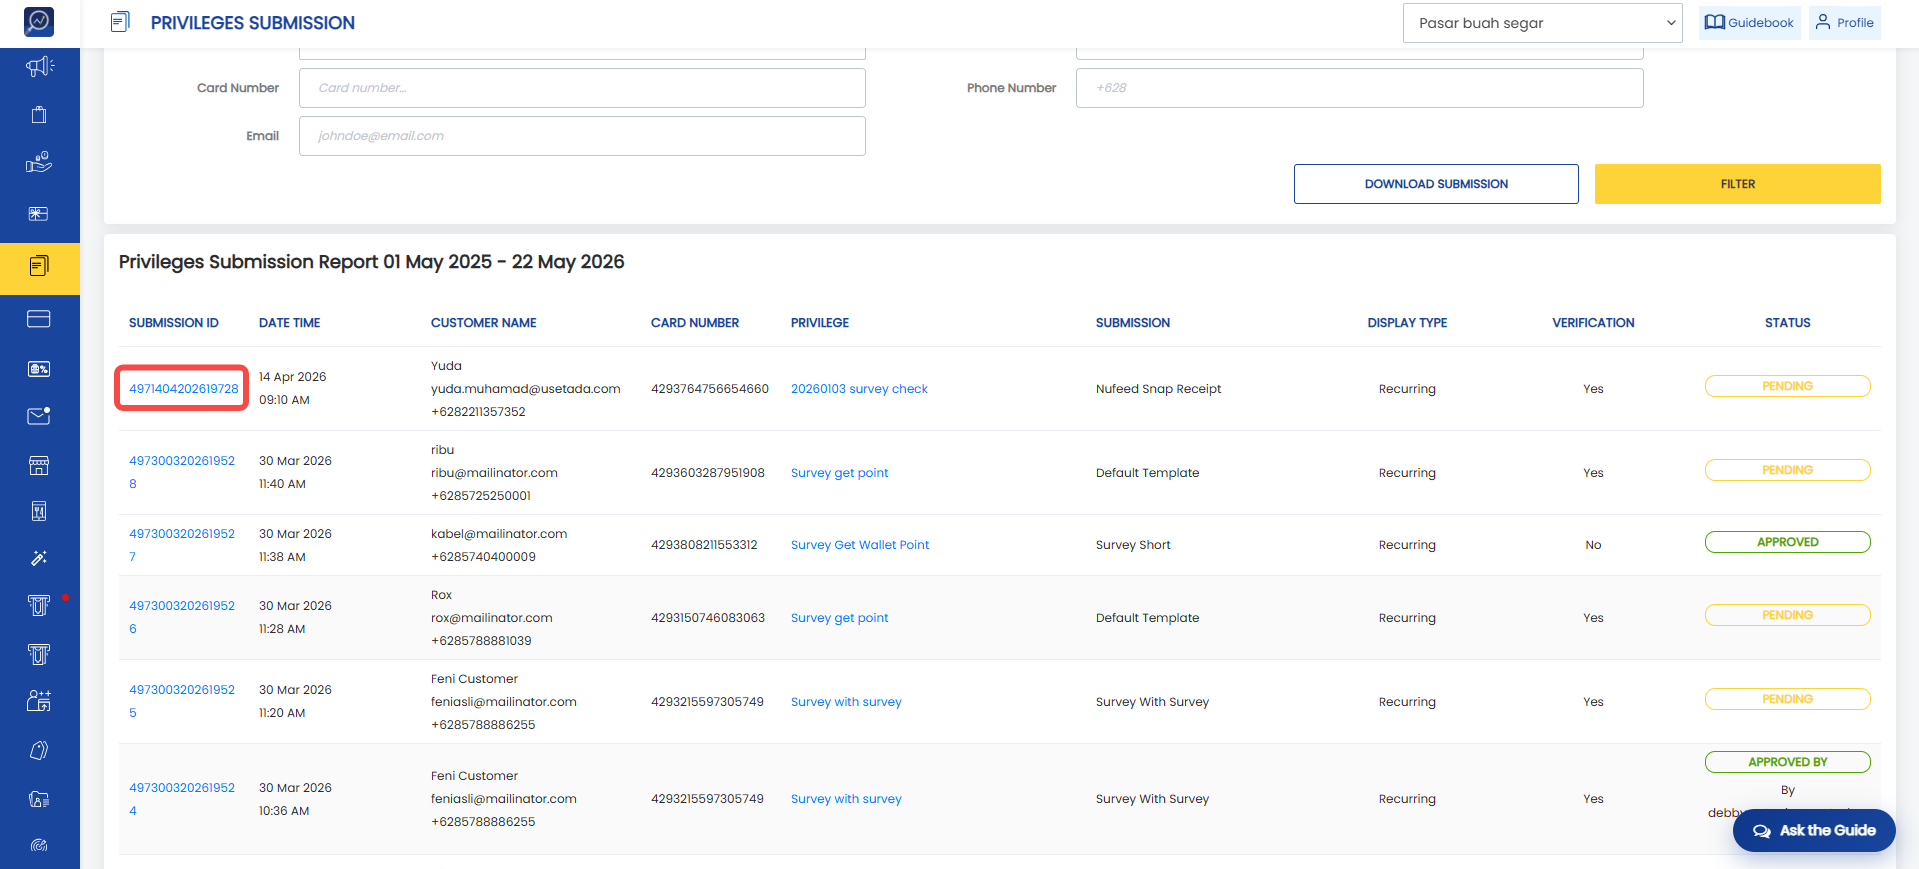 4. Review the member’s submission answers.
5. Click “Approve” to approve the submission.
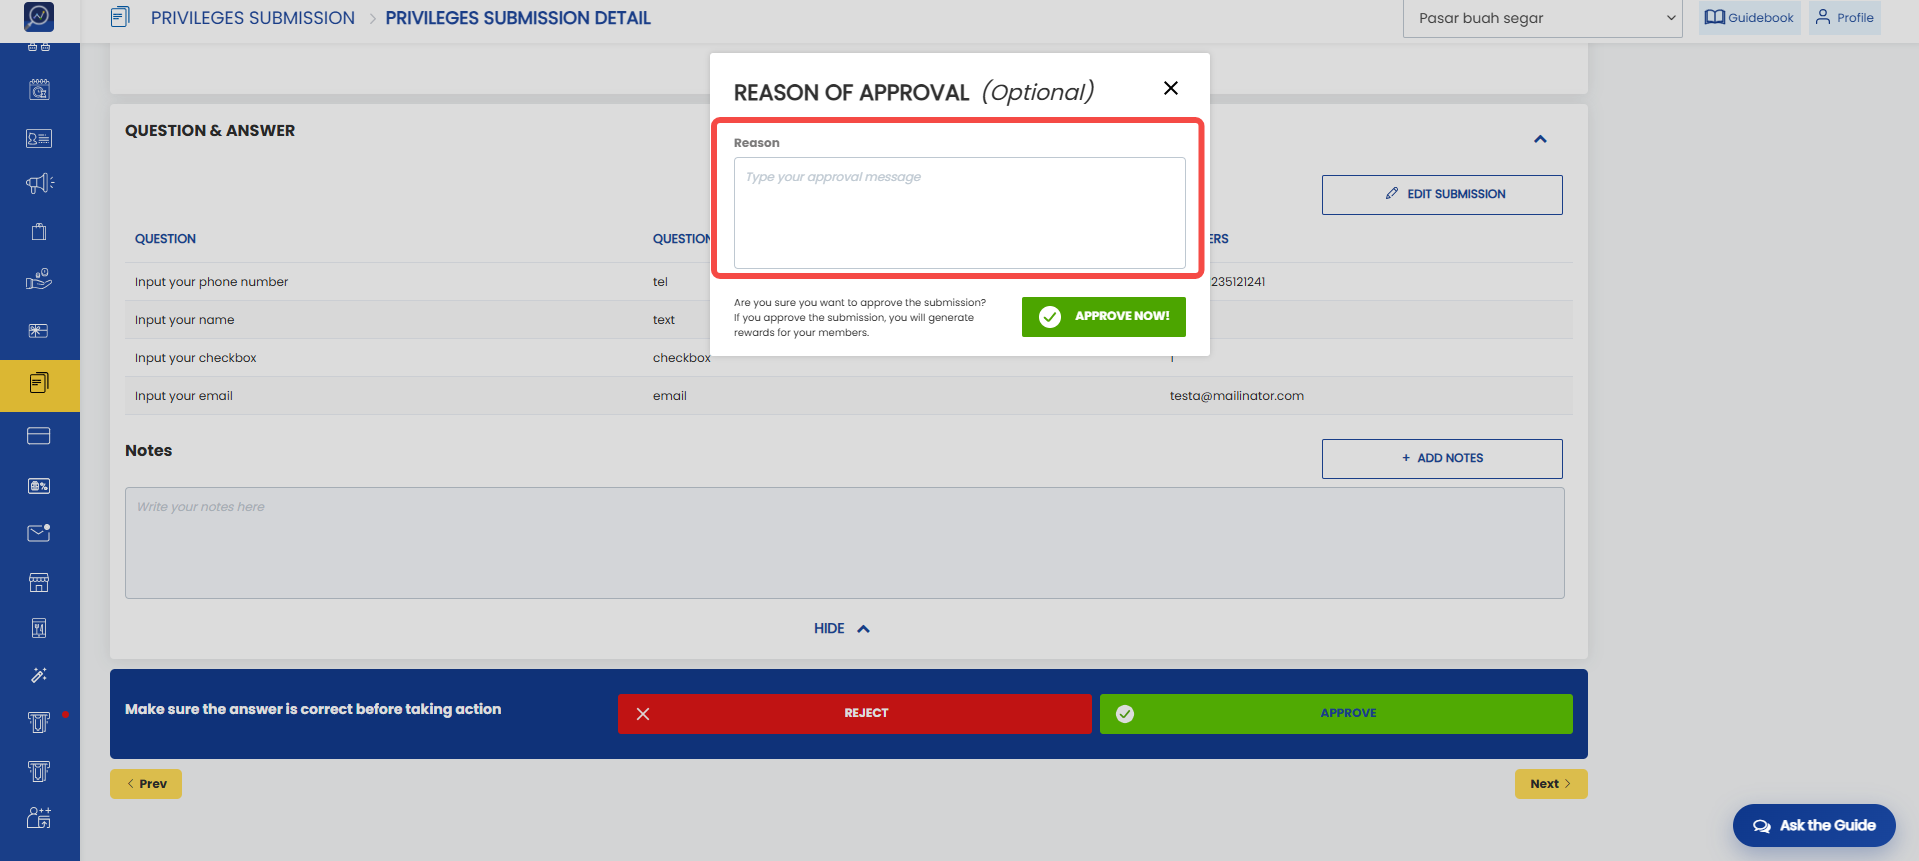
 6. Enter an approval reason in the provided field (if required).
How to Reject a Submission (Survey)
1. Open the “Privileges Submission” menu.
2. Search for the submission using filters.
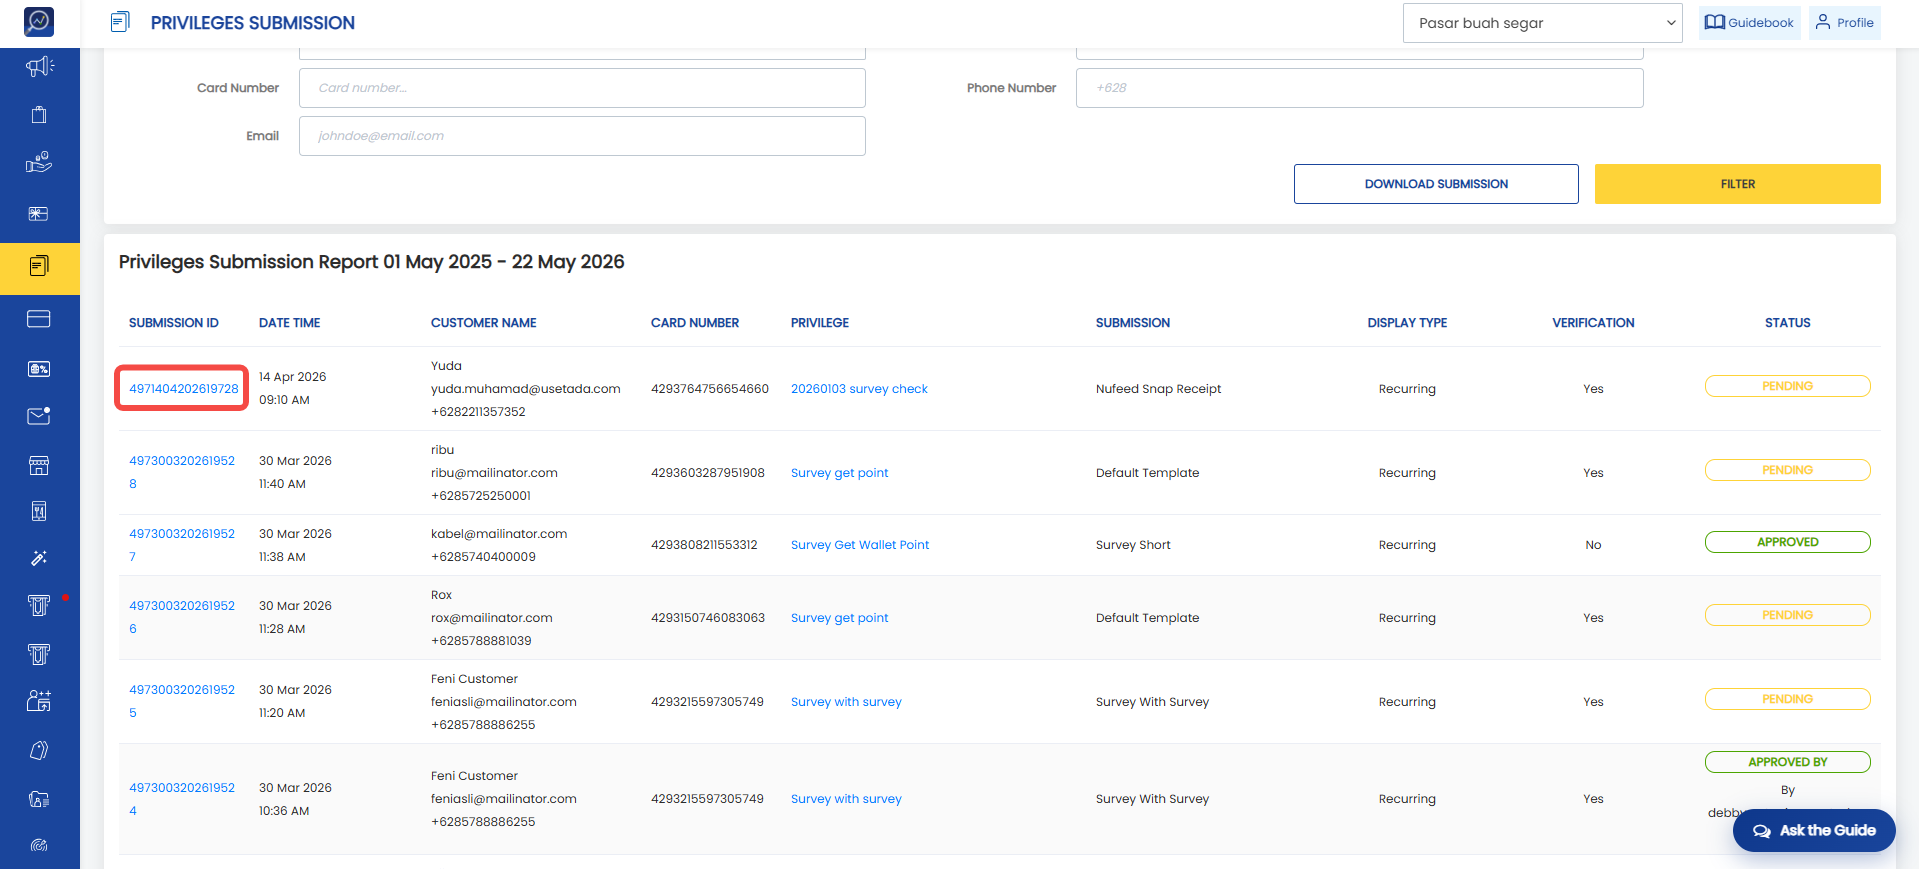
3. Click the Submission ID.
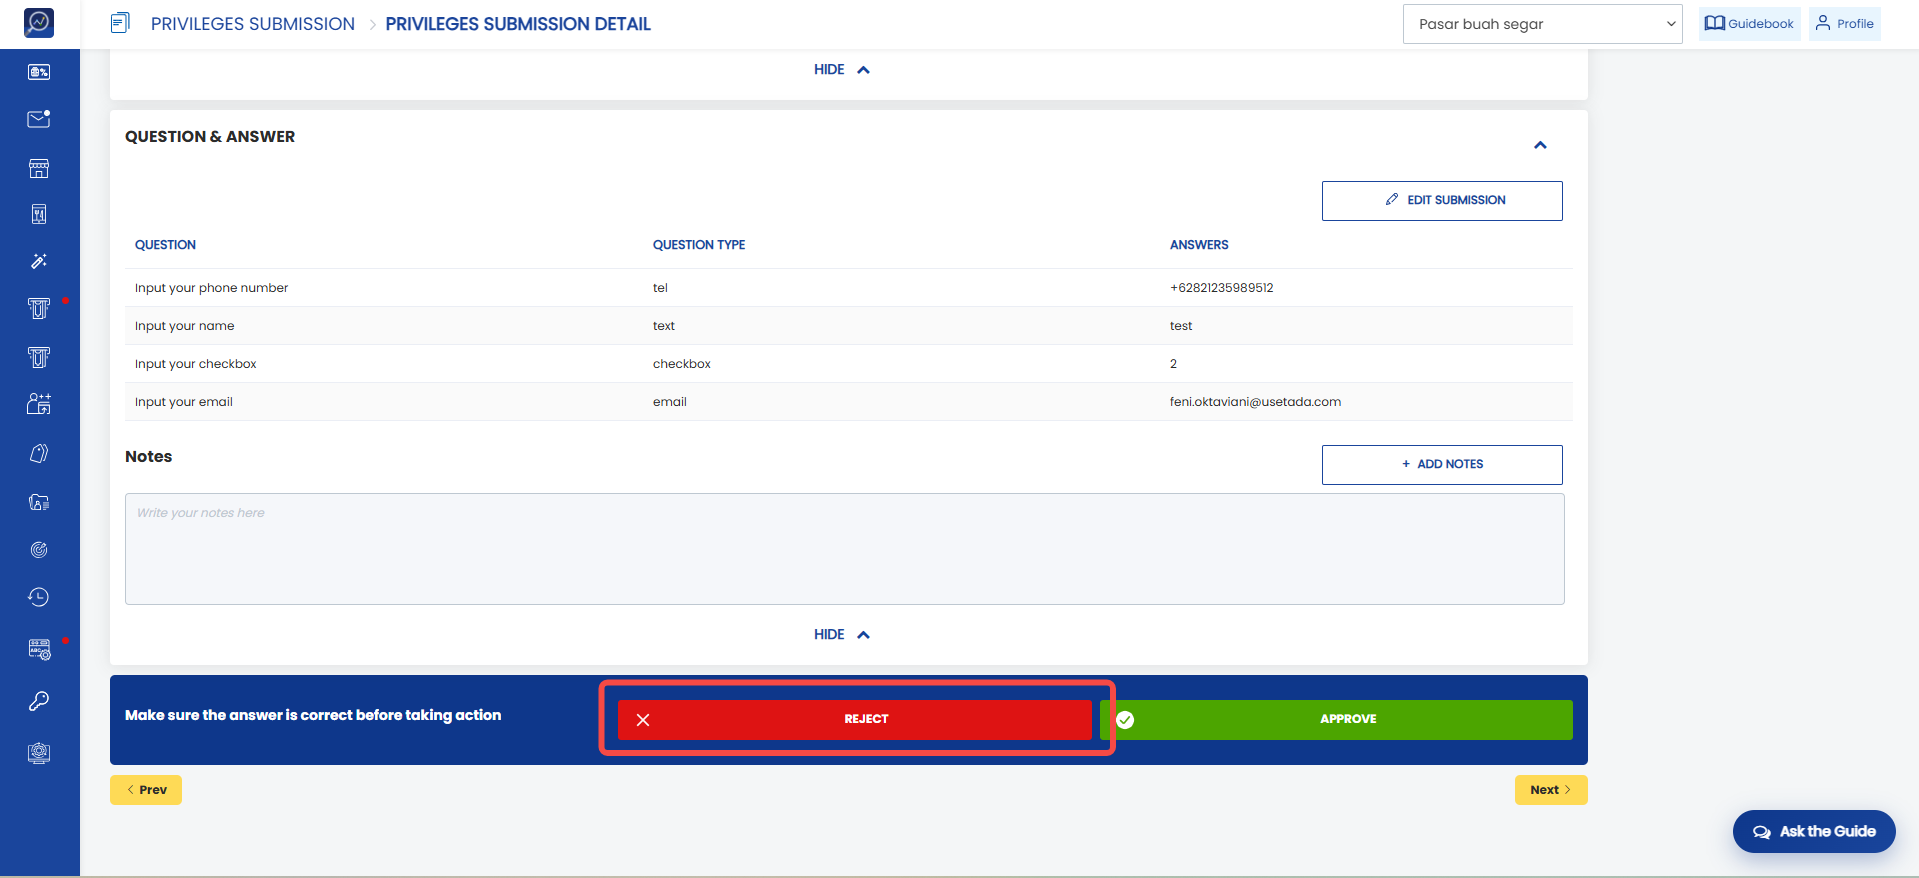
 4. Review the member’s submission answers.
5. Click “Reject” to reject the submission.
 6. Enter the rejection reason.
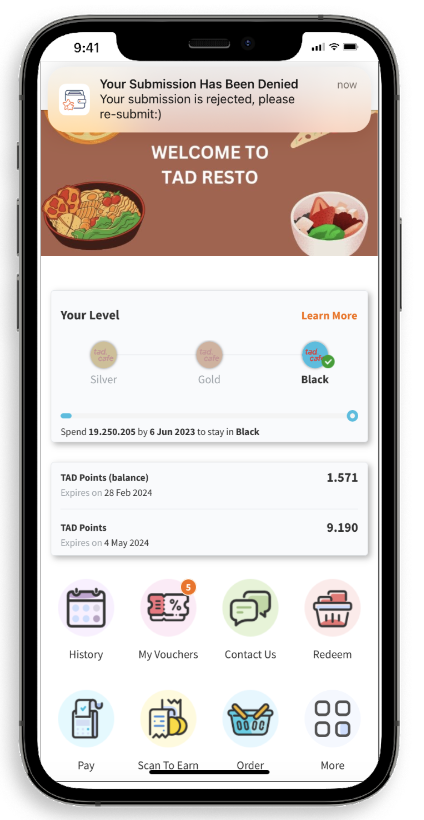
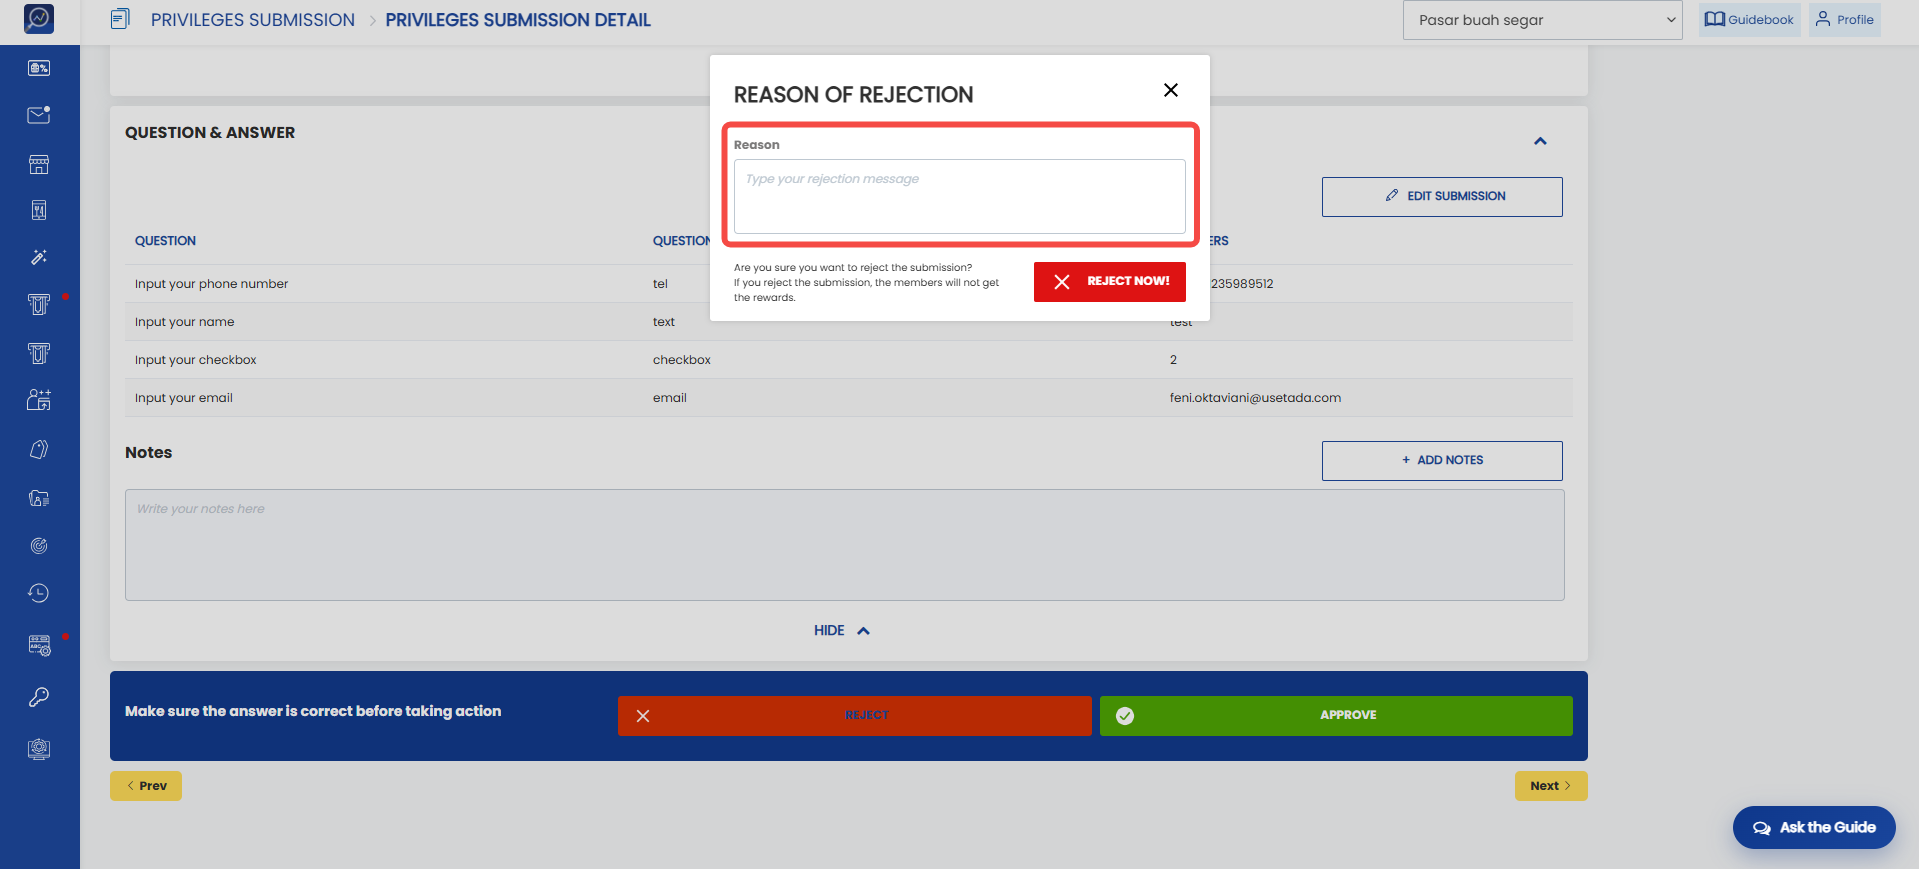 7. The member will receive a notification when the submission is rejected.
How to Edit Submission Data (Survey)
1. Open the “Privileges Submission” menu.
2. Search for the submission using filters.
3. Click the Submission ID.
4. In the “Question & Answer” section, click “Edit Submission”.
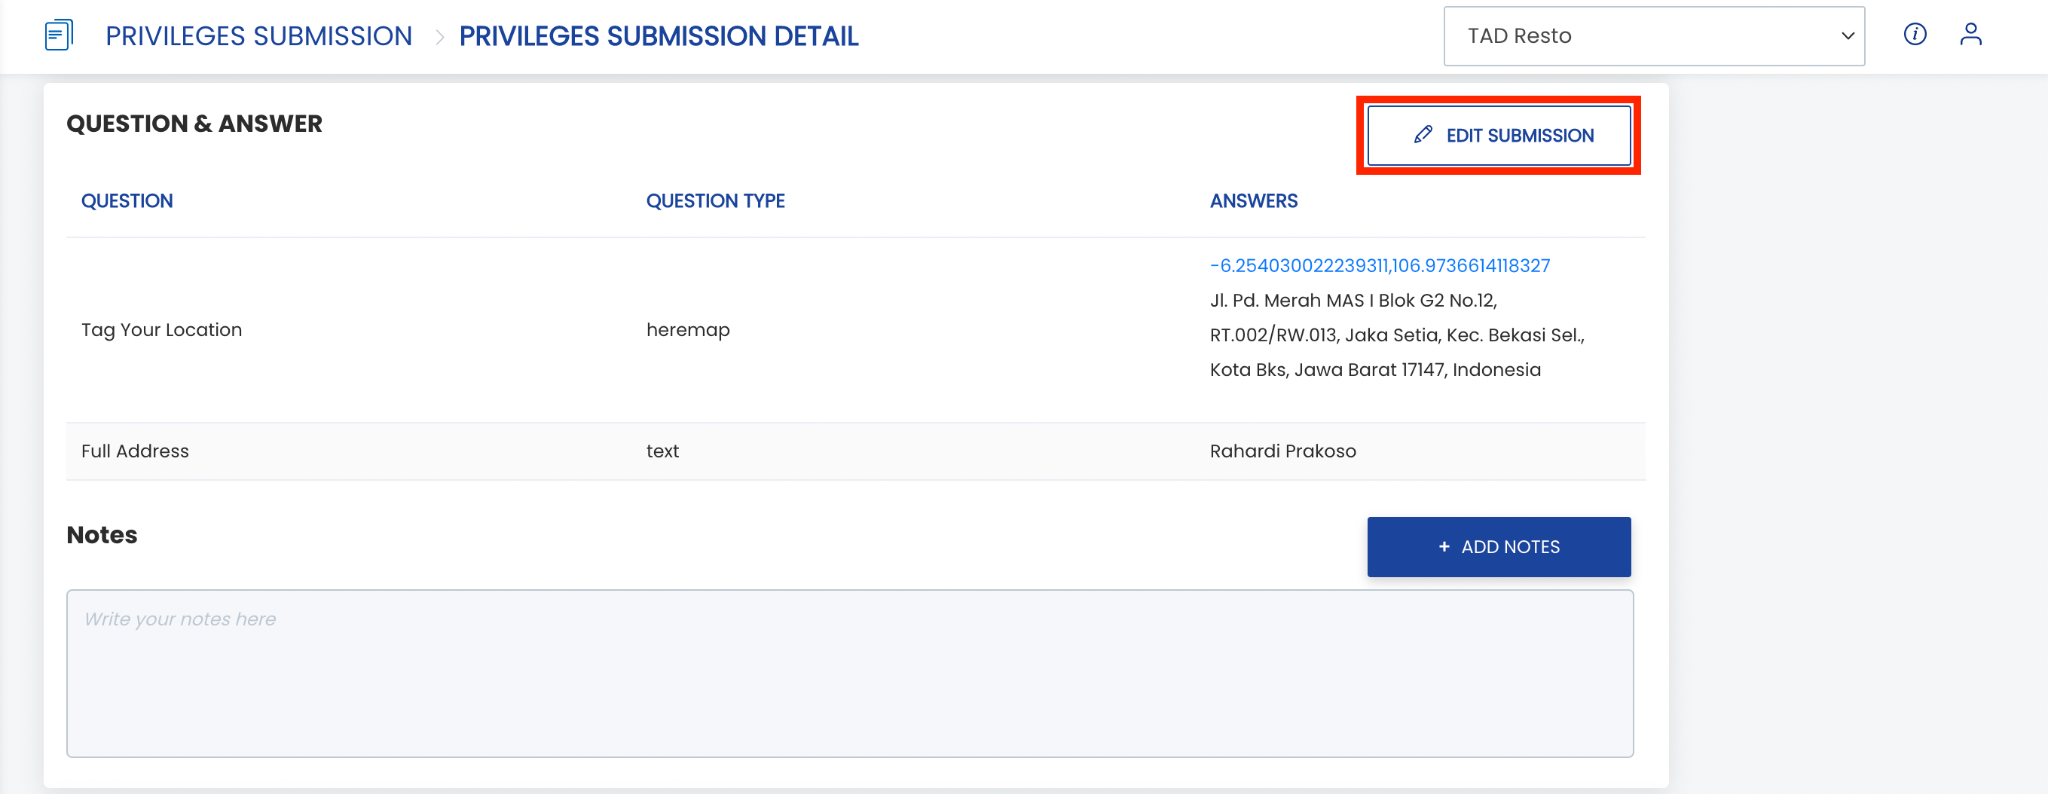 5. The user will be redirected to the submission edit page. Update the data as needed.
6. Click “Save”.
7. The submission changes will be saved automatically.
How to Approve a Submission (Snap Receipt - AI OCR)
The AI OCR feature is used to automatically read receipt data uploaded by members.
1. Open the “Privileges Submission” menu.
2. Search for the submission using filters.
3. Click the Submission ID.
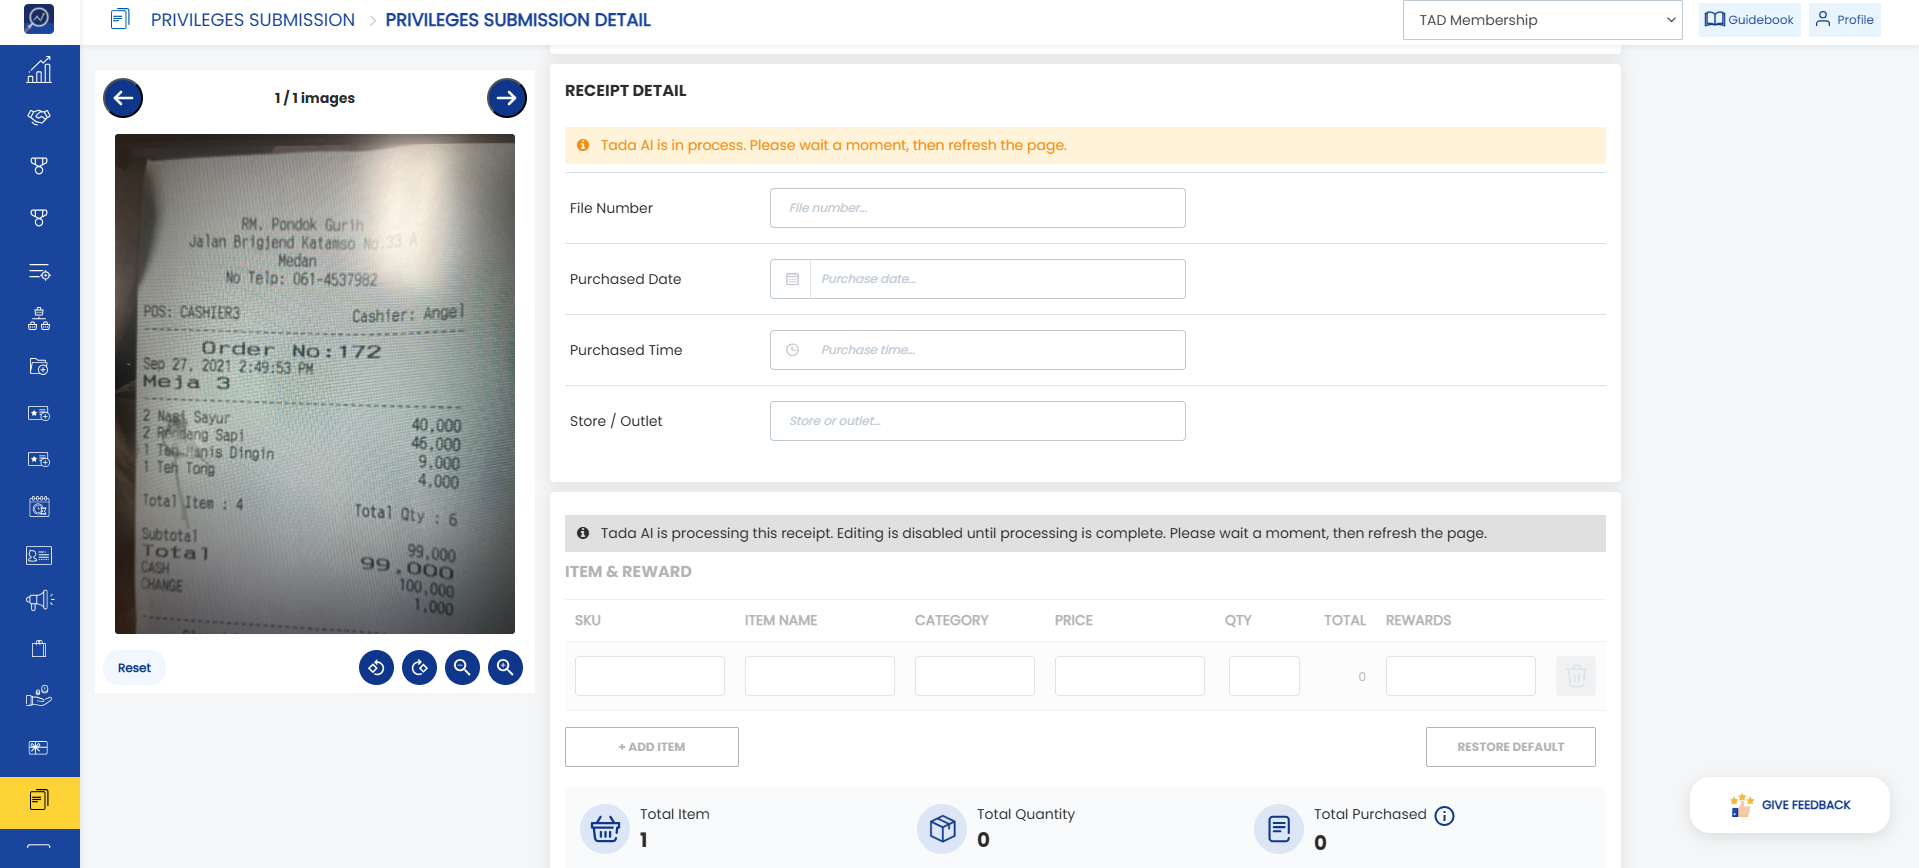
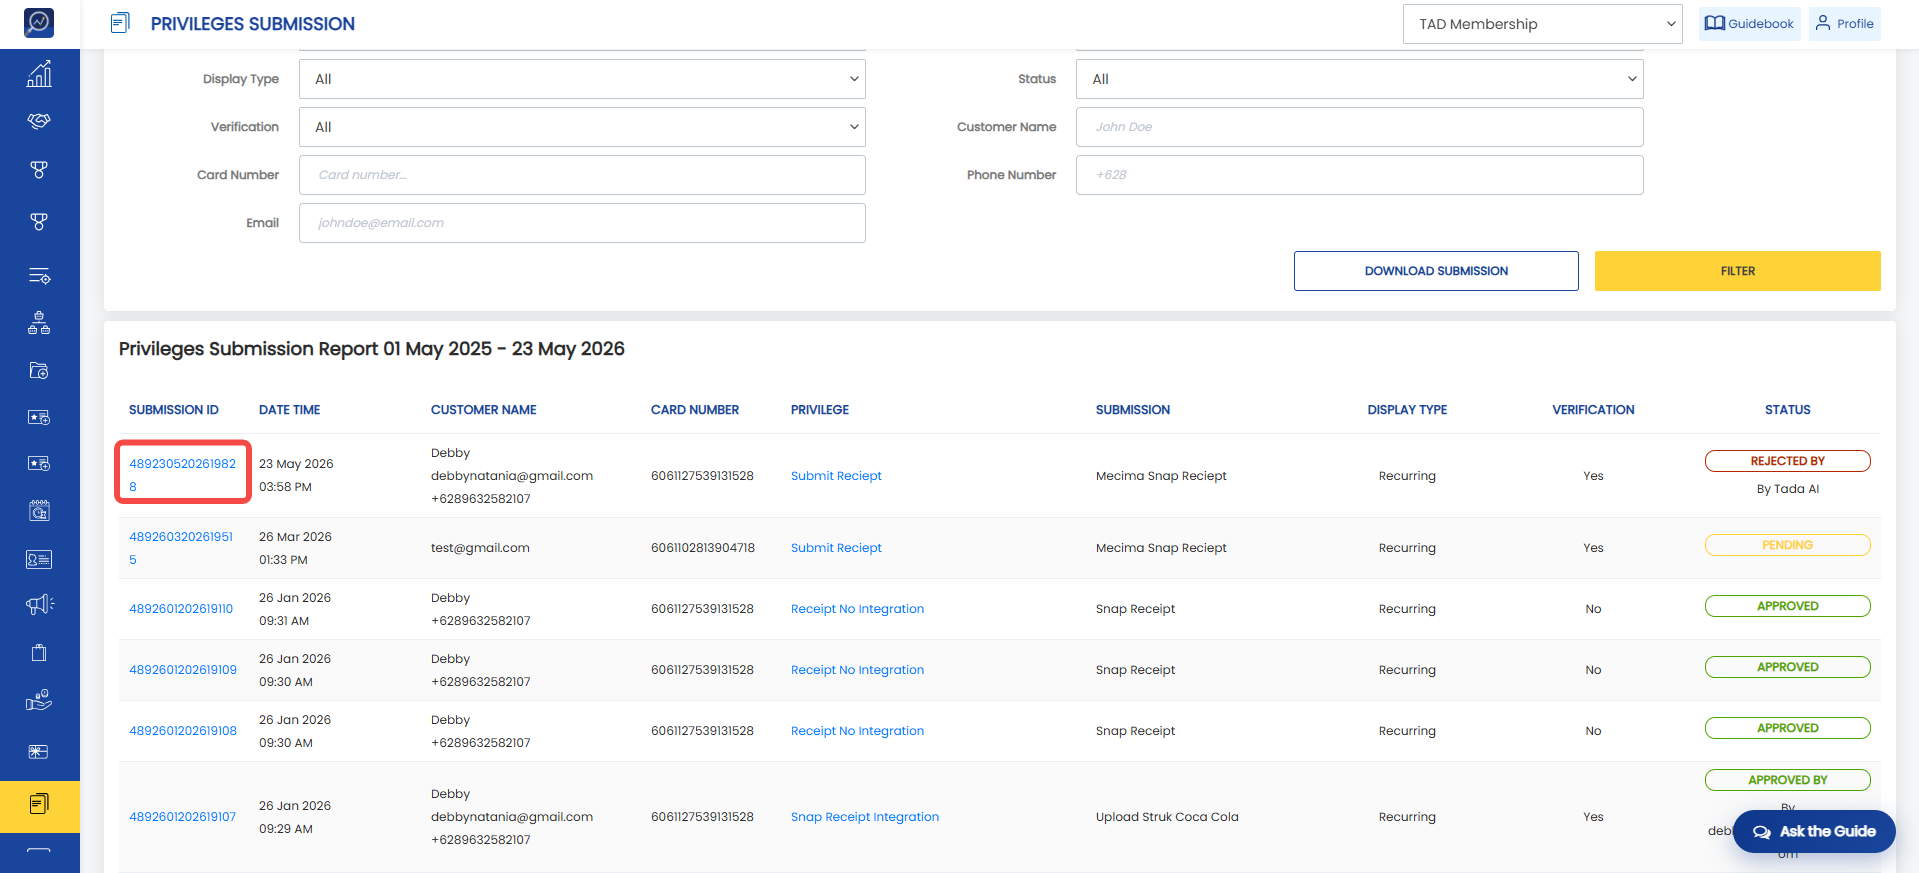 4. Wait for the AI OCR reading process to complete. All fields on the Privileges Submission Detail page will be disabled during processing. Please wait a moment and refresh the page.
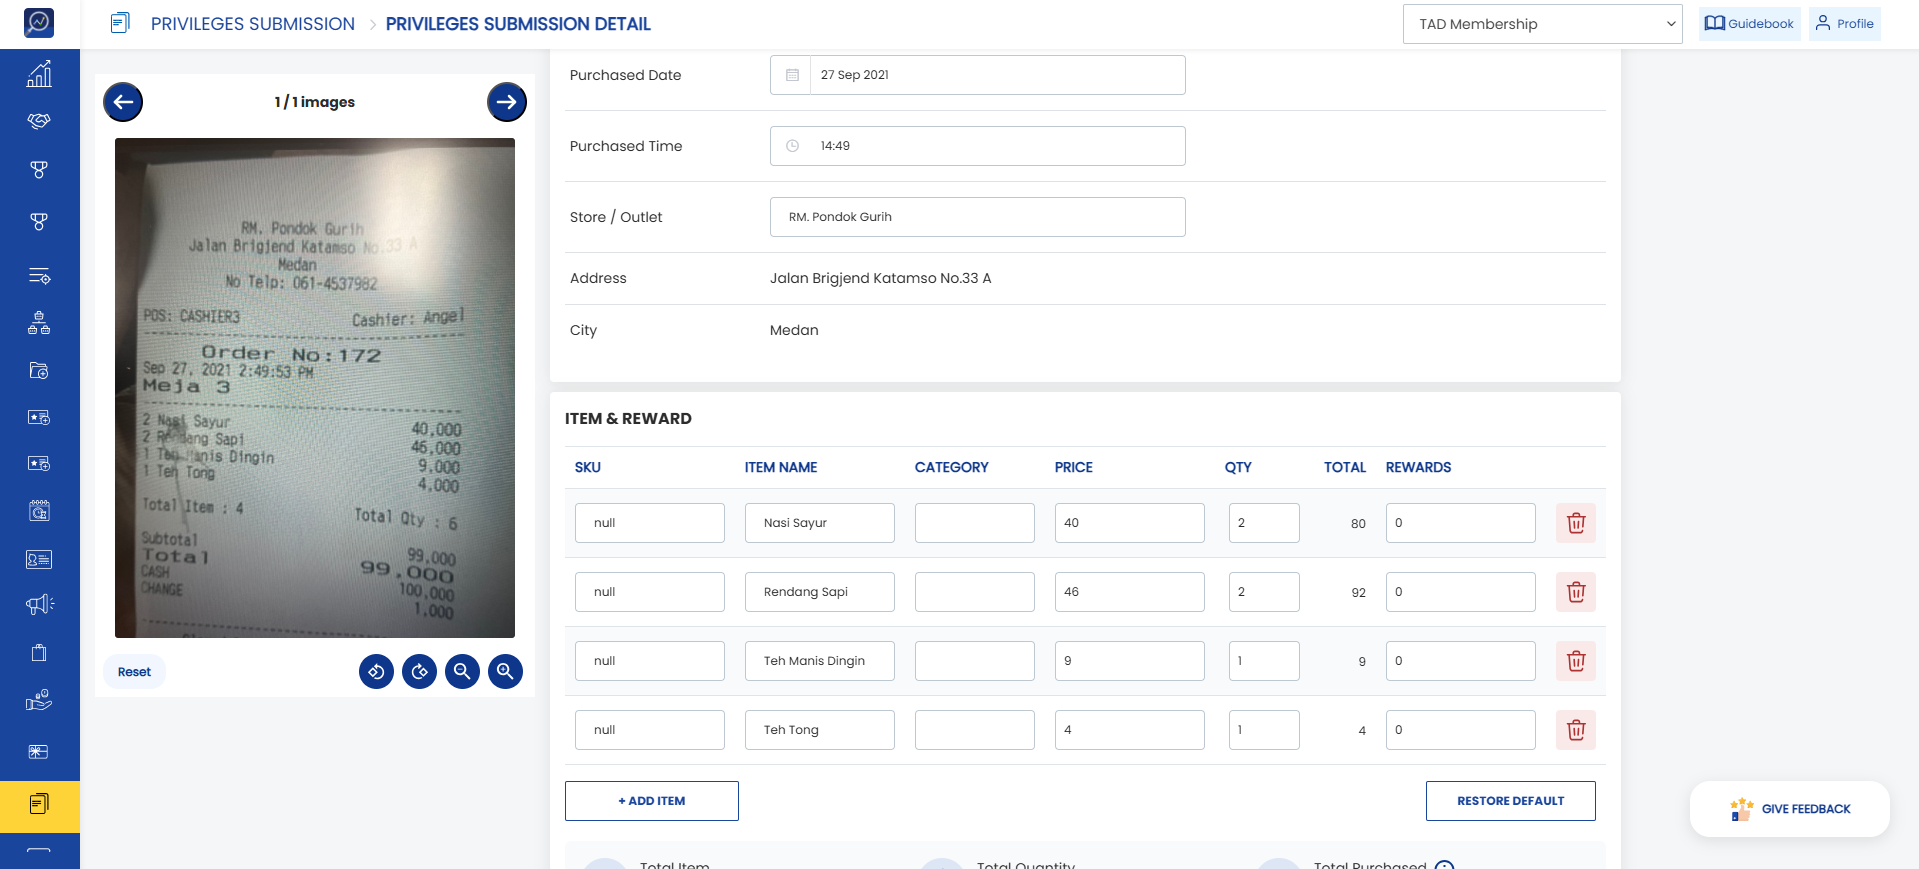
 5. After refreshing the page, the AI OCR reading results will appear.
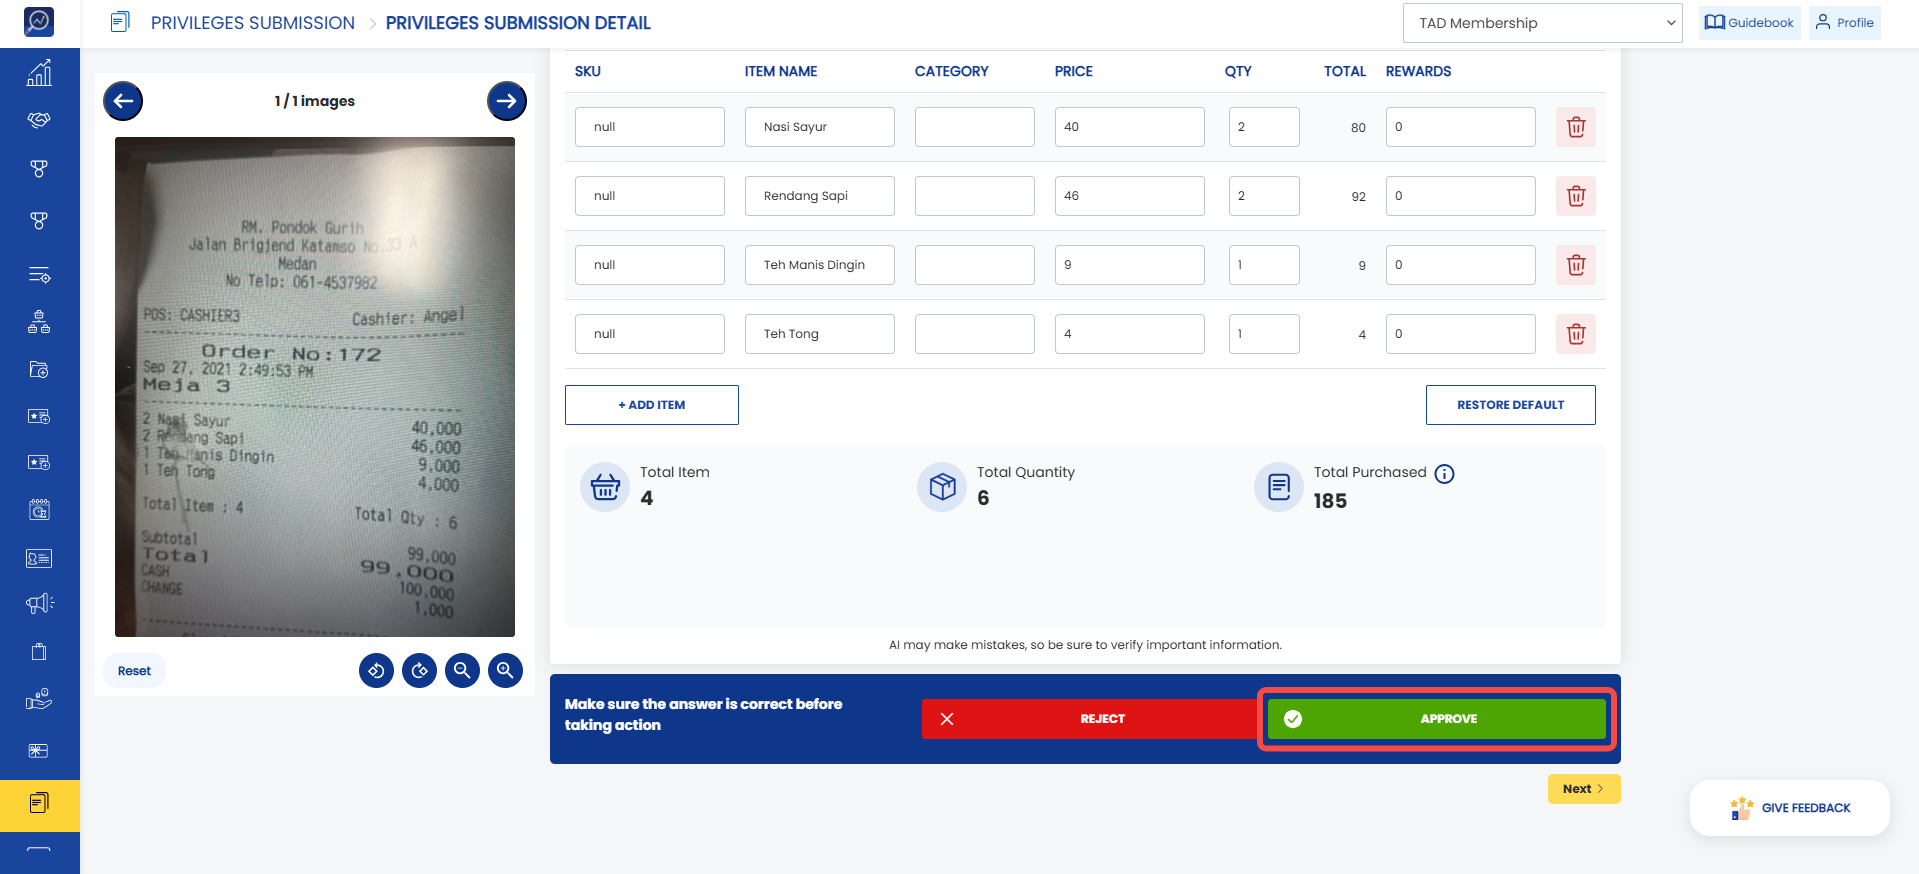
 6. If the results are correct, click “Approve”.
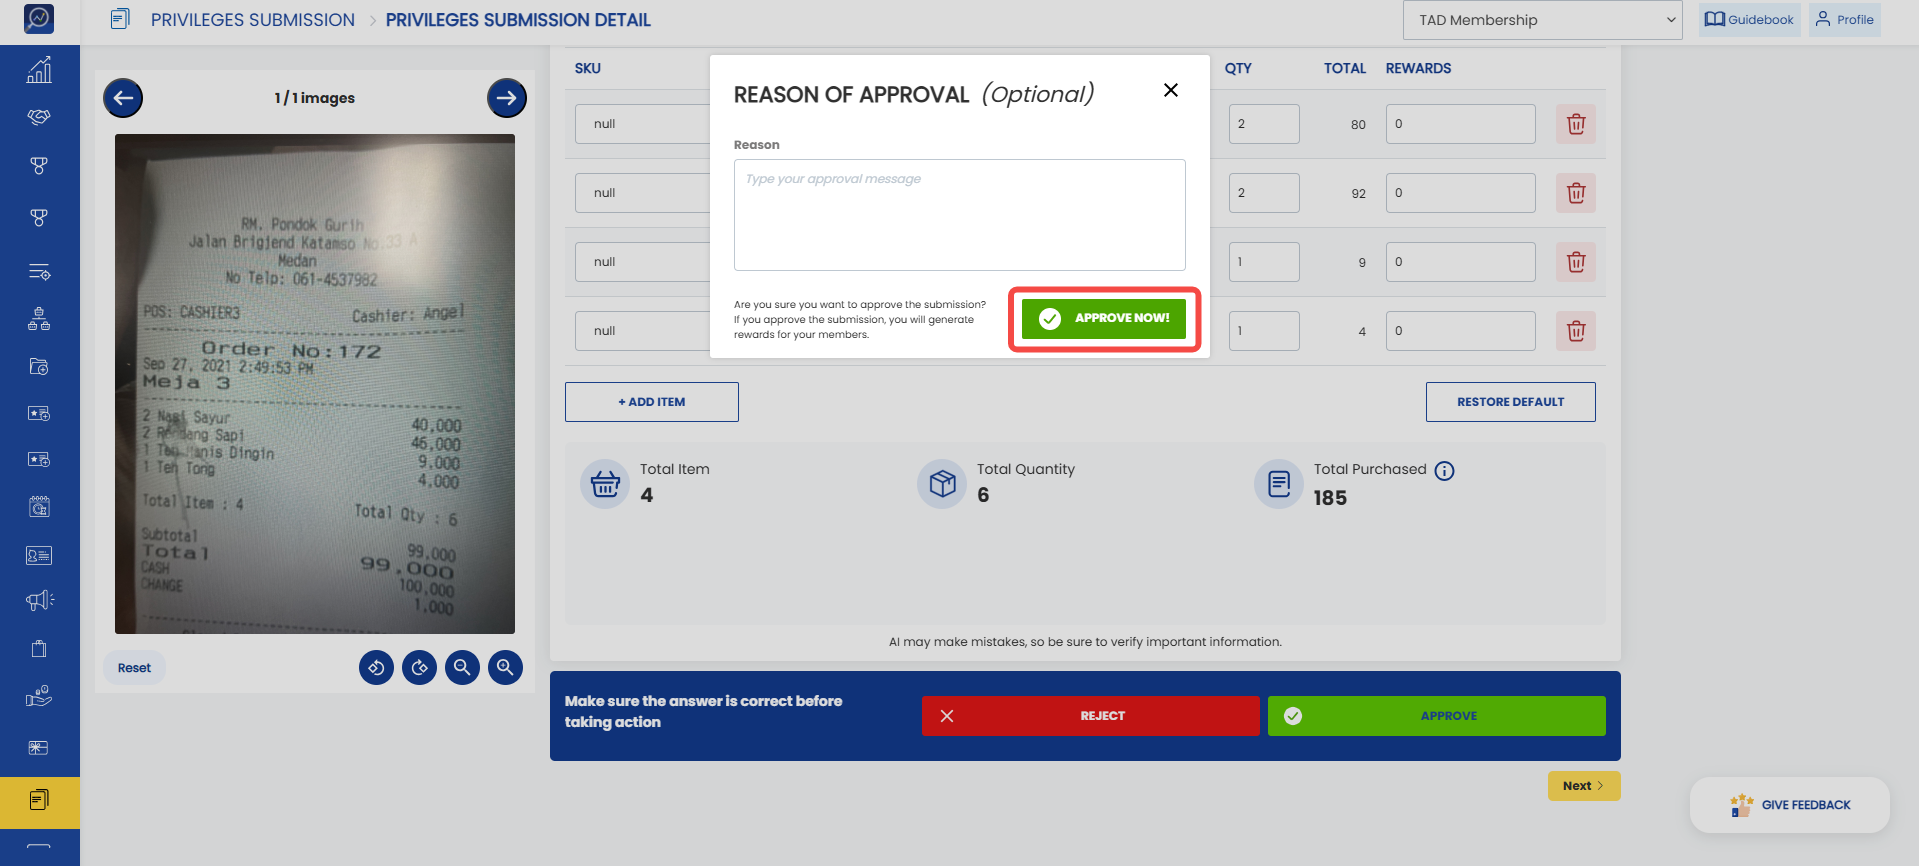
 7. Enter an approval reason in the provided field, then click “Approve Now”.
How to Reject a Submission (Snap Receipt - AI OCR)
1. Open the “Privileges Submission” menu.
2. Search for the submission using filters.
3. Click the Submission ID.
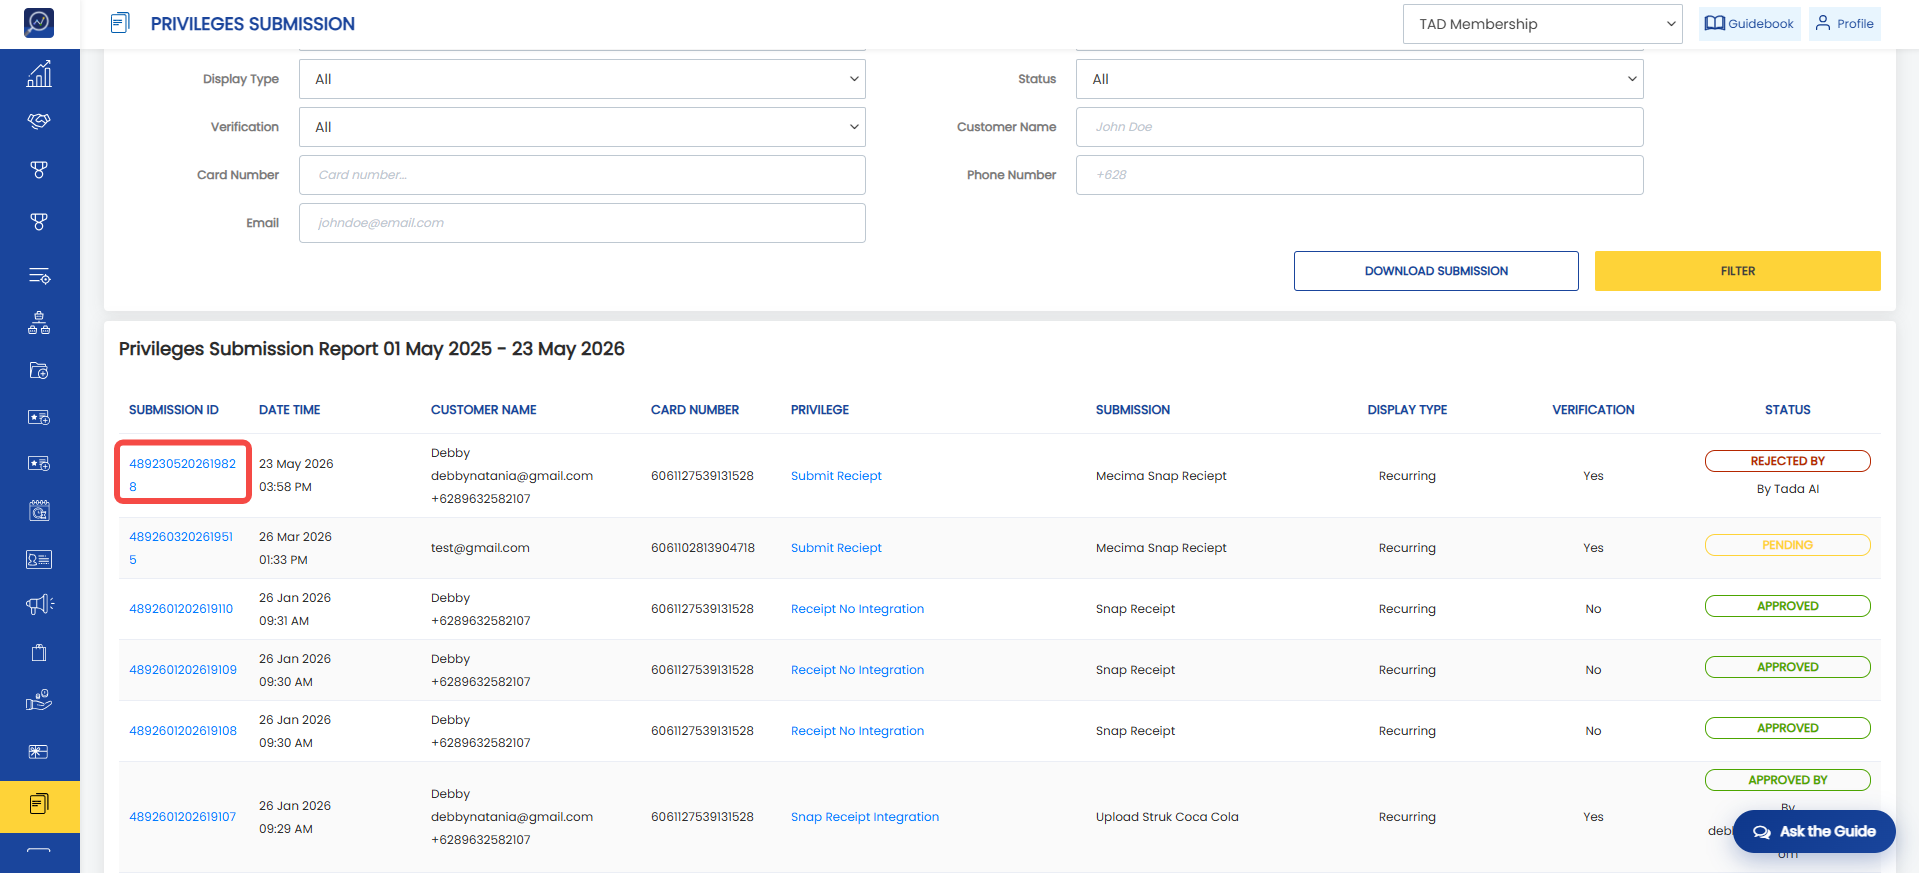 4. Wait for the AI OCR reading process to complete. All fields on the Privileges Submission Detail page will be disabled during processing. Please wait a moment and refresh the page.
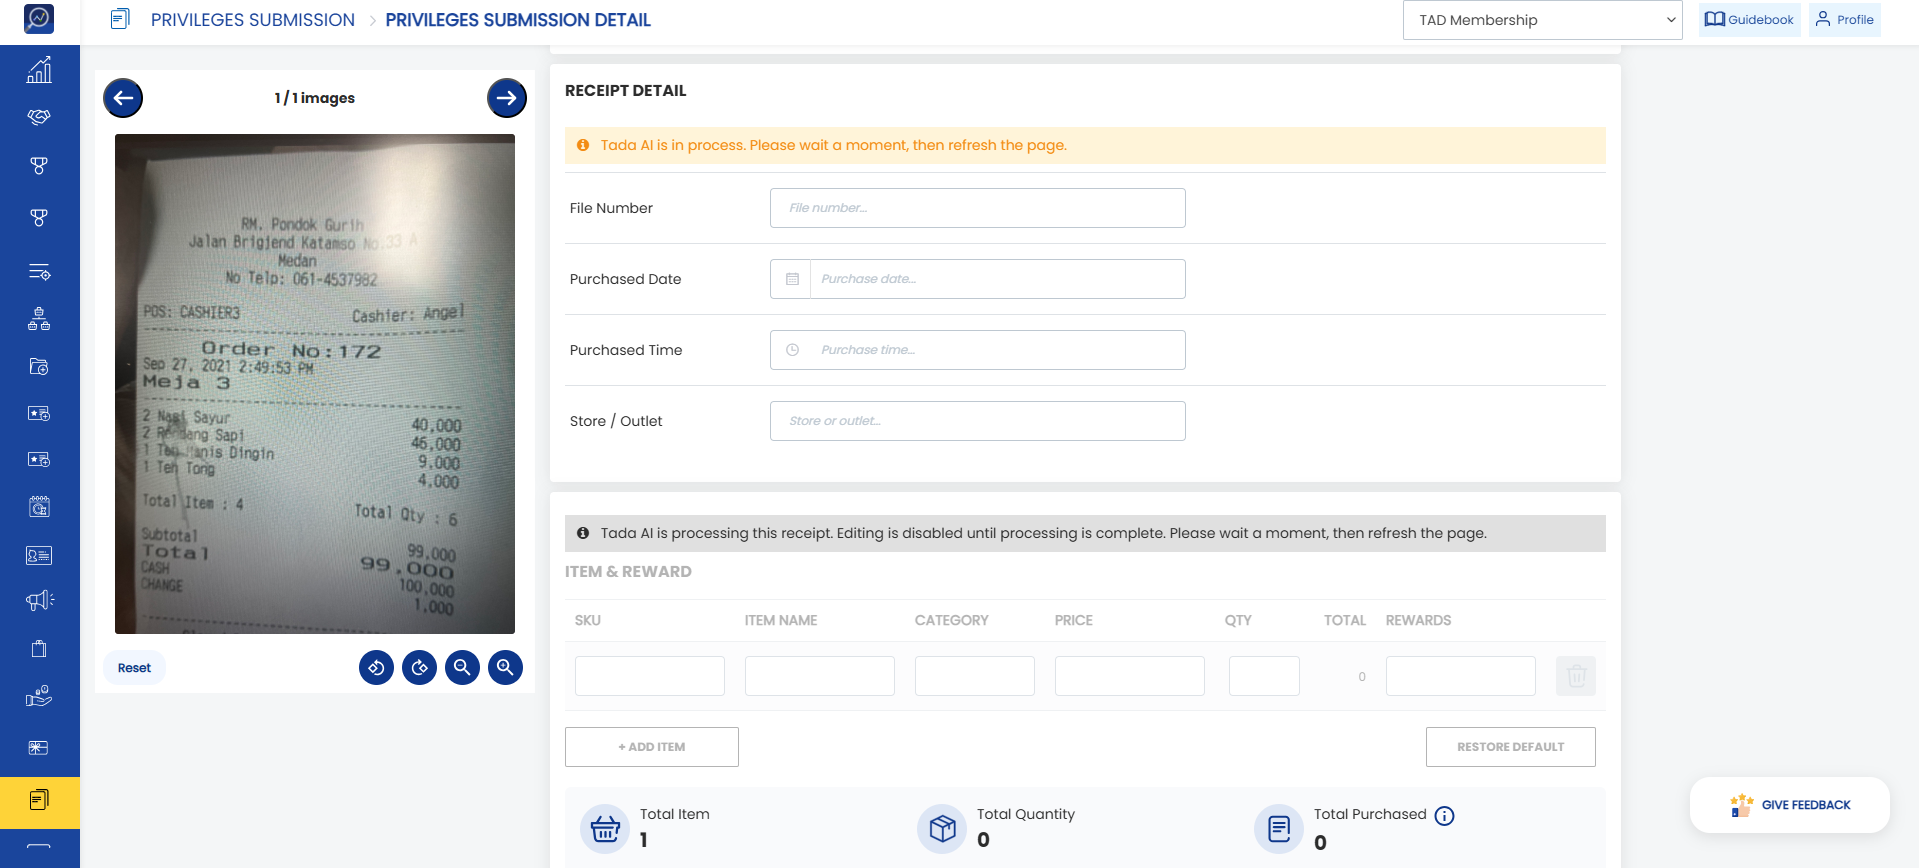 5. After refreshing the page, the AI OCR reading results will appear.
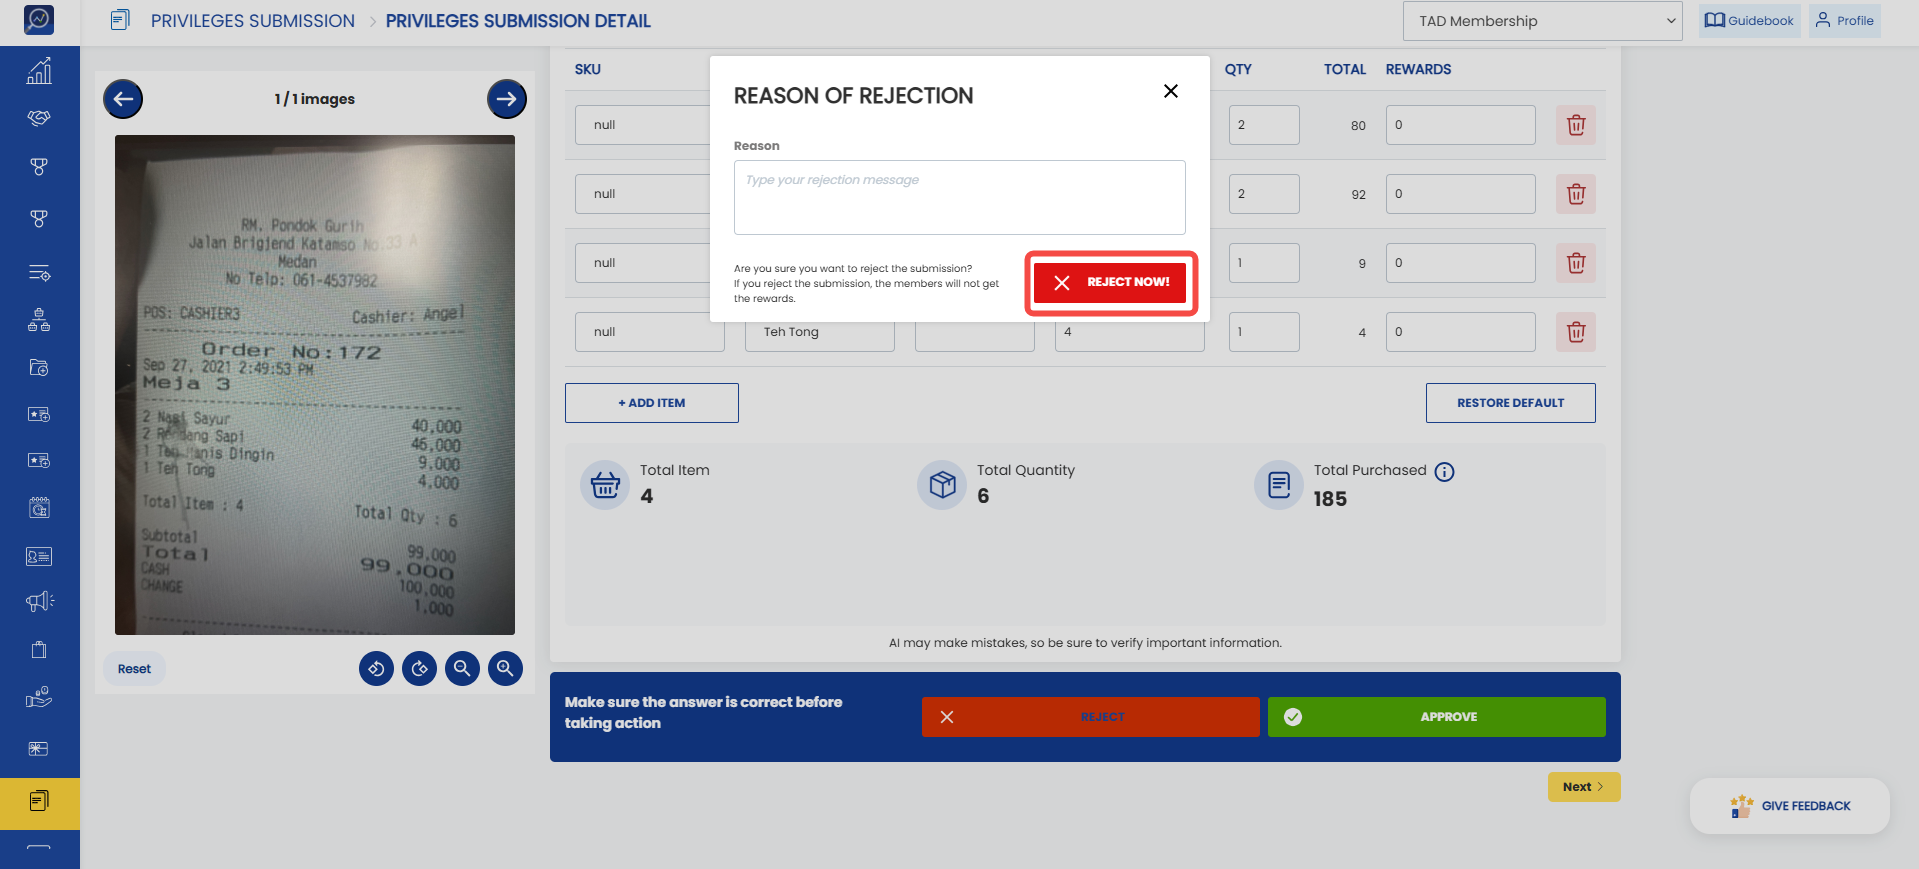
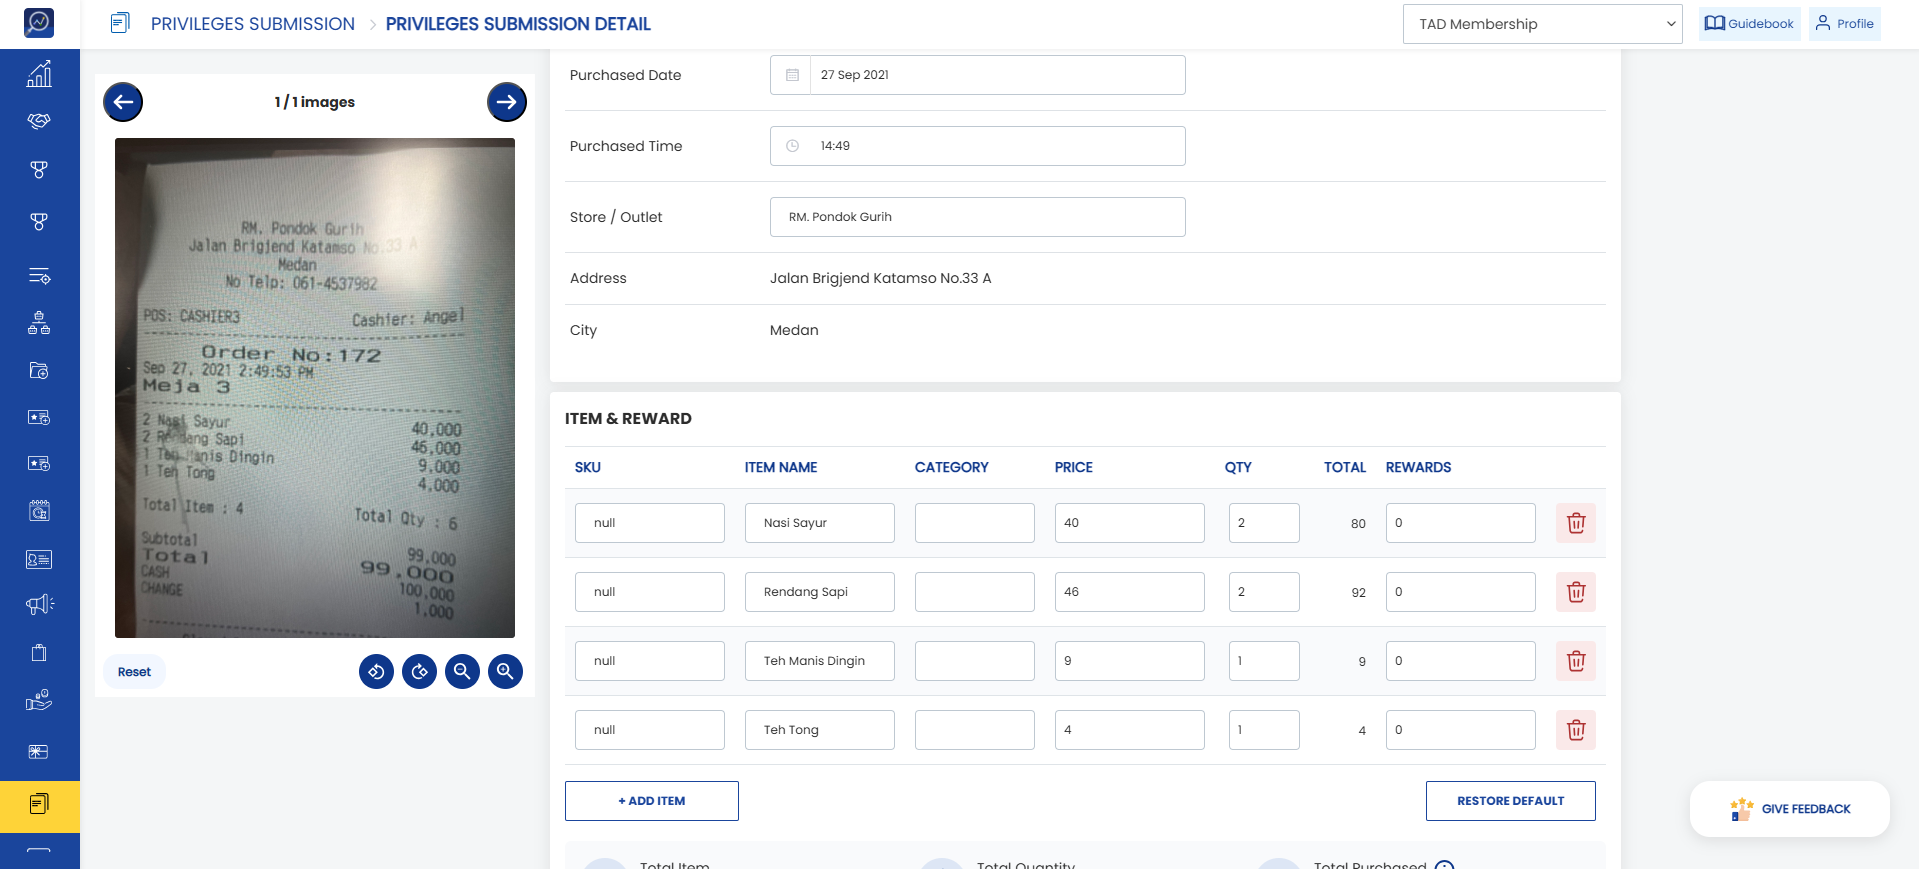 6. If the submission needs to be rejected, click “Reject”.
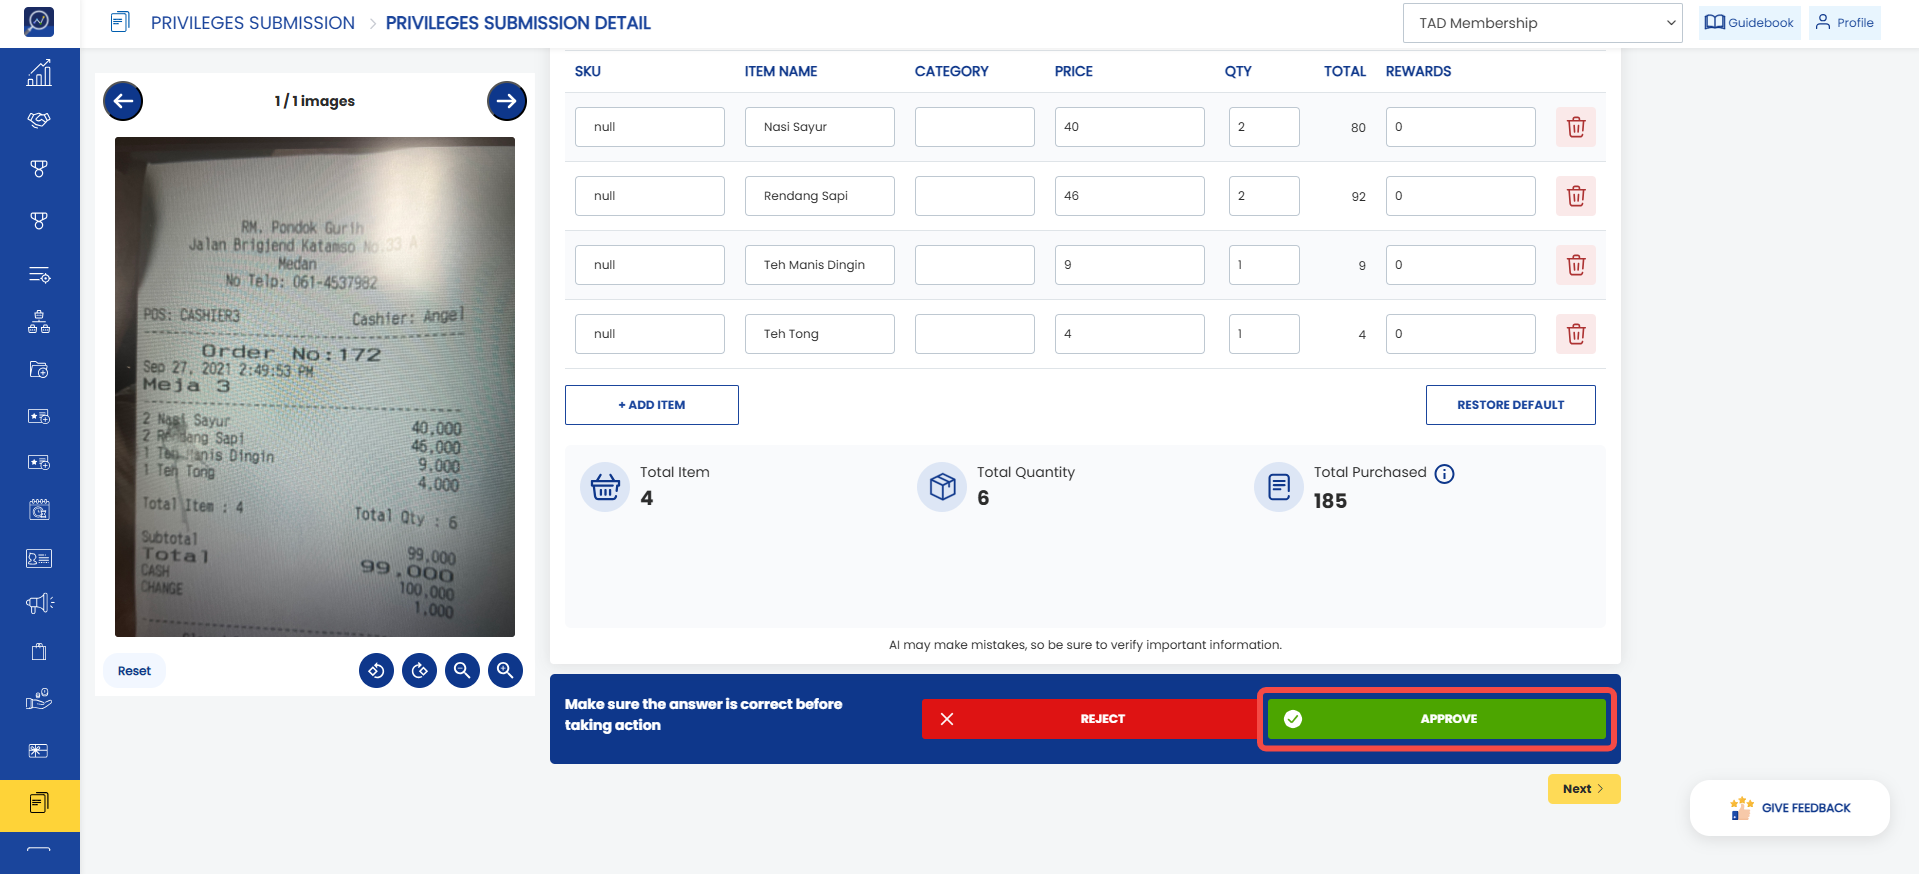 7. Enter the rejection reason in the provided field, then click “Reject Now”.
How to Add Items to a Submission (Snap Receipt - AI OCR - Manual Rewards)
1. Open the “Privileges Submission” menu.
2. Search for the submission using filters.
3. Click the Submission ID.
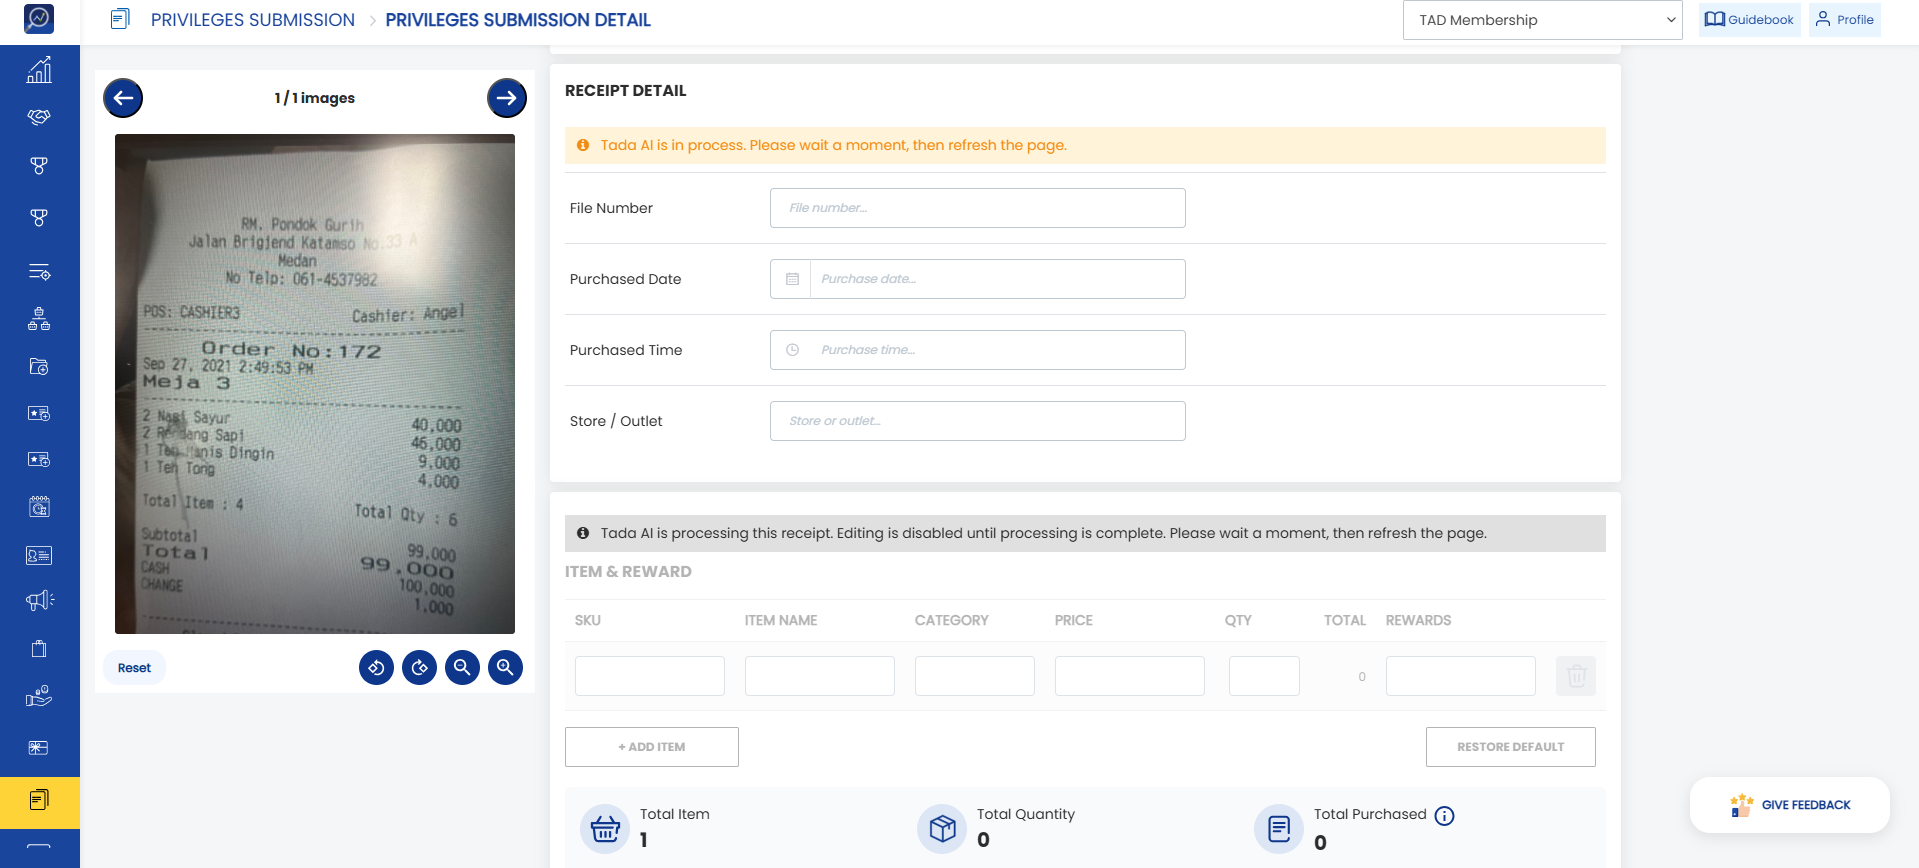
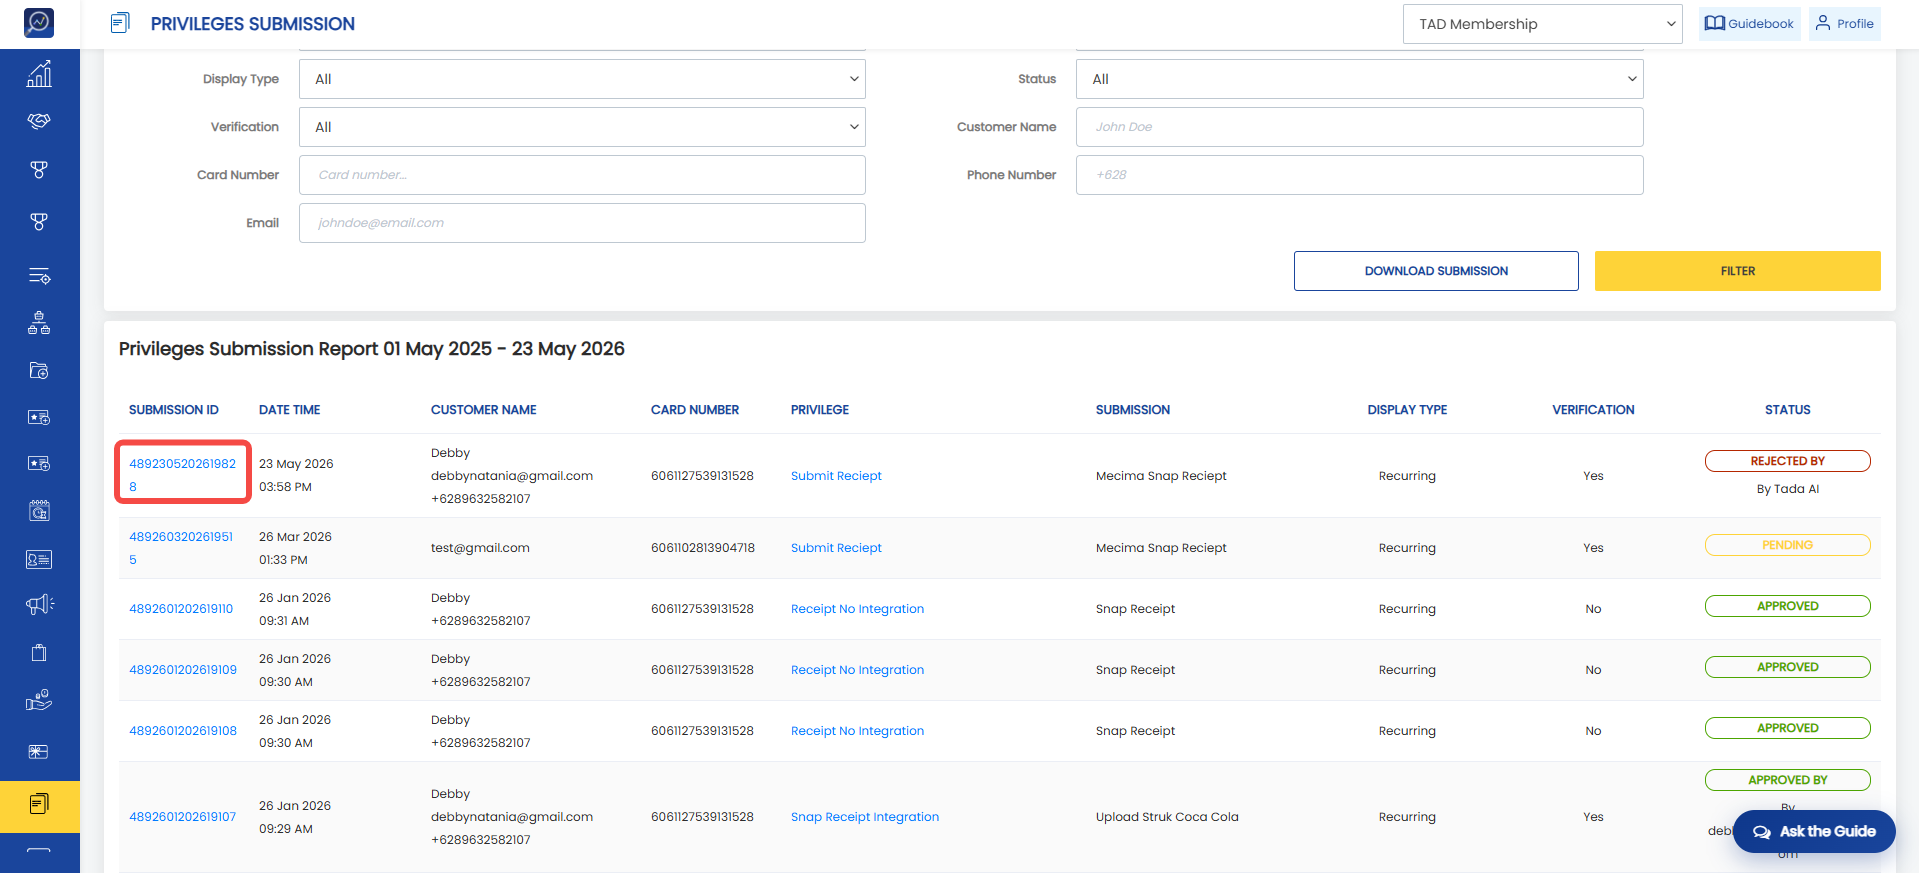 4. Wait for the AI OCR reading process to complete. All fields on the Privileges Submission Detail page will be disabled during processing. Please wait a moment and refresh the page.
 5. After refreshing the page, the AI OCR reading results will appear.
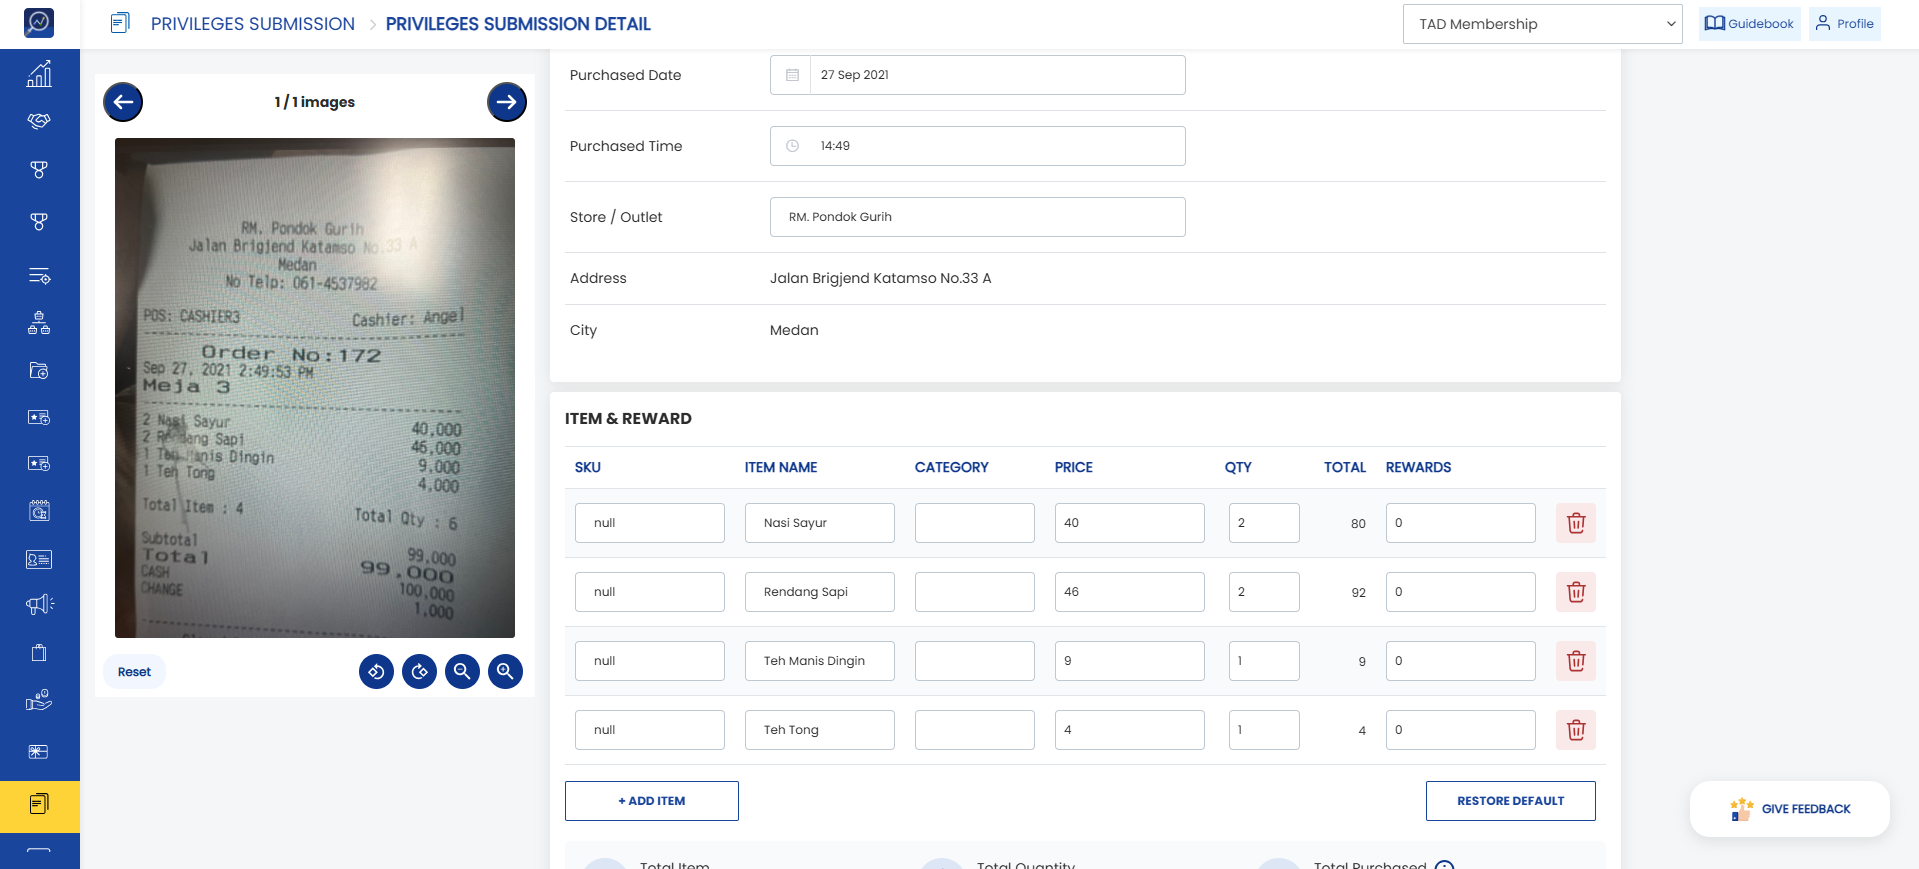 6. If you want to add an item that is not available in the AI OCR reading results, click “Add Item”.
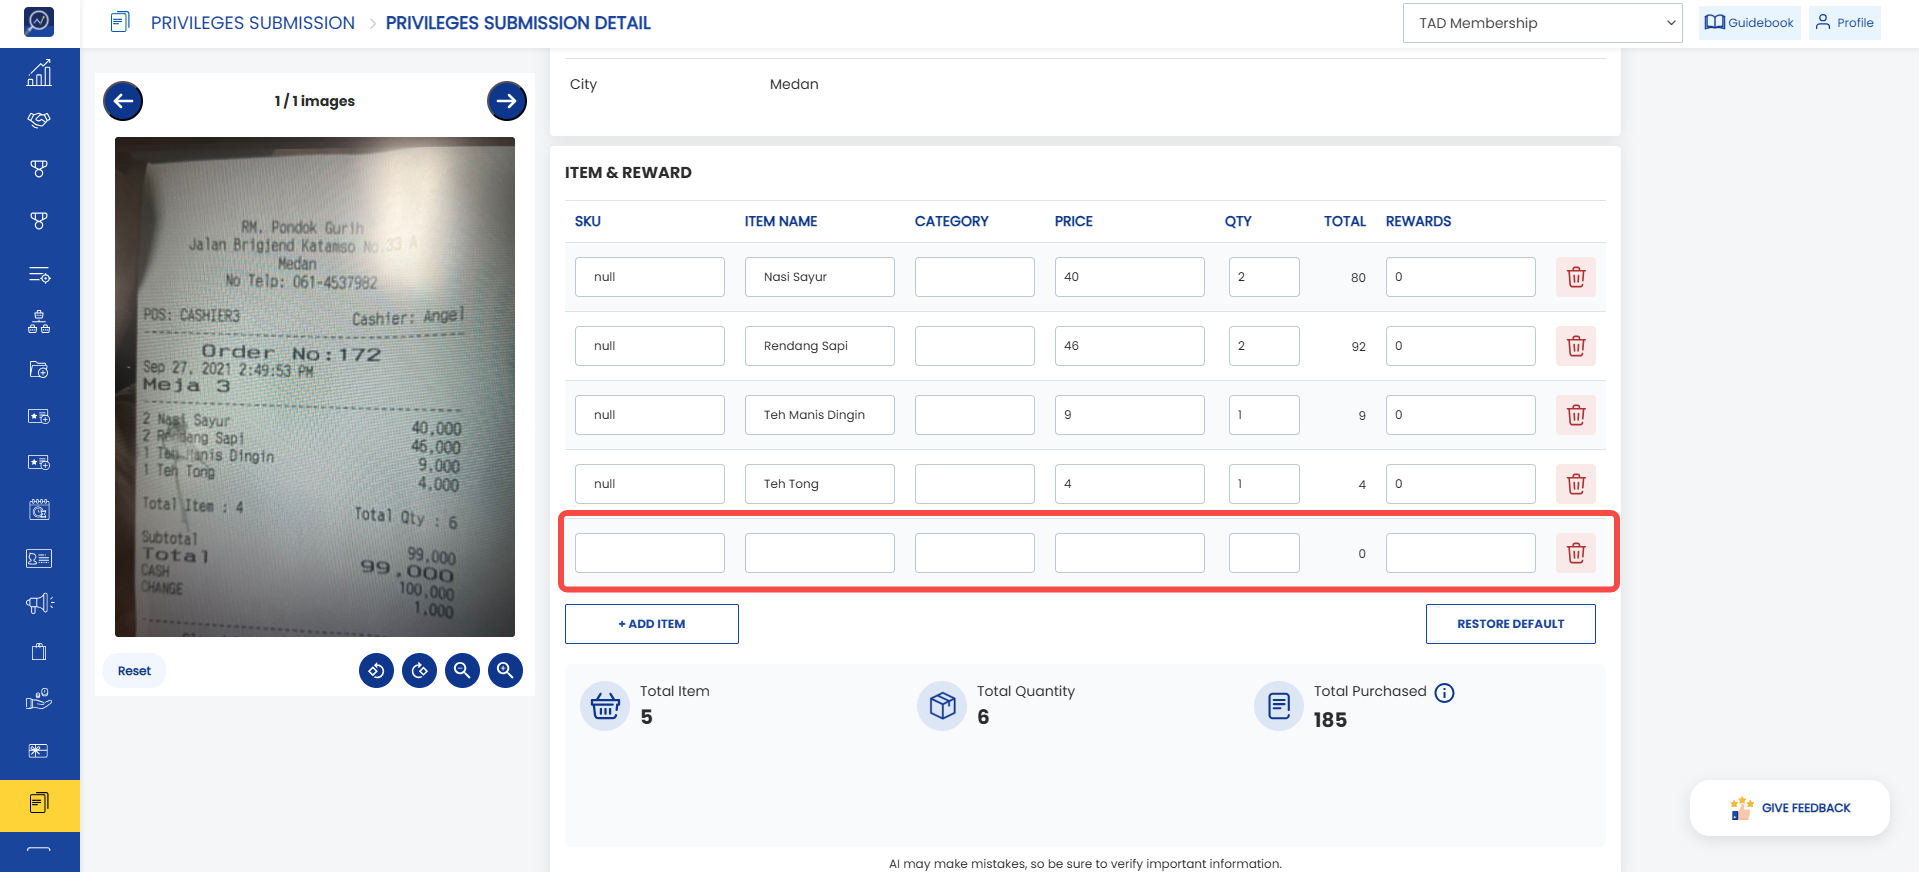
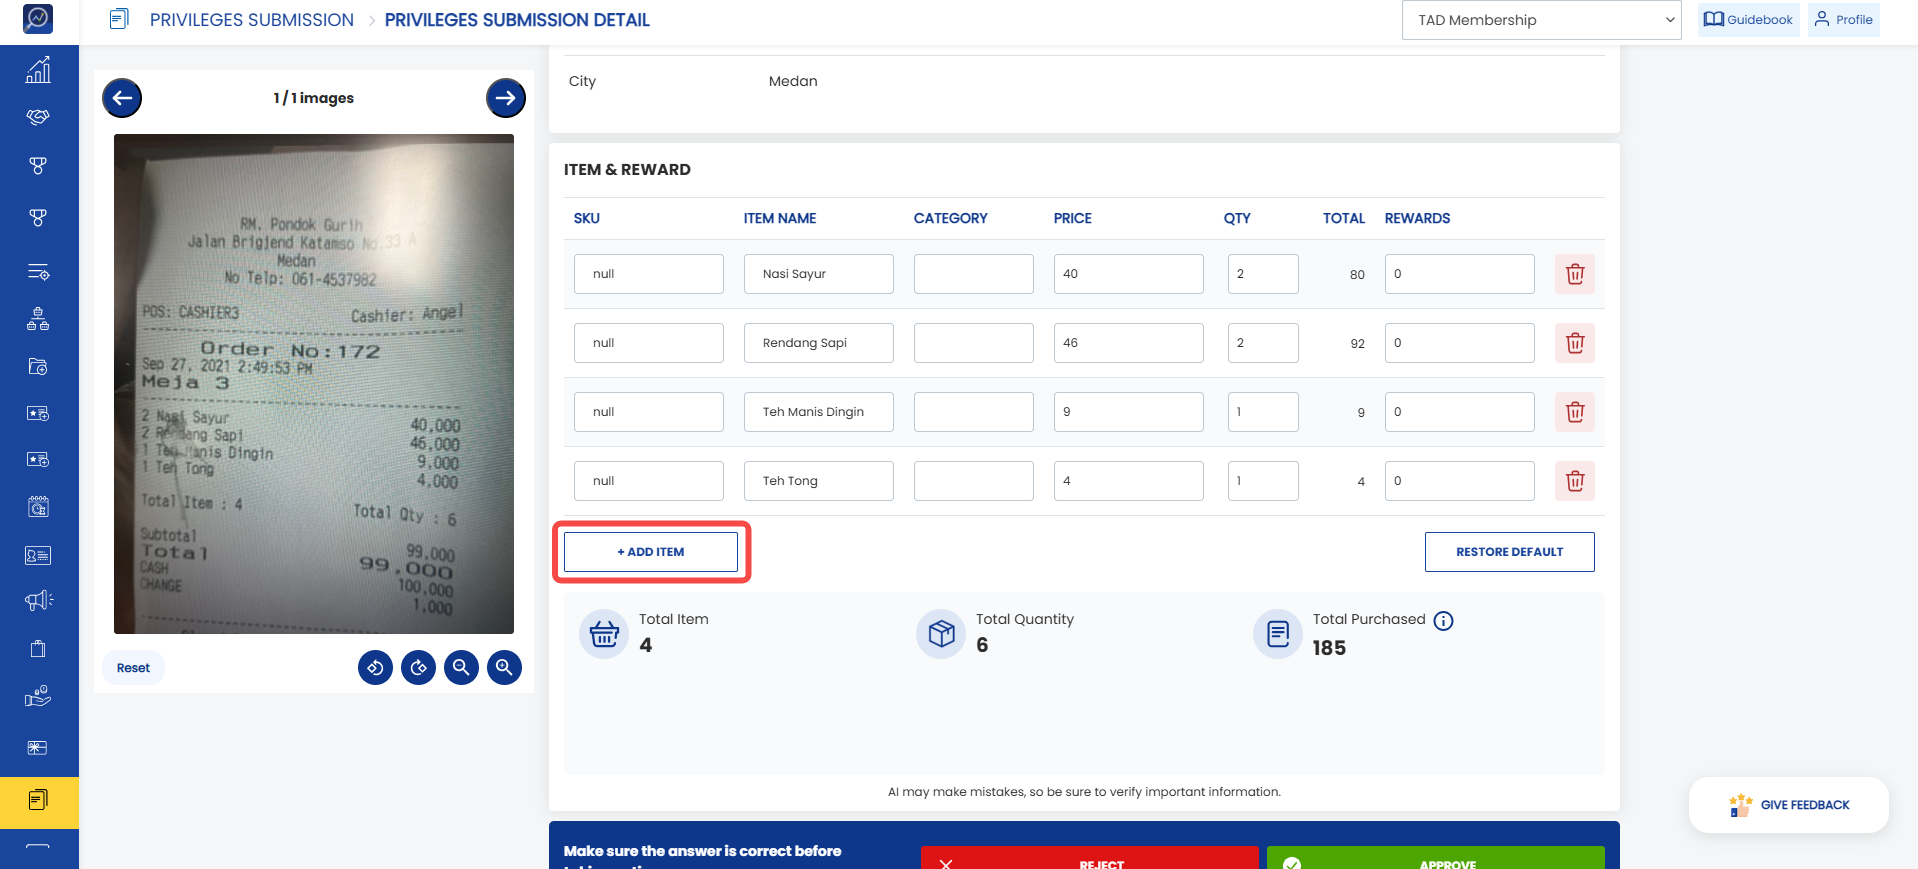 7. A new item row will appear. Complete the item details and specify the reward to be granted.
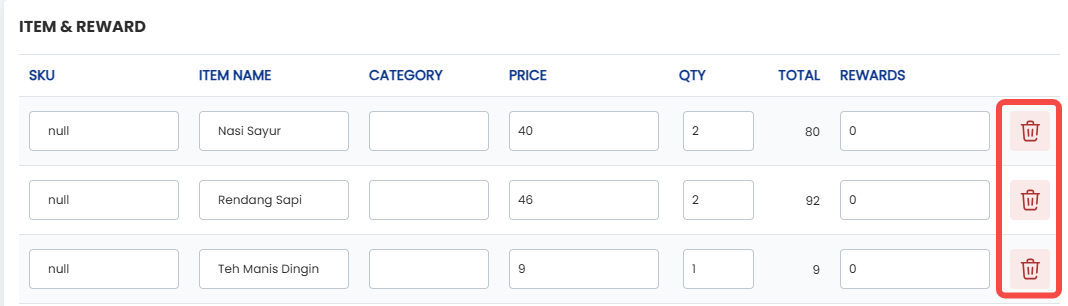
 8. If there is an item that needs to be removed, click the trash bin icon.
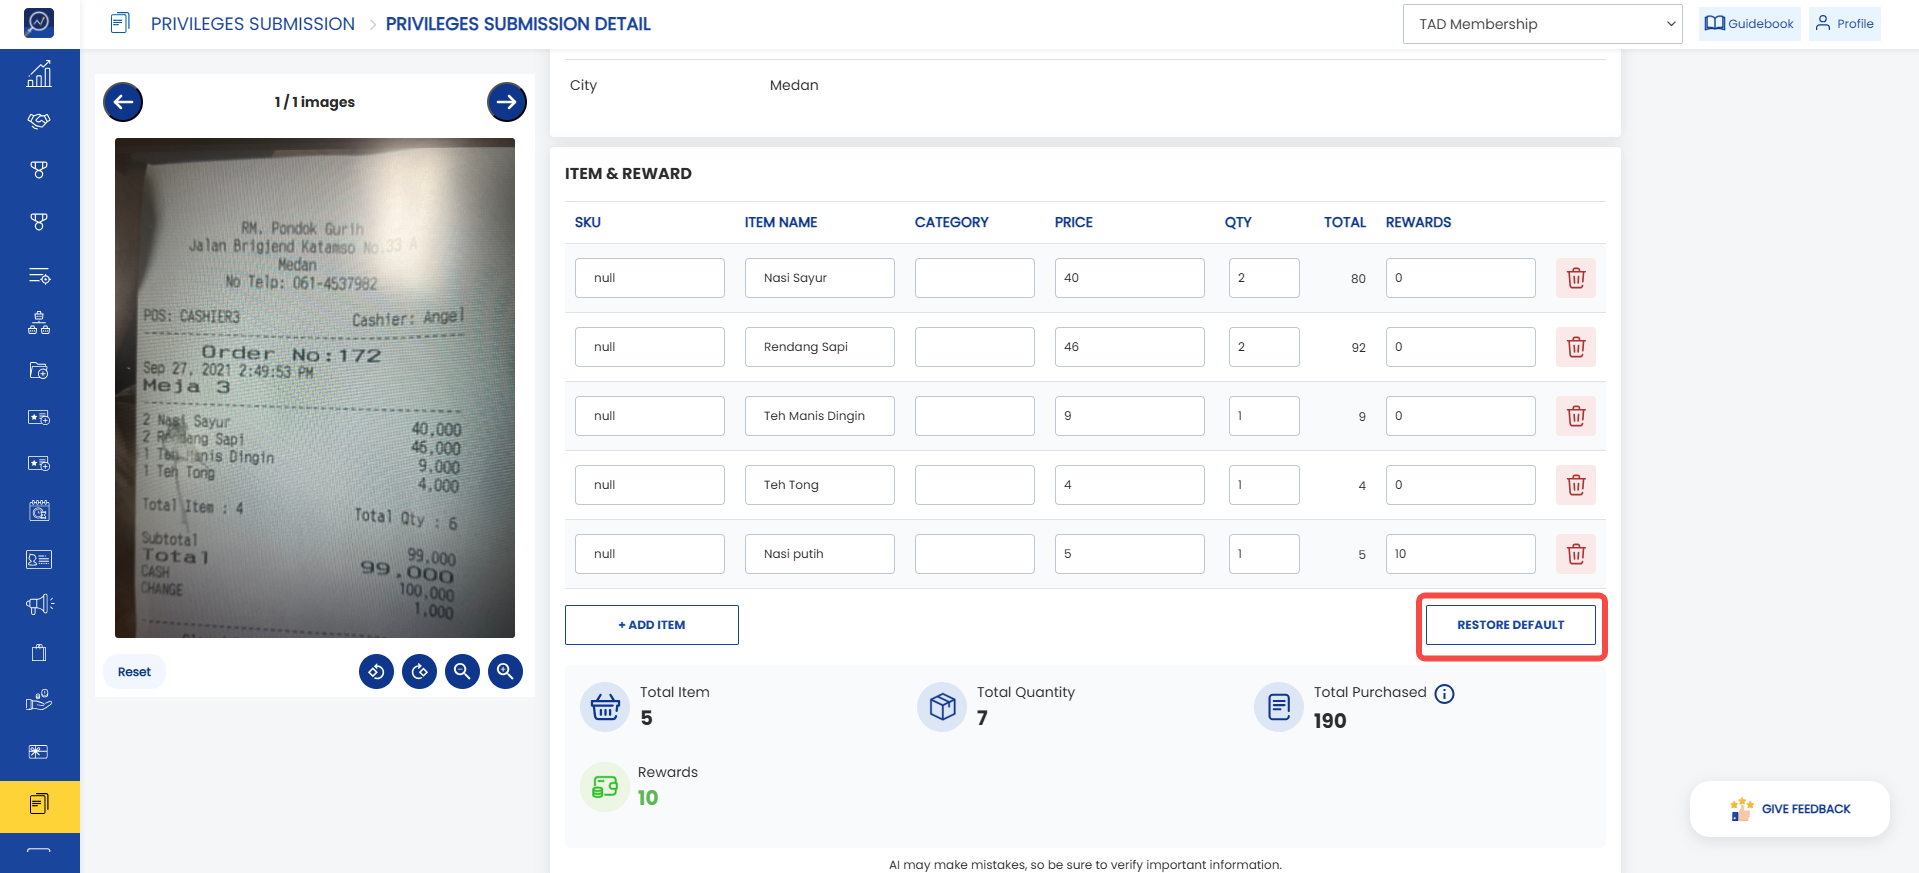
 9. If you want to restore the item data to the original AI OCR reading results, click “Restore Default”.
How to Add Items to a Submission (Snap Receipt - AI OCR - Auto Calculated Rewards)
1. Open the “Privileges Submission” menu.
2. Search for the submission using filters.
3. Click the Submission ID.
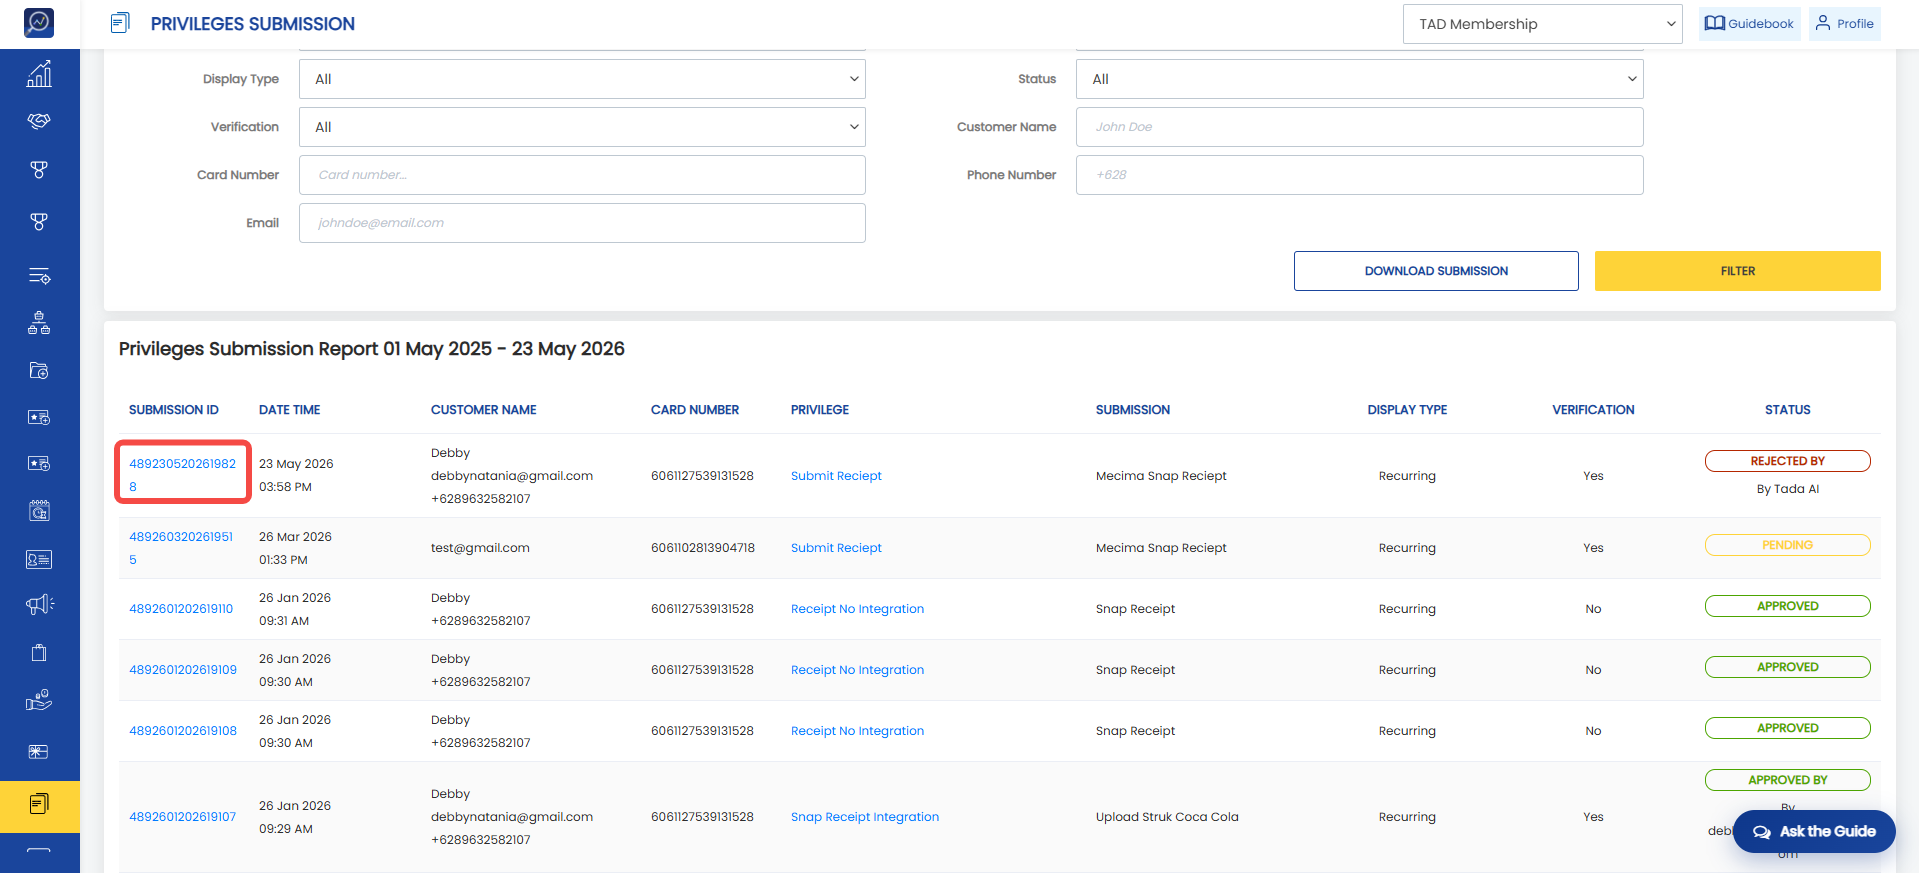 4. Wait for the AI OCR reading process to complete. All fields on the Privileges Submission Detail page will be disabled during processing. Please wait a moment and refresh the page.
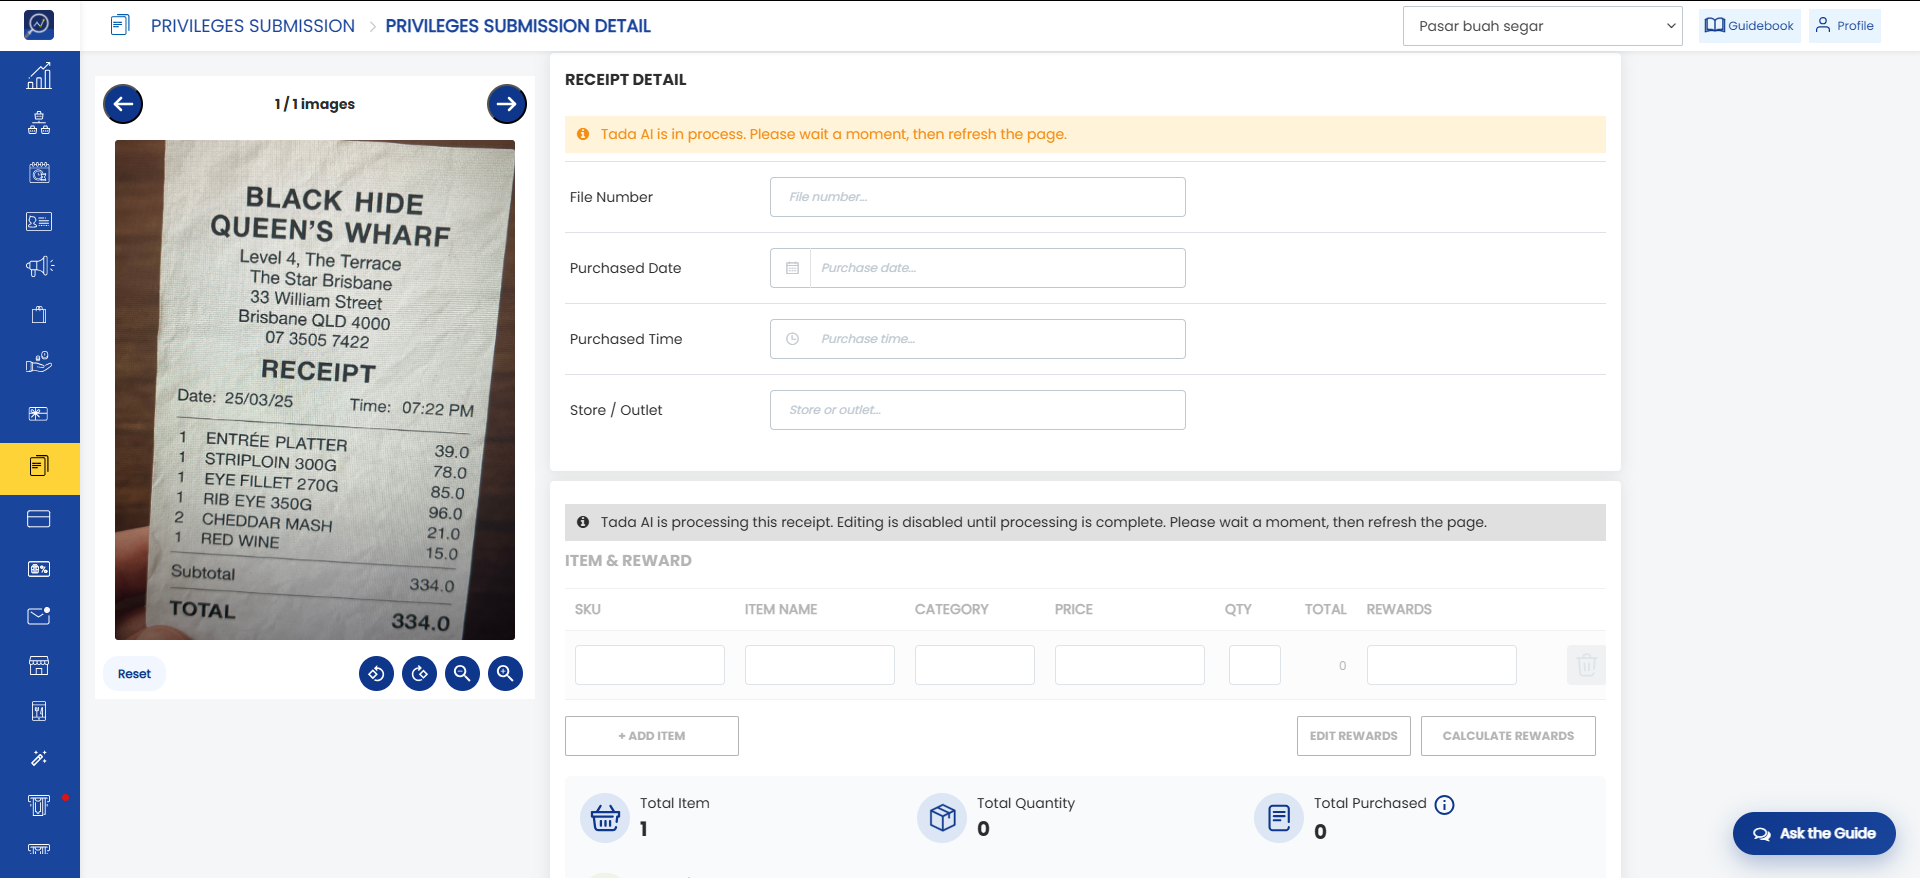 5. After refreshing the page, the AI OCR reading results will appear.
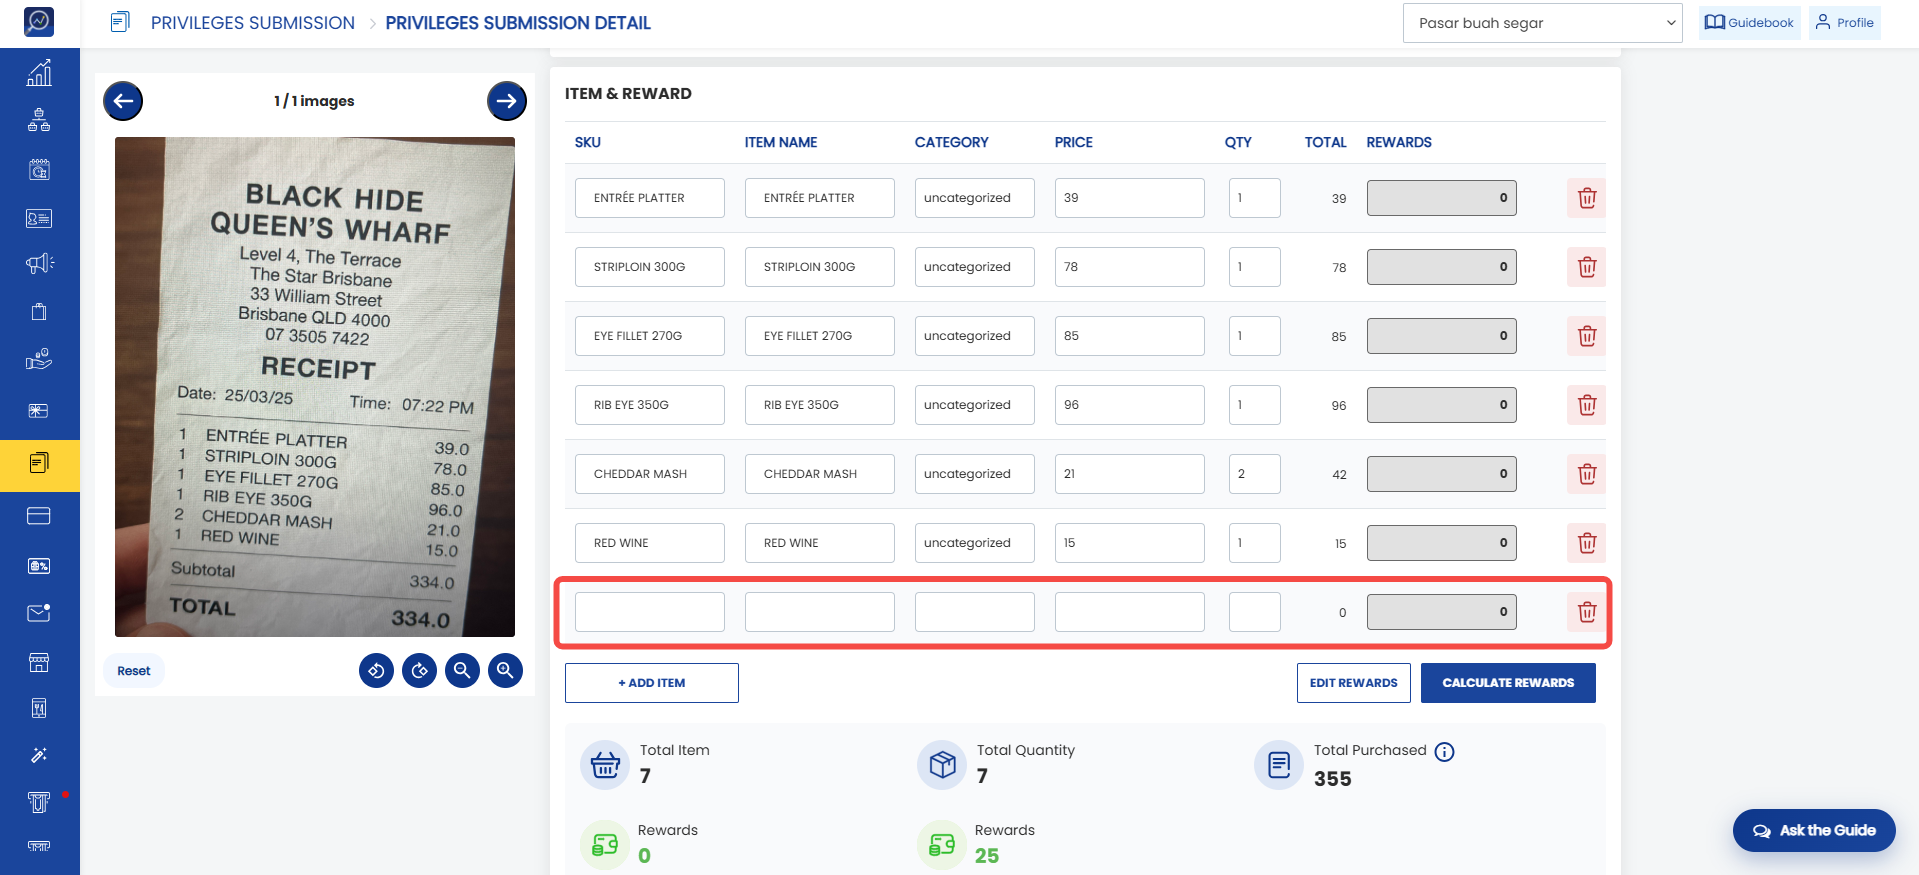
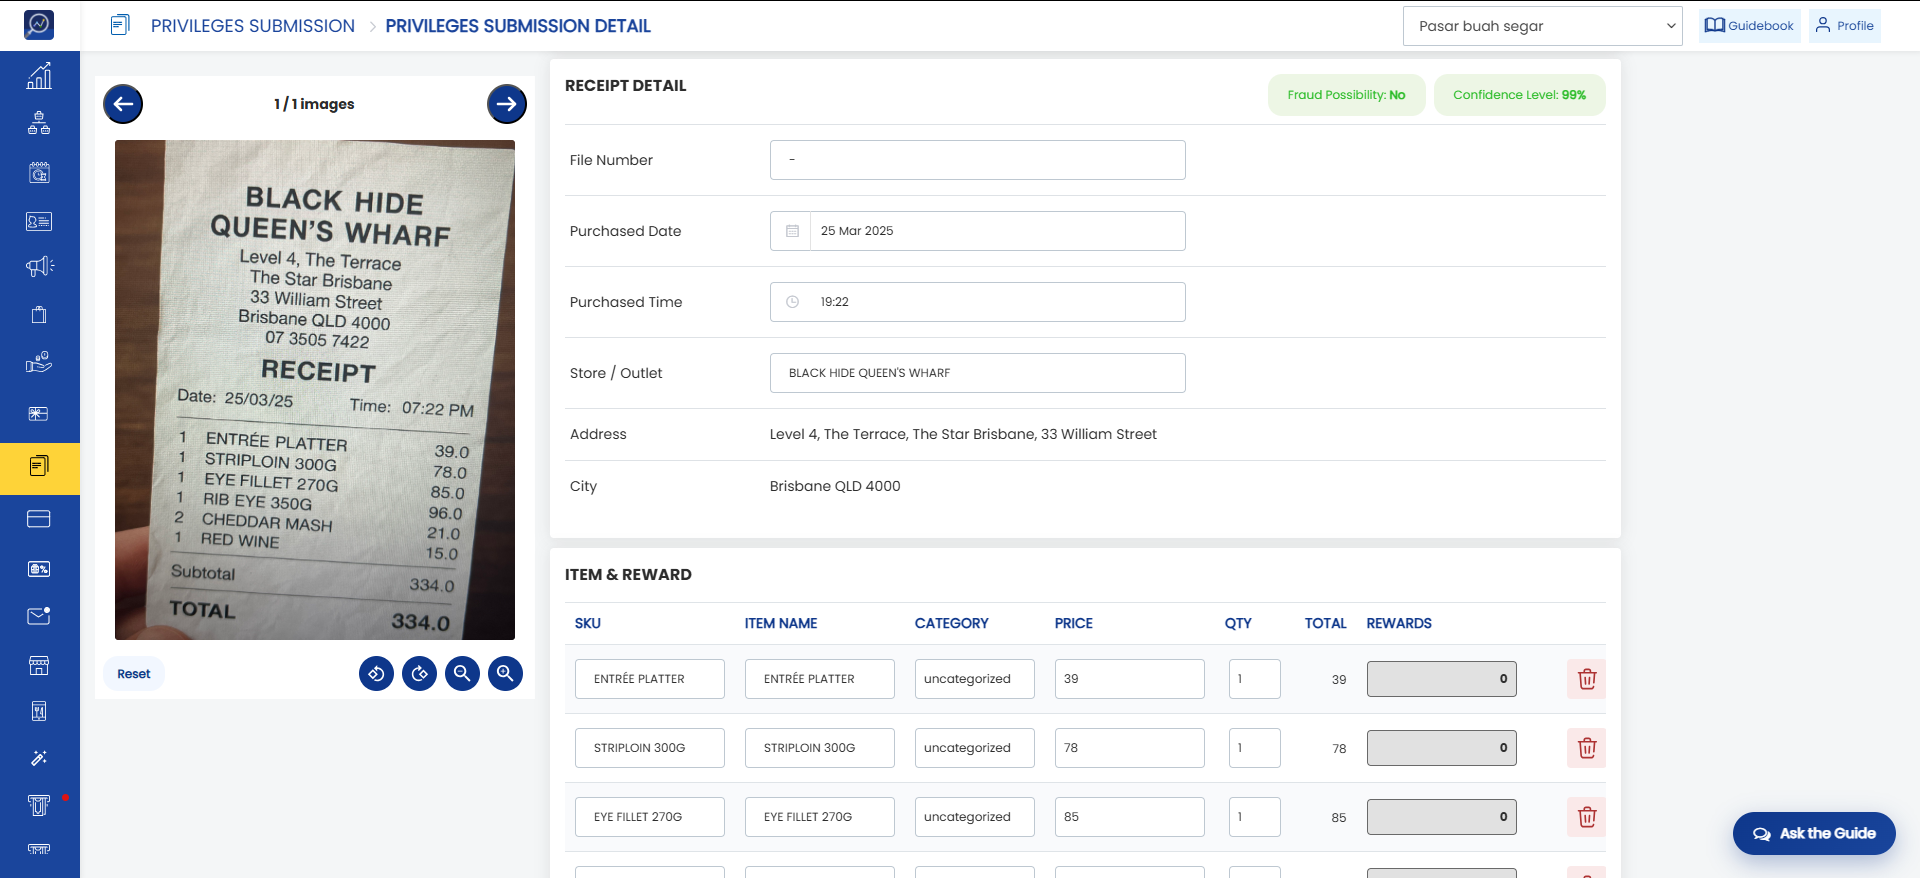 6. If you want to add an item that is not available in the AI OCR reading results, click “Add Item”.
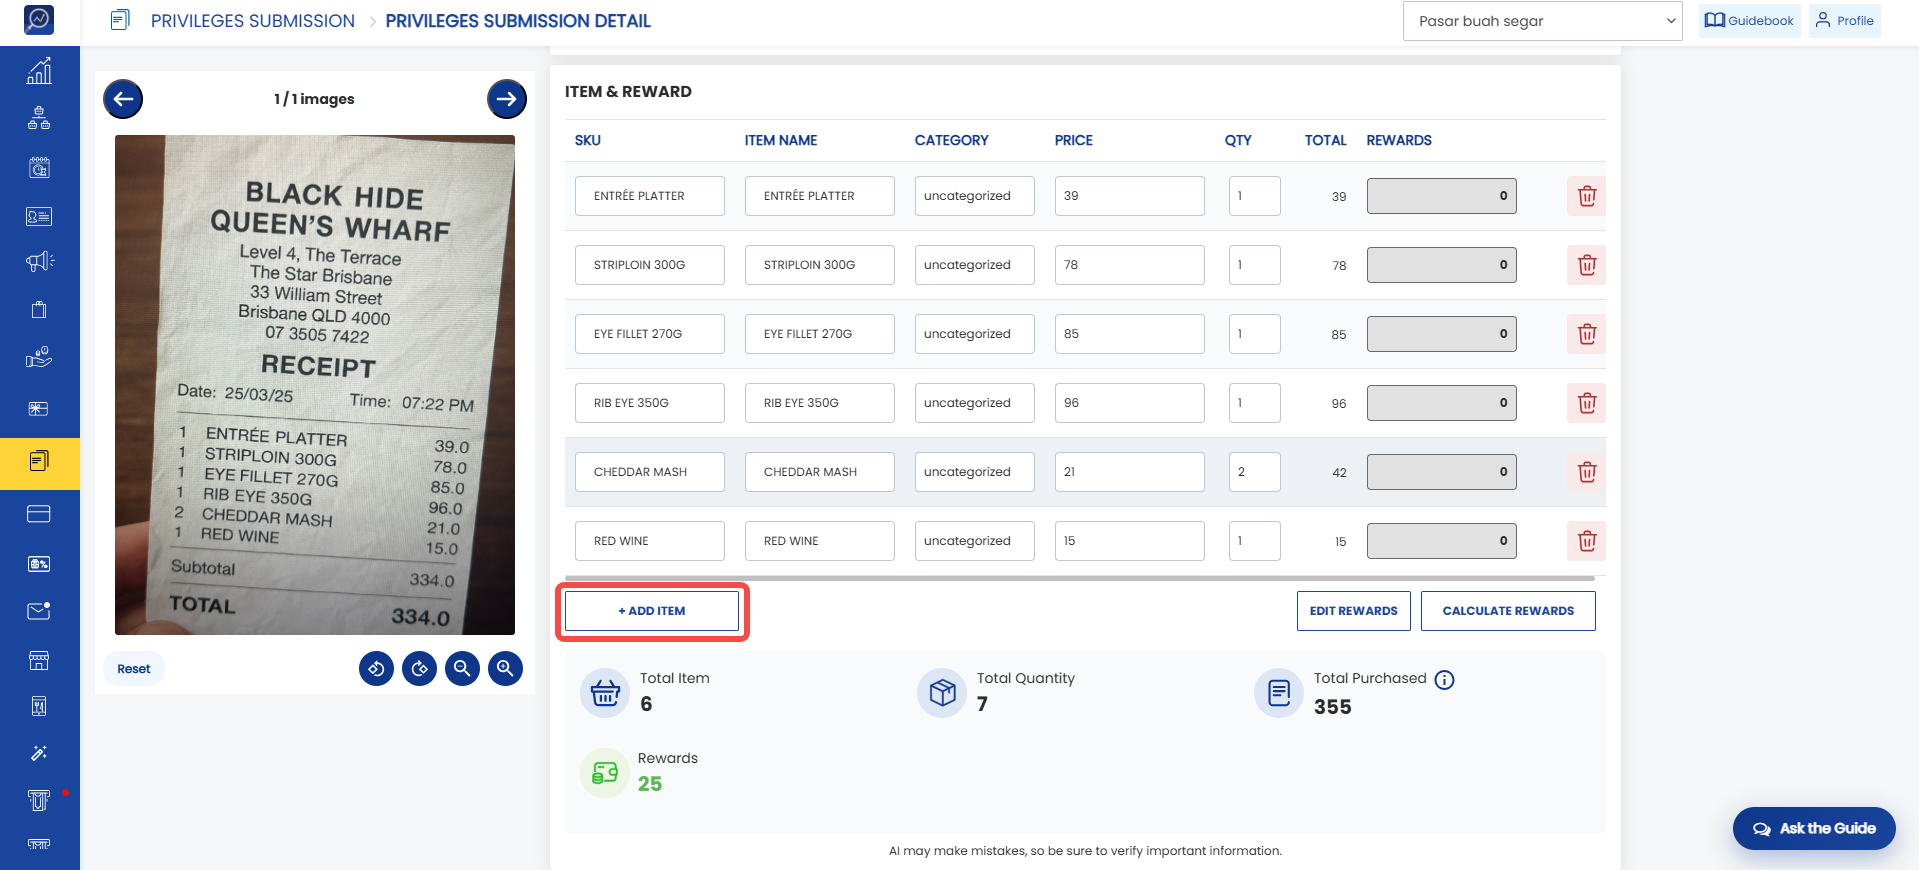 7. If you want to add an item that is not available in the AI OCR reading results, click “Add Item”.
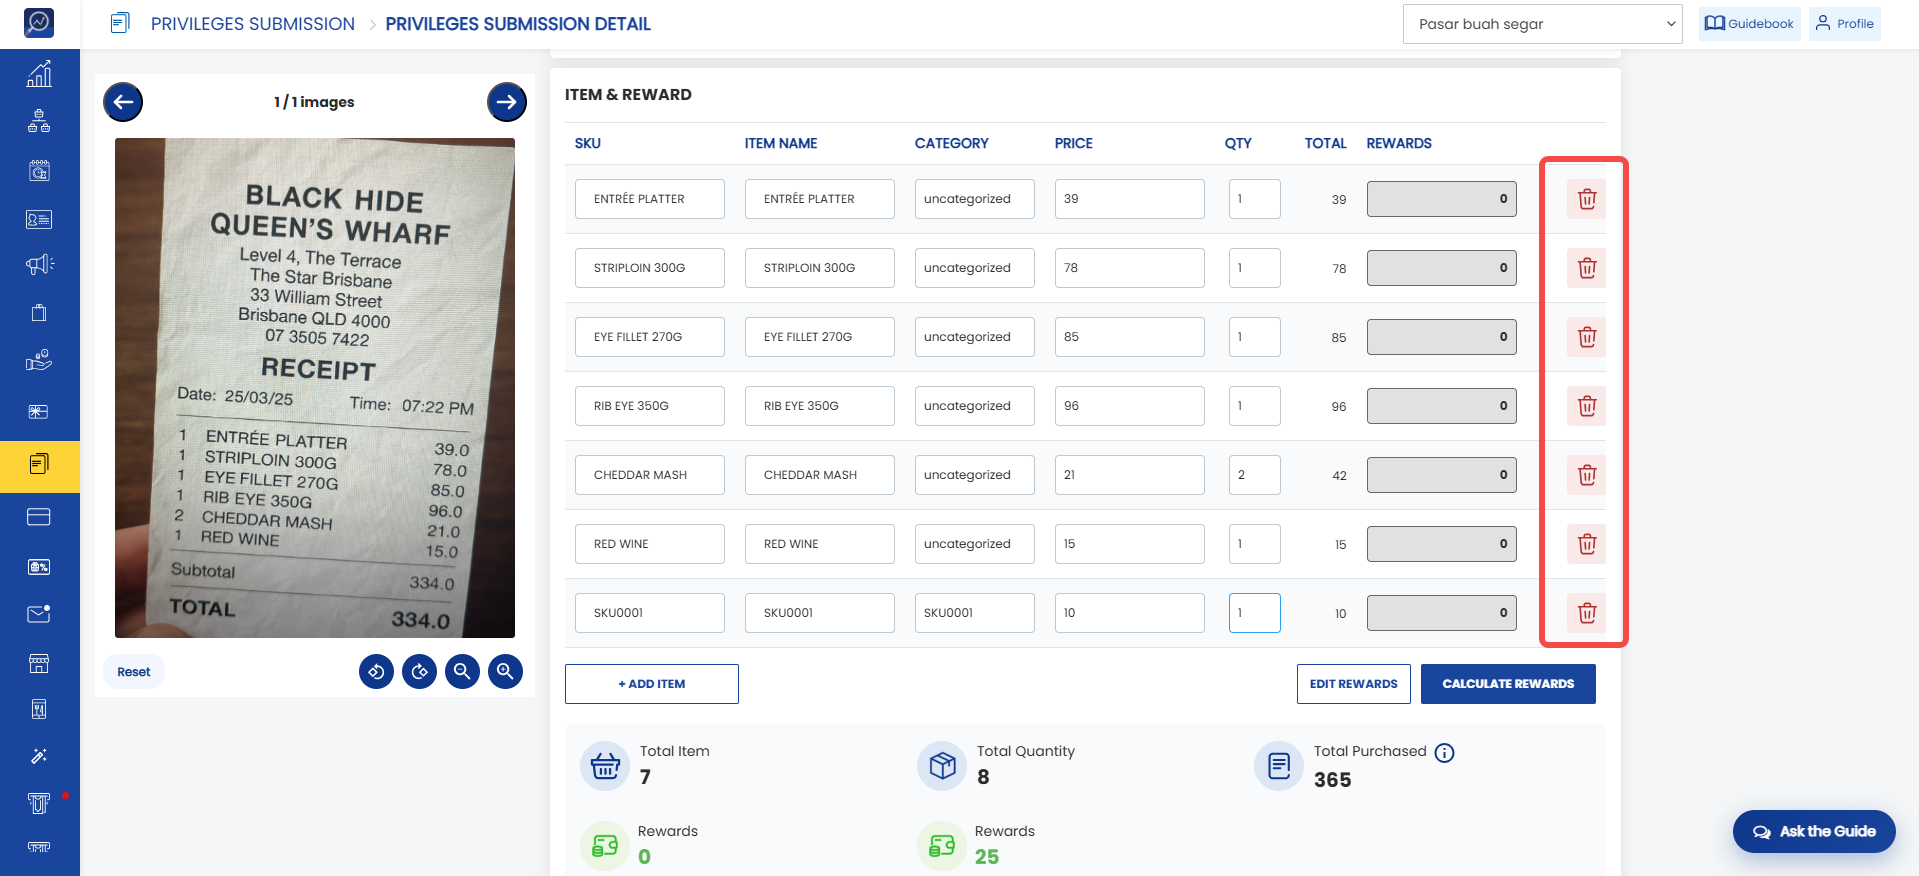
 8. If there is an item that needs to be removed, click the trash bin icon.
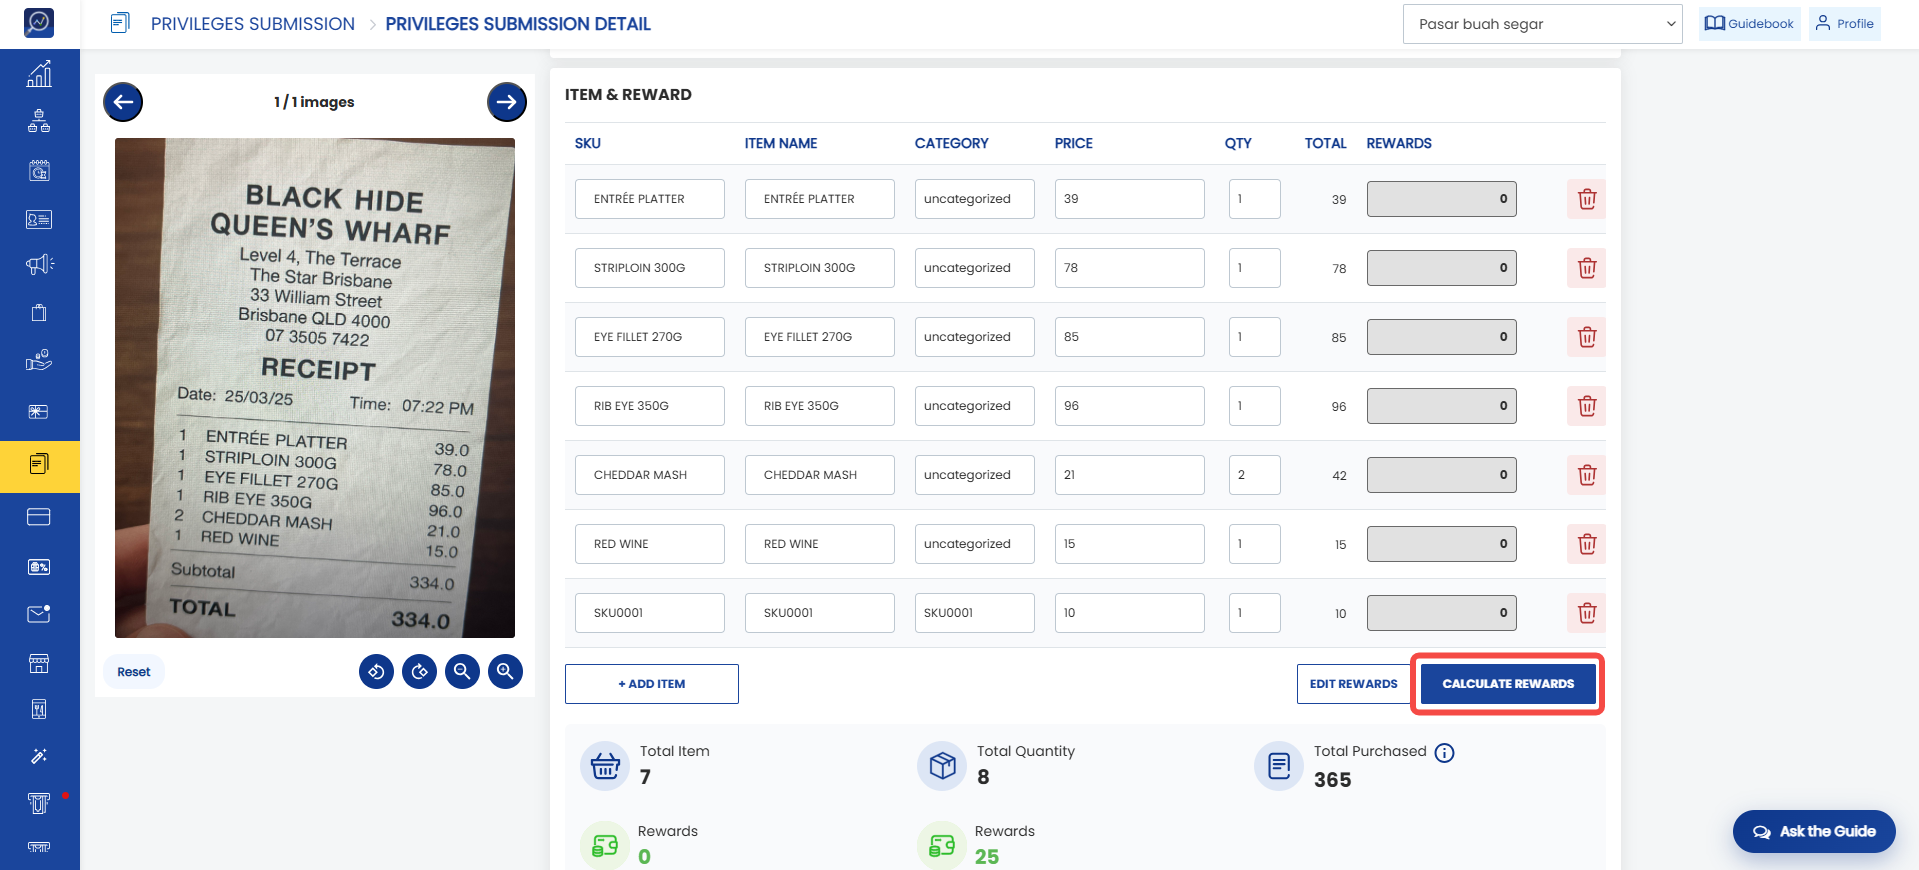
 9. Click “Calculate Rewards” so the system can calculate rewards for eligible items.
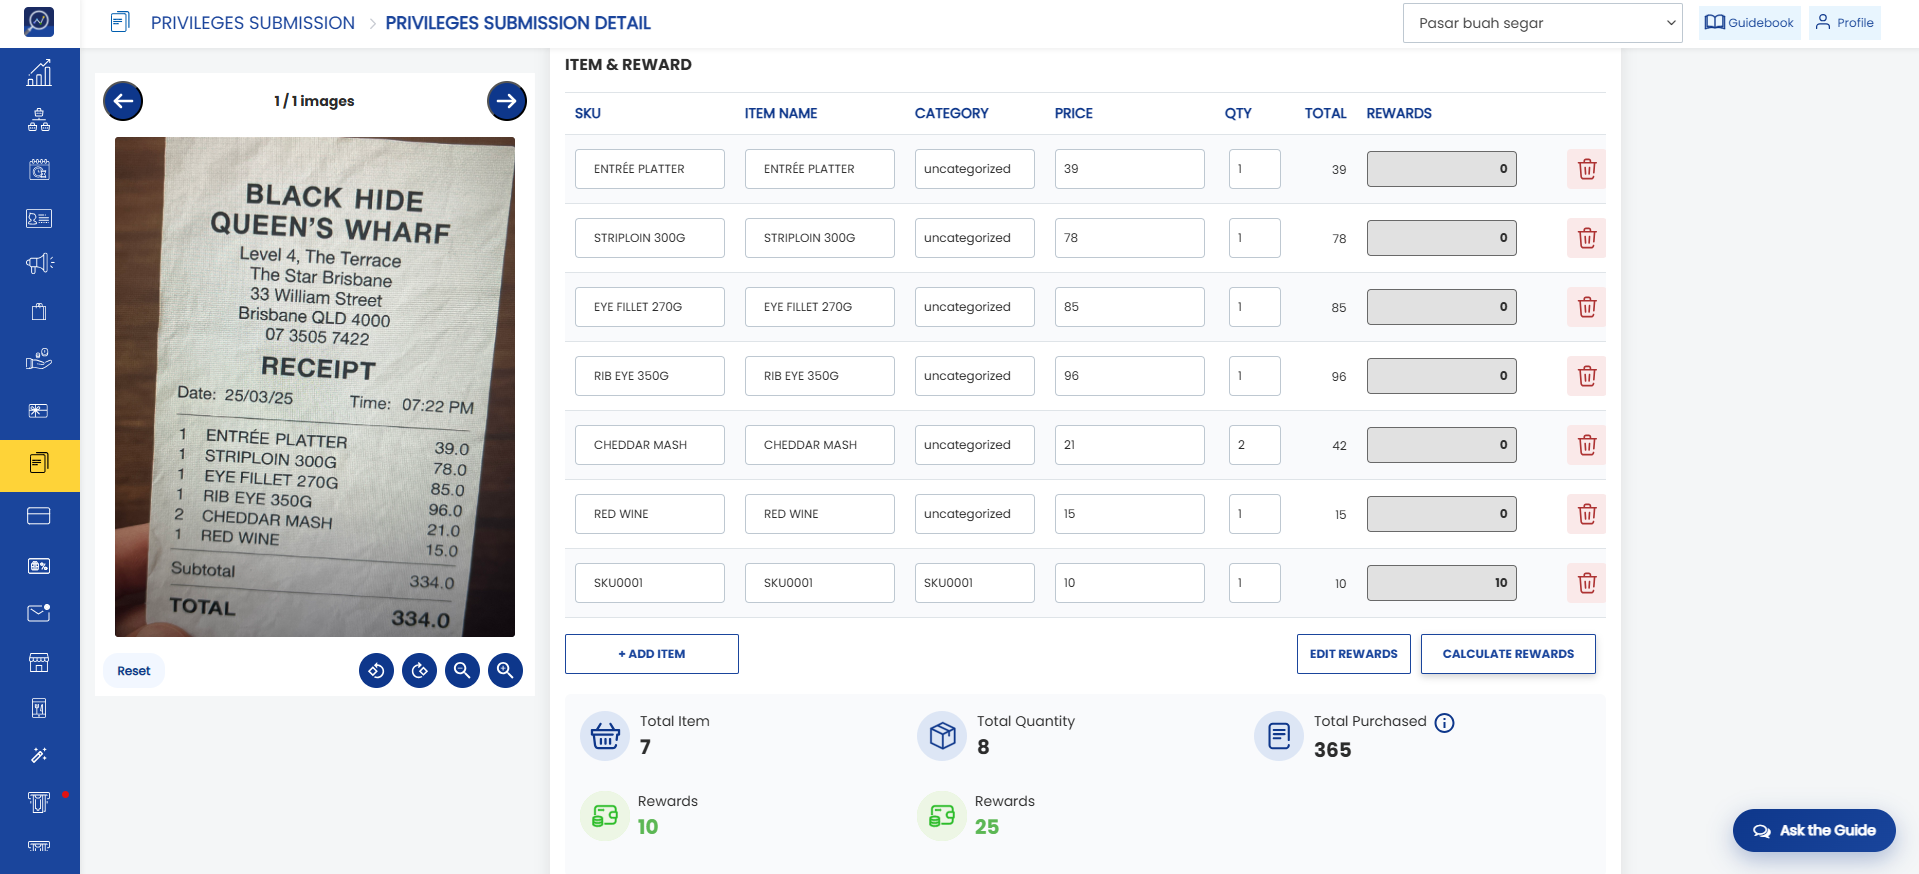
 10. The rewards will be updated, and the submission can then be approved or rejected.
How to Edit Rewards in a Submission (Snap Receipt - AI OCR - Auto Calculated Rewards)
1. Open the “Privileges Submission” menu.
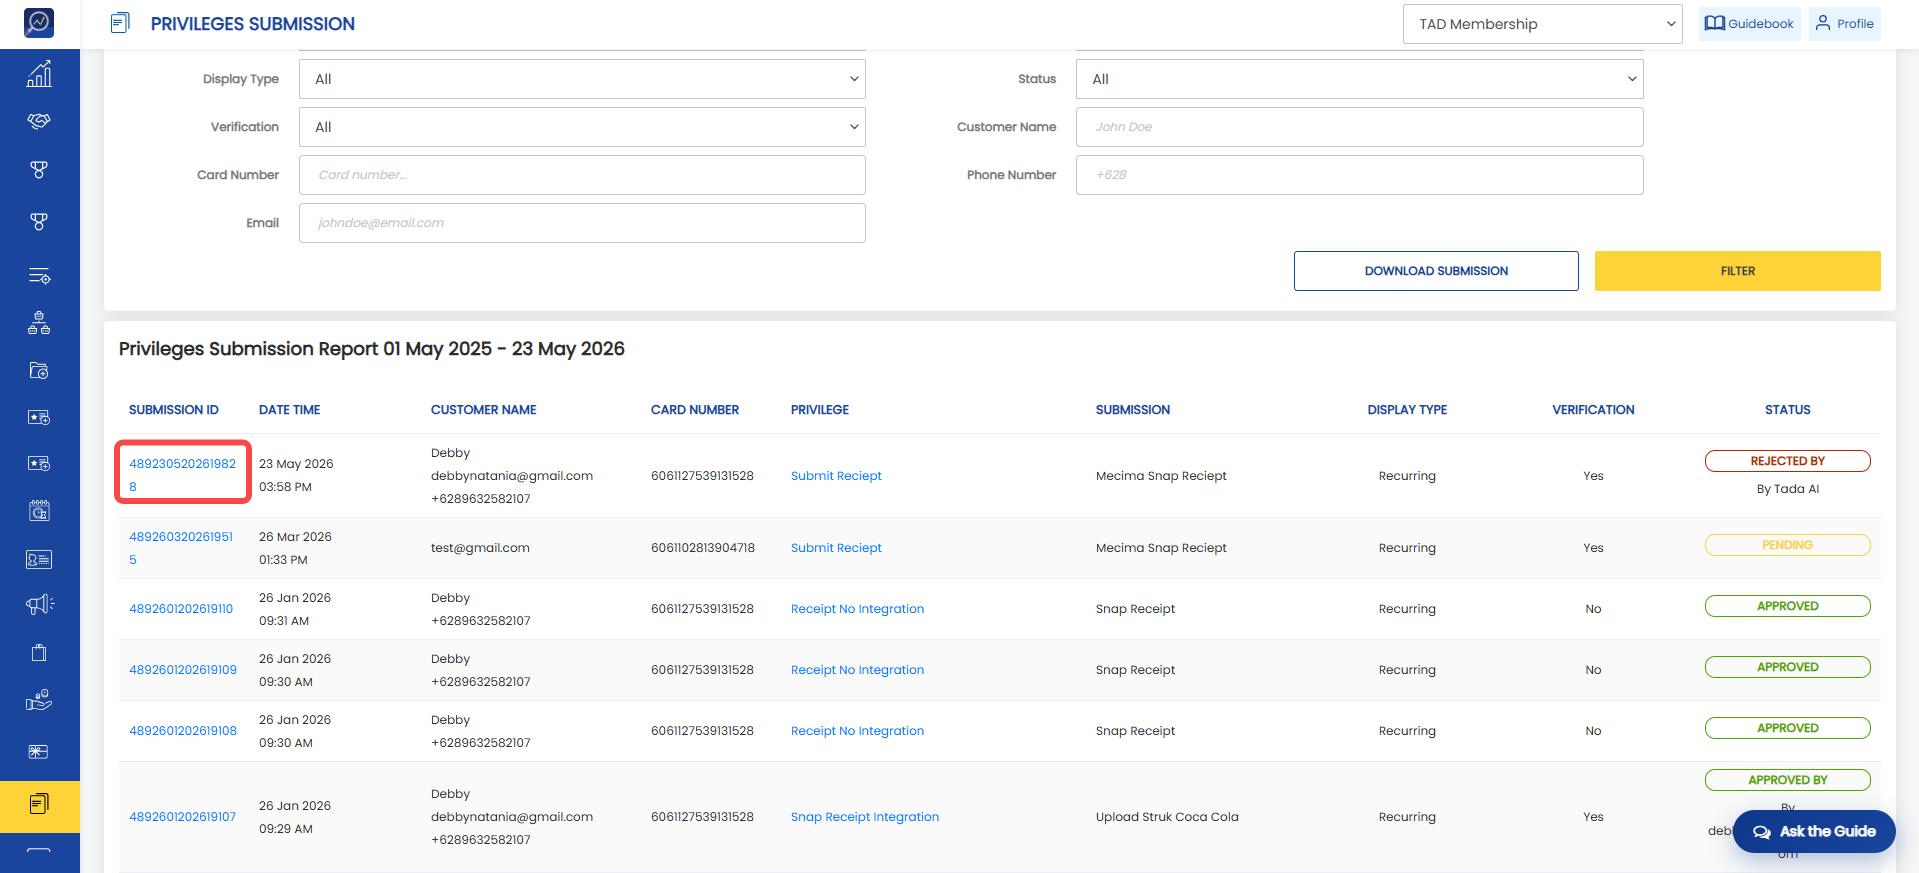
2. Enter filters to make it easier to find the submission. Click the Submission ID to open the submission details.
3. Search for the submission using filters.
4. Click the Submission ID.
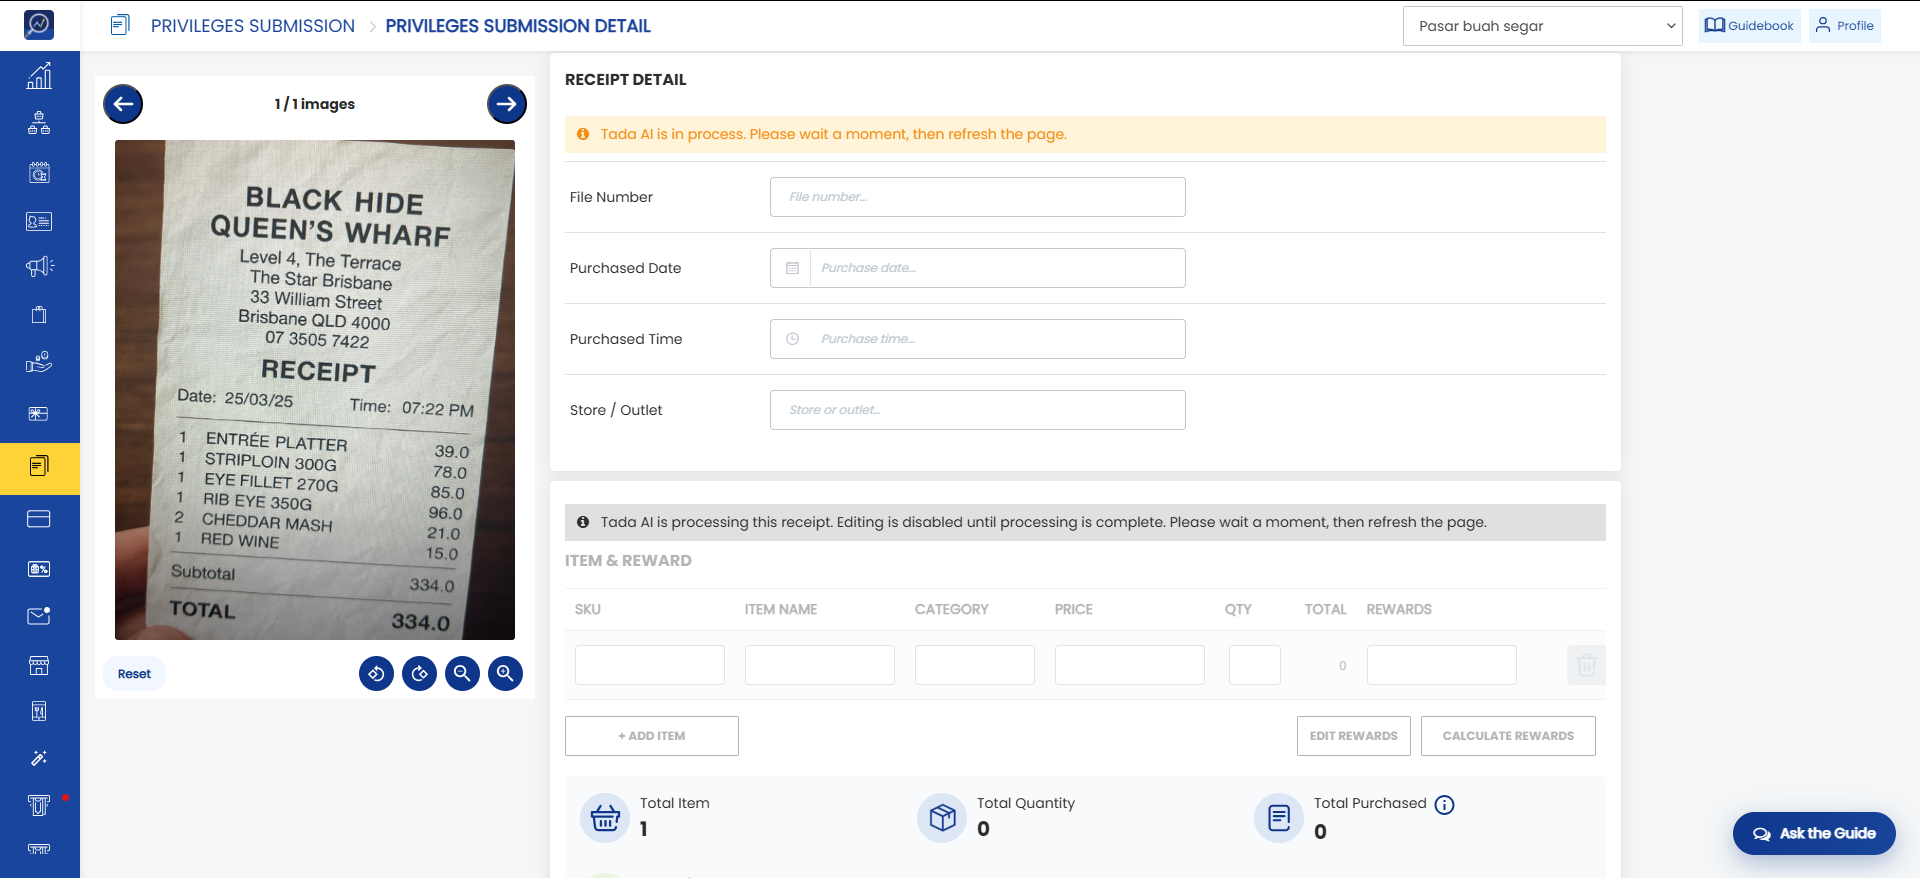
 5. Wait for the AI OCR reading process to complete. All fields on the Privileges Submission Detail page will be disabled during processing. Please wait a moment and refresh the page.
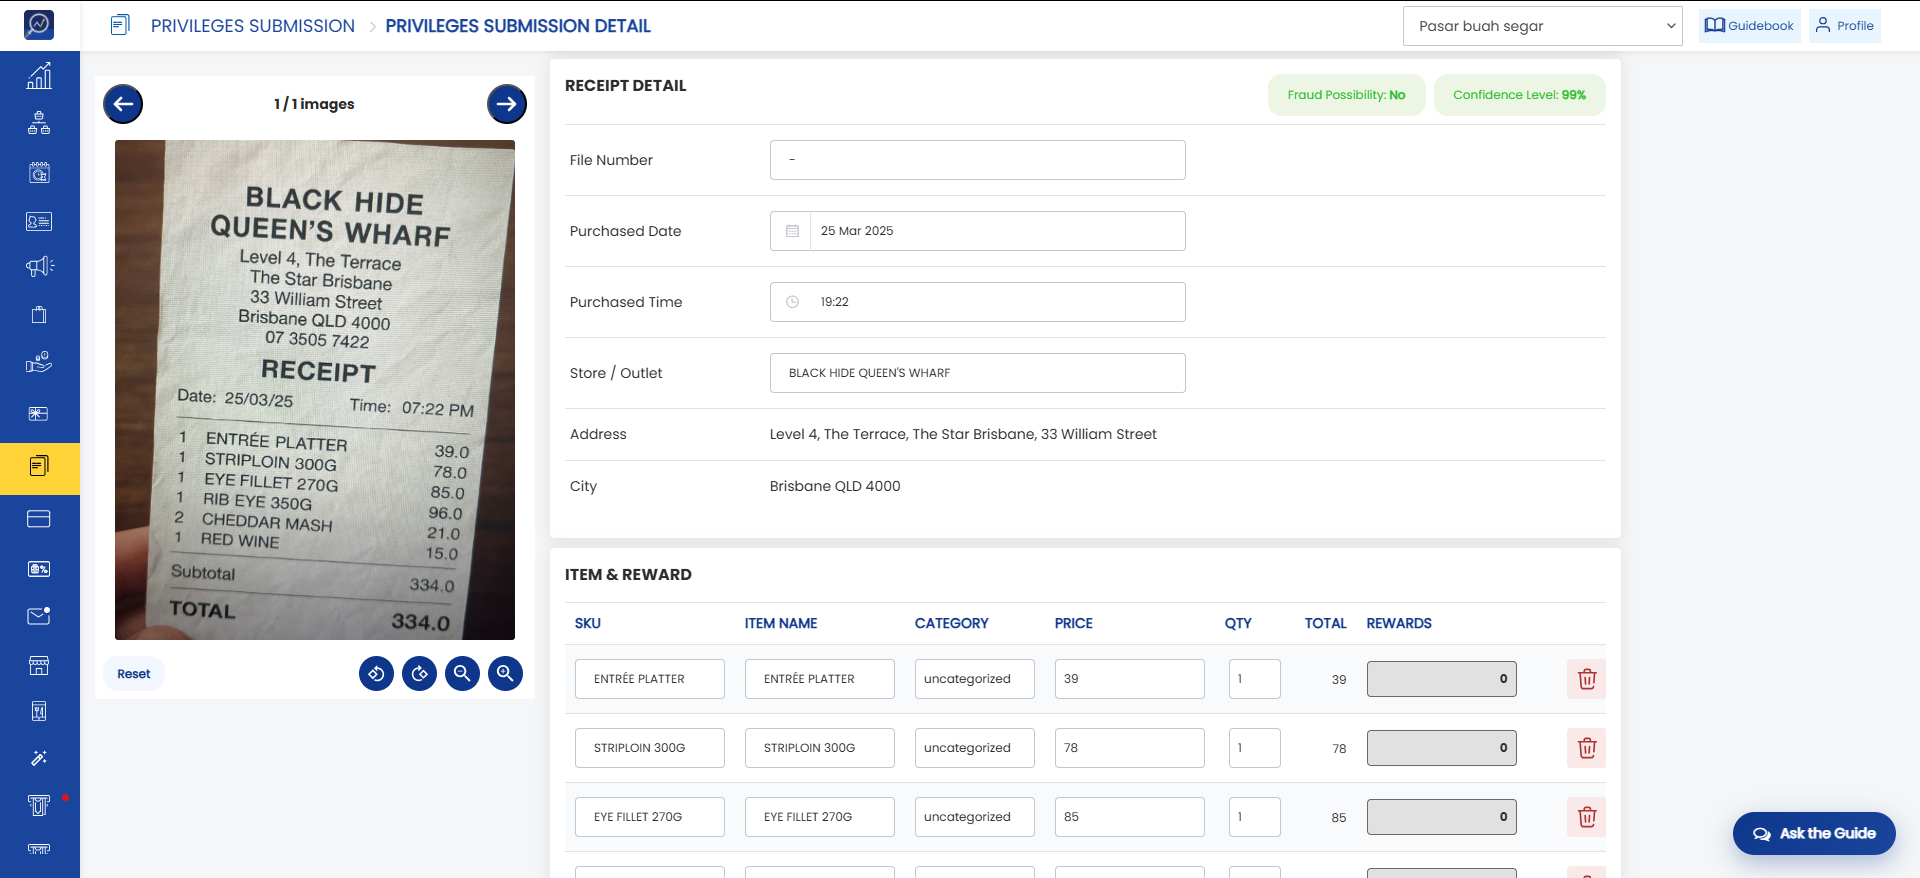
 6. After refreshing the page, the AI OCR reading results will appear.
 7. If you want to modify the rewards generated from the AI OCR results, click “Edit Rewards”.
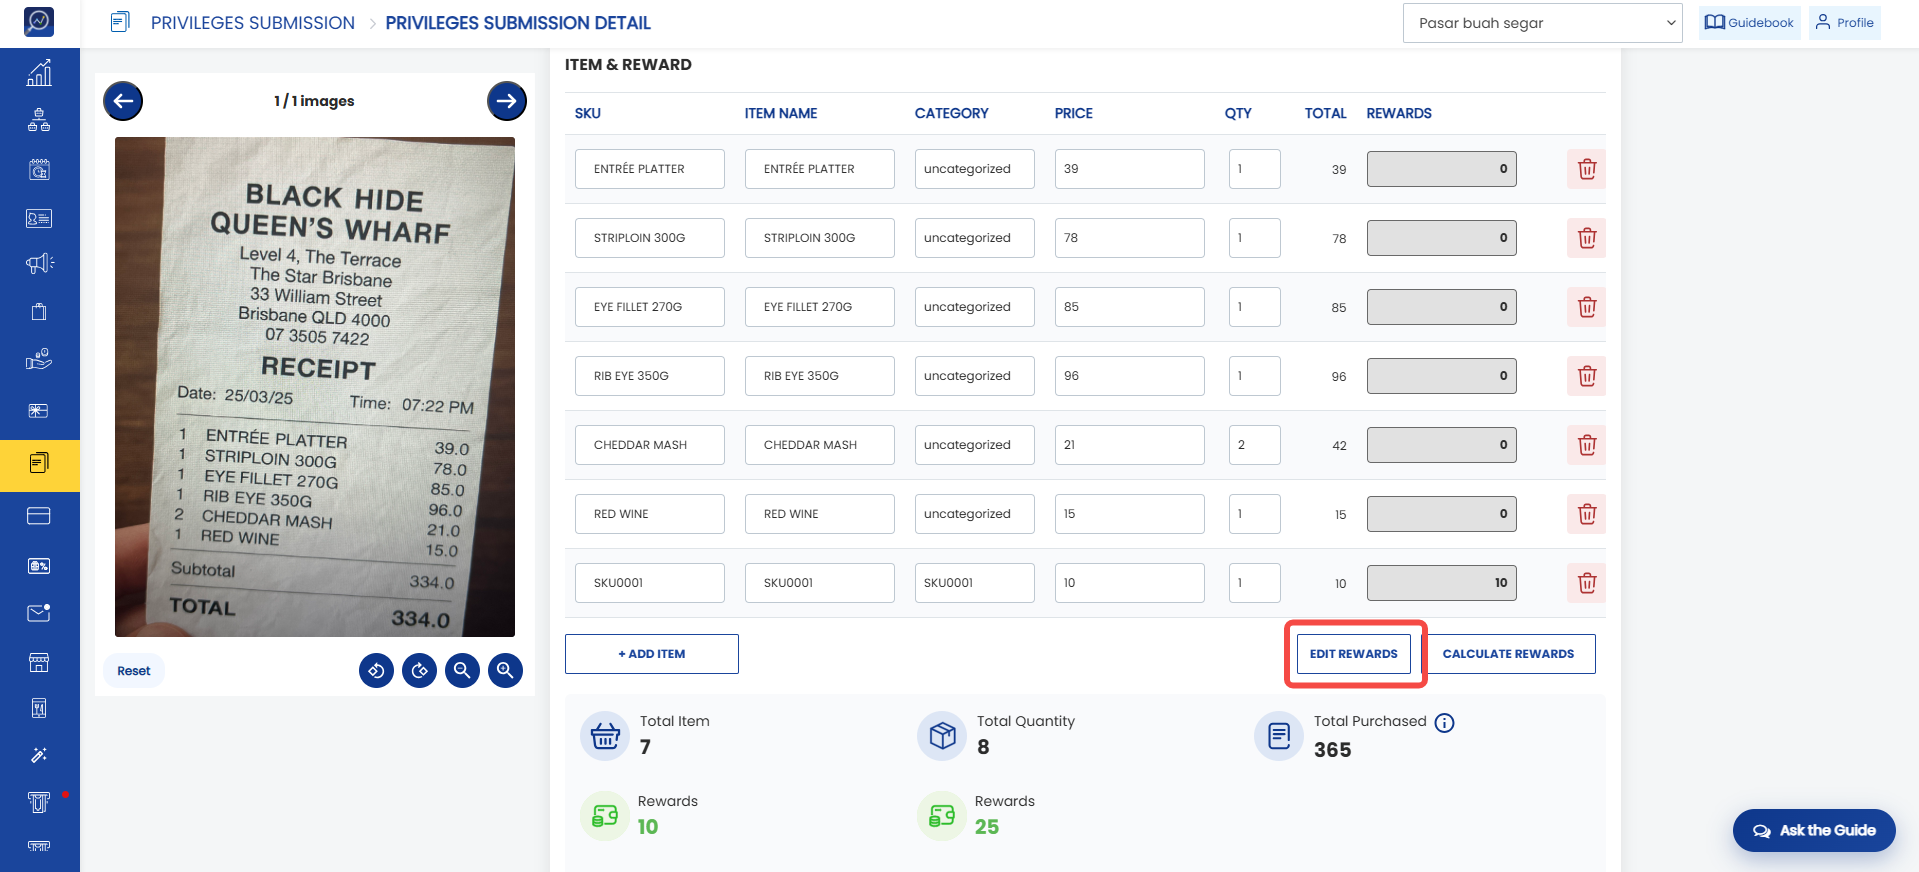 8. The reward fields will become editable. Enter the desired rewards and click “Save”.
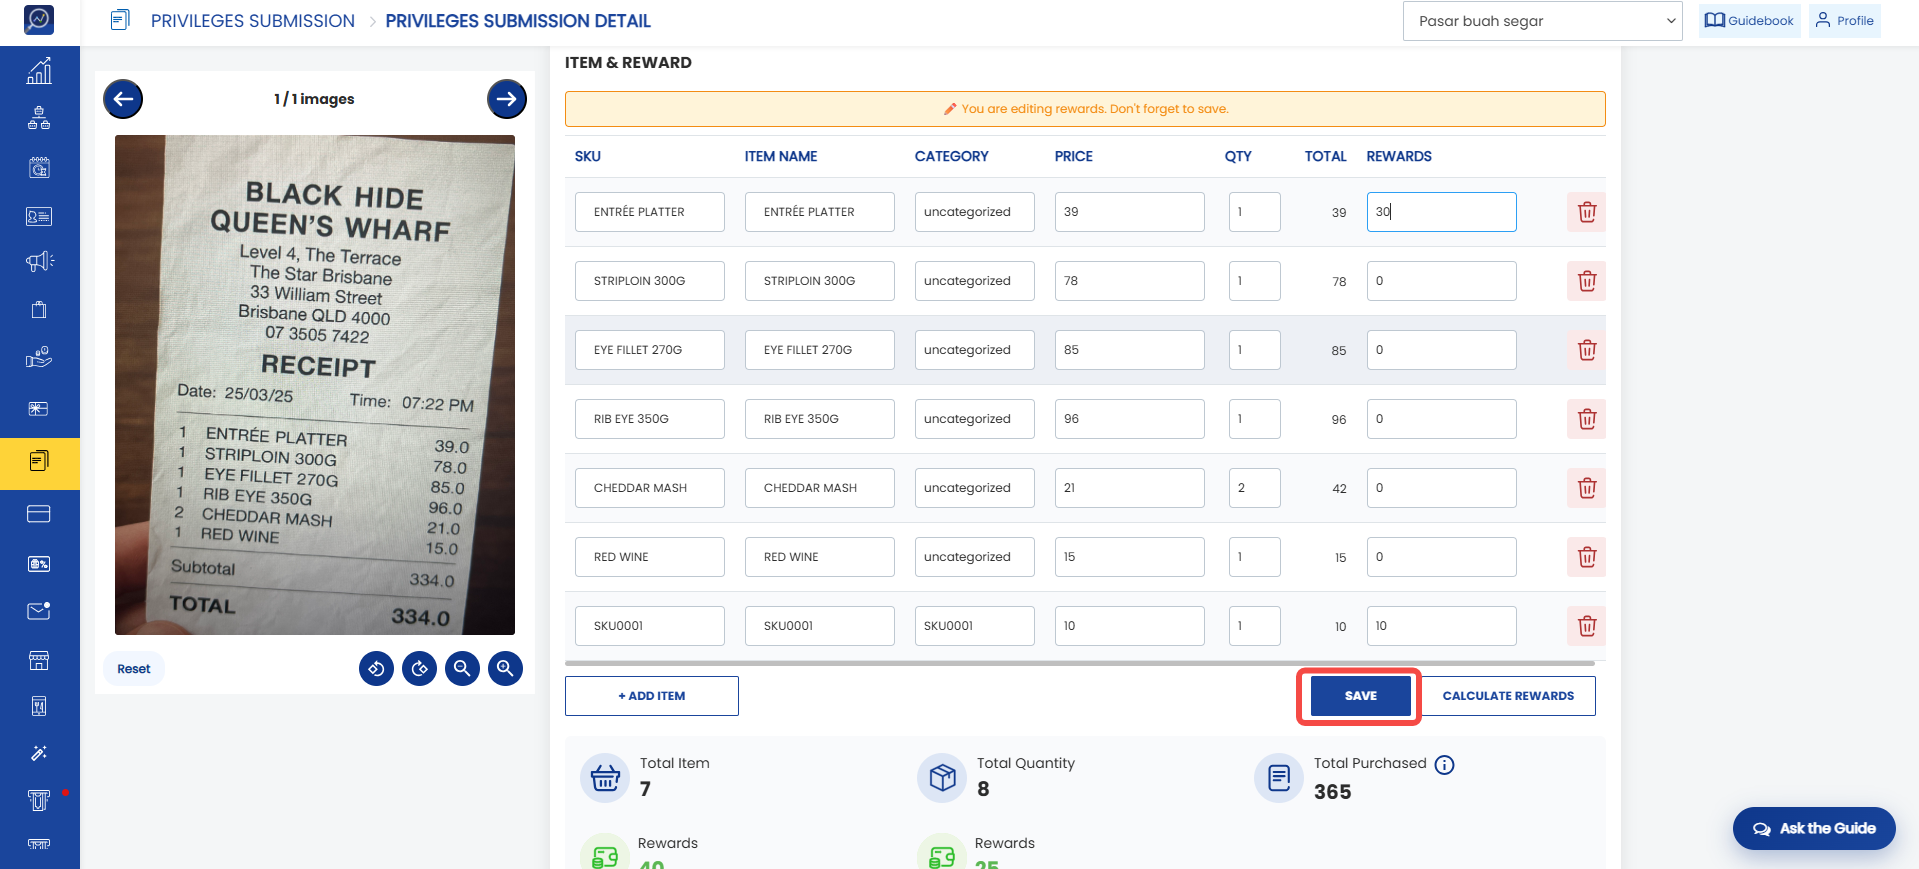 9. The rewards will be updated, and the submission can then be approved or rejected.