
Stores
The Stores menu is used to manage all store or outlet data owned by the merchant. Through this menu, users can:
- Add new stores
- Manage outlet/store access
- Create cashier accounts
- Manage store status
- View store rating performance
How to Add a New Store
1. Open the “Store” menu, then select the “Store Management” submenu.
2. On the “Store Info” tab, click “Add New Store”.
3. Select “Add Single Store”.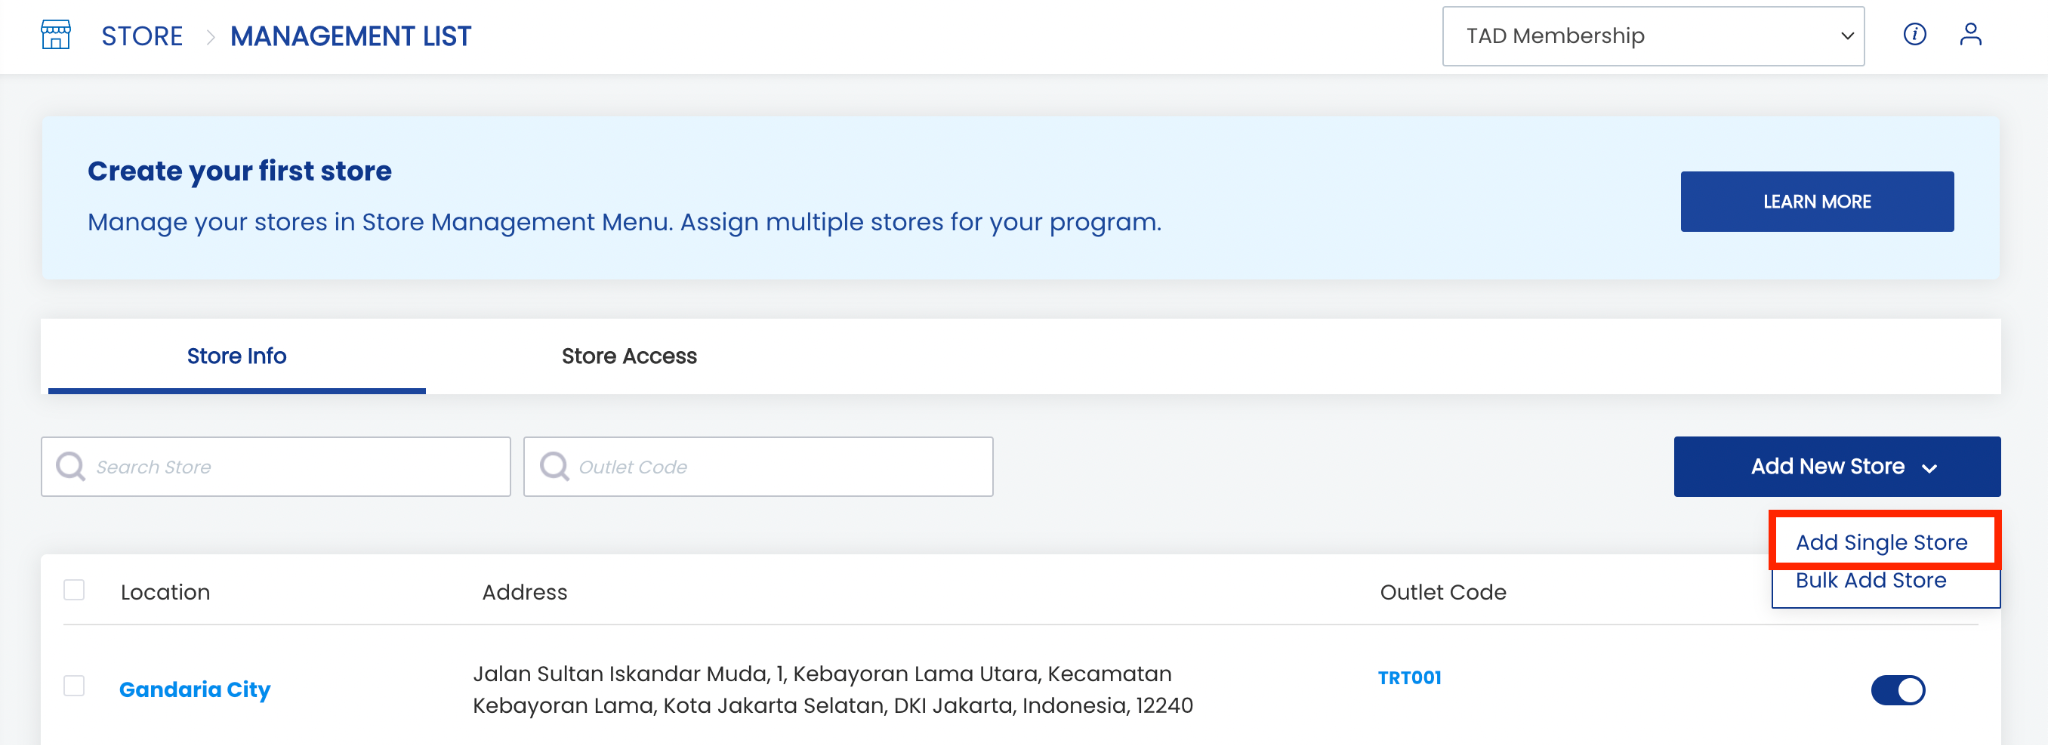 4. Complete the Outlet Information. Fill in the Name, Email, and Phone Number parameters.
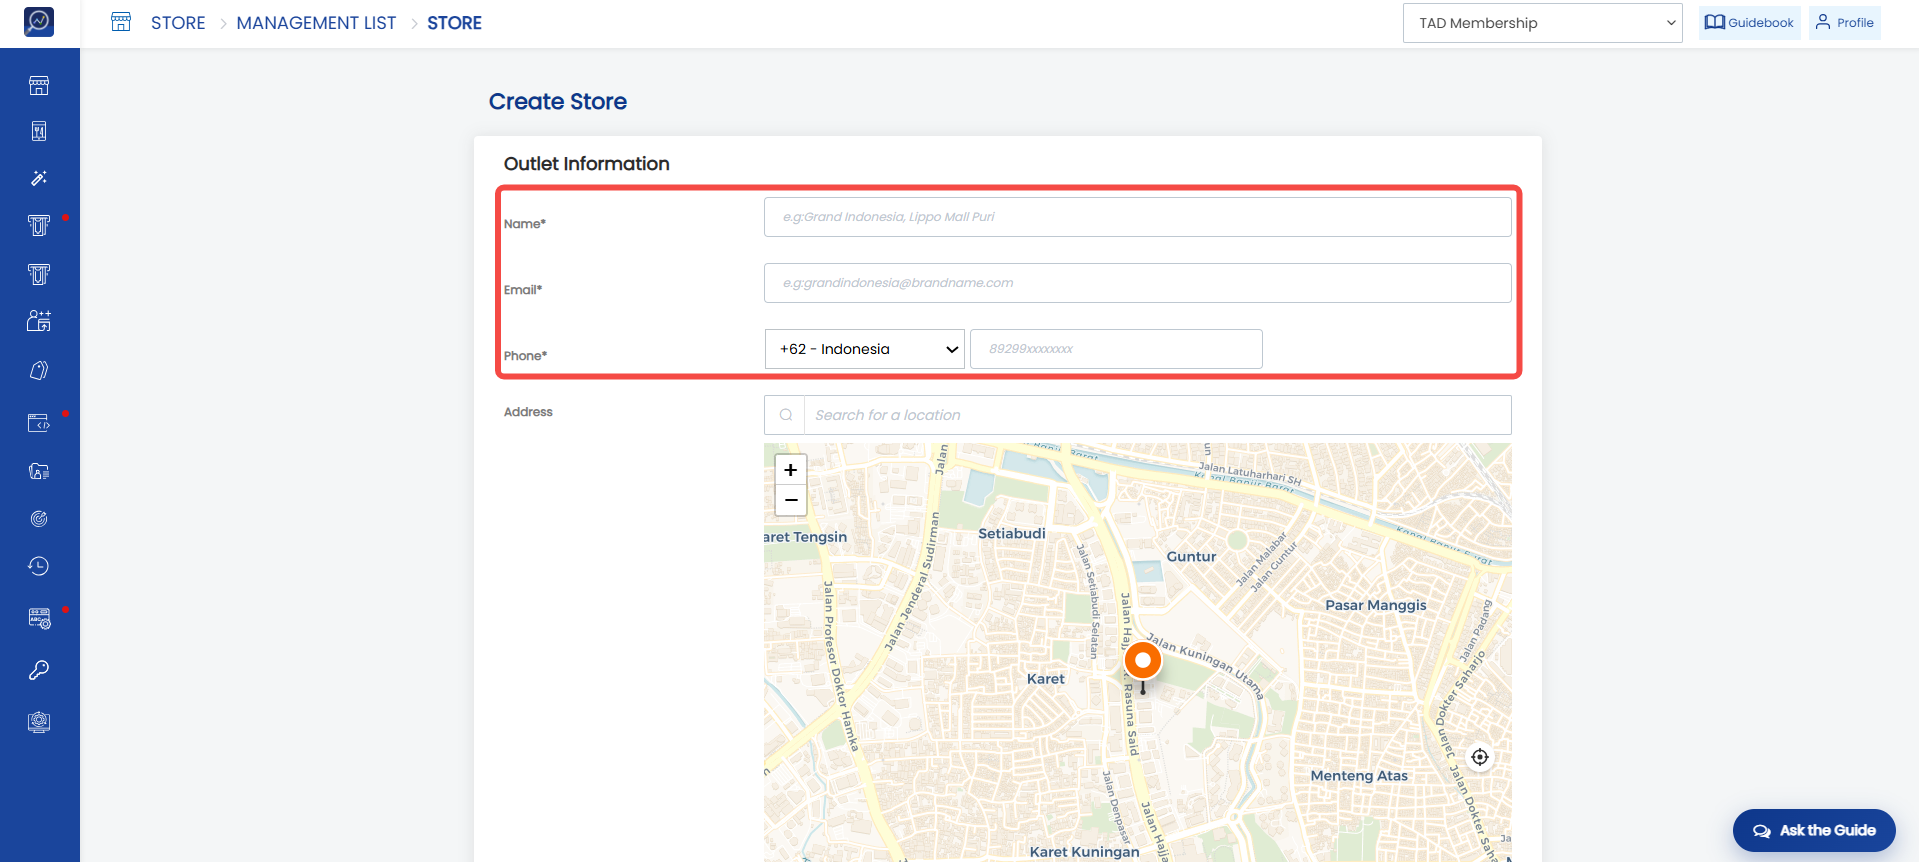 5. Complete the store address by filling in the Address field. Select the appropriate address from the available dropdown list.
Note: The address details, province, city, district, sub-district, and coordinates will be filled automatically. Complete any address information that is still empty.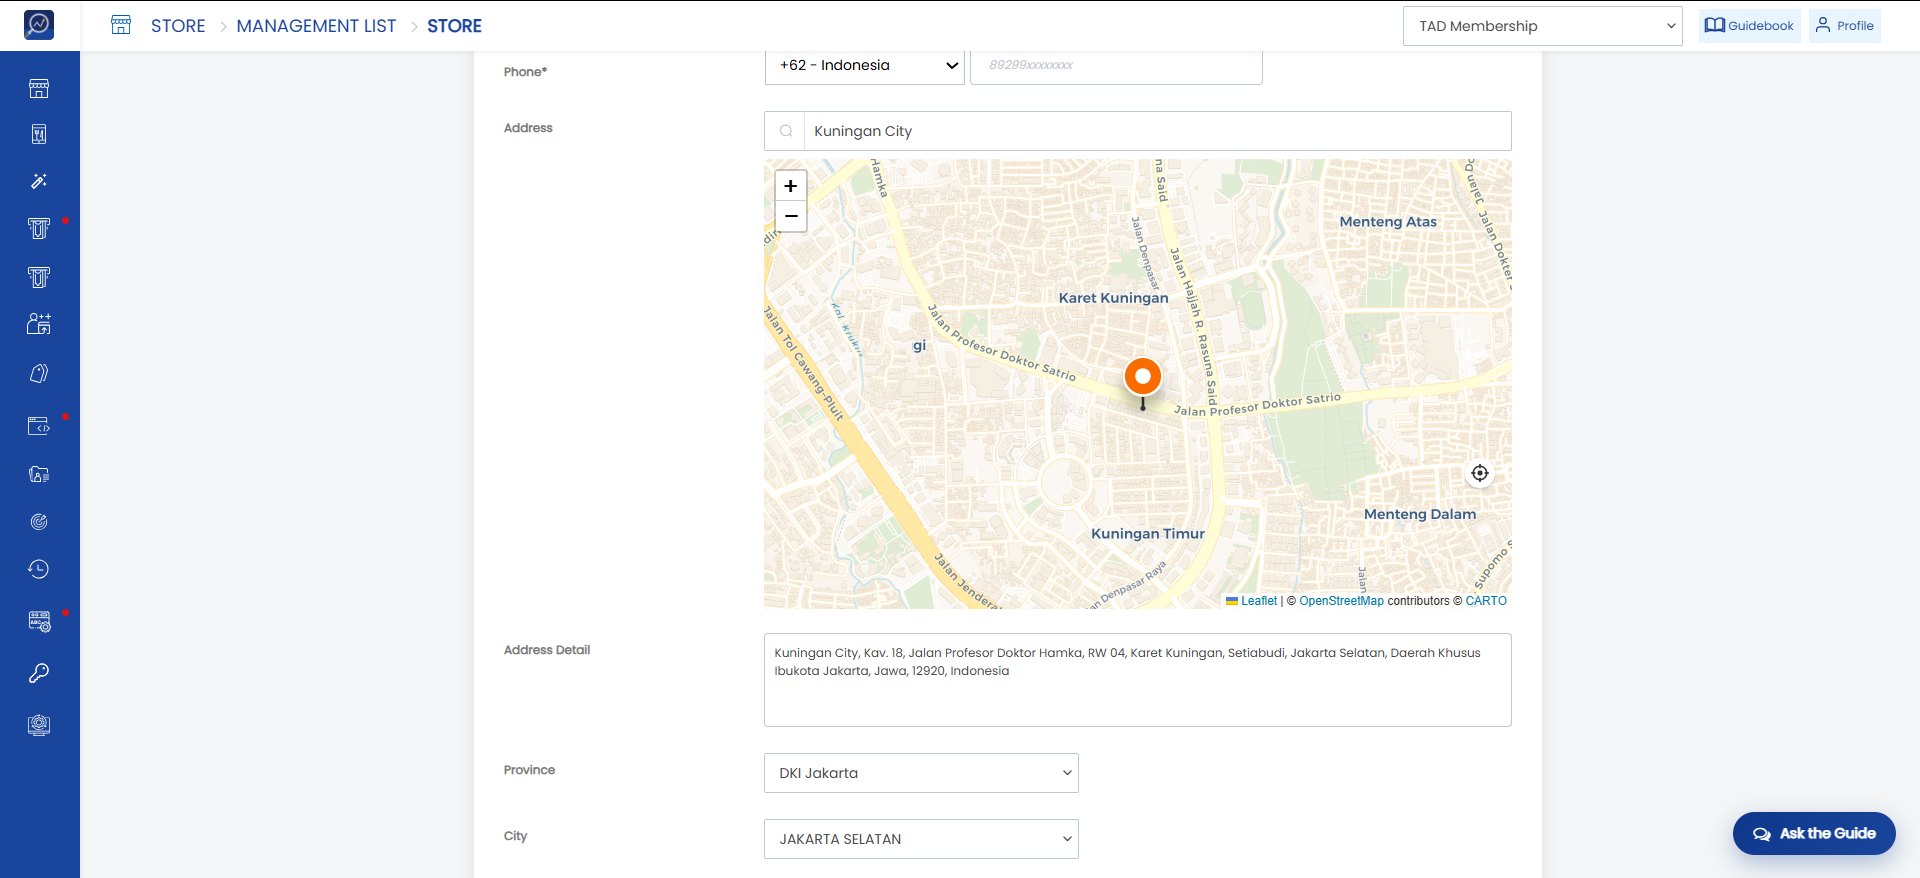 6. Upload a Store Image with a maximum size of 500 KB and a 1:1 ratio.
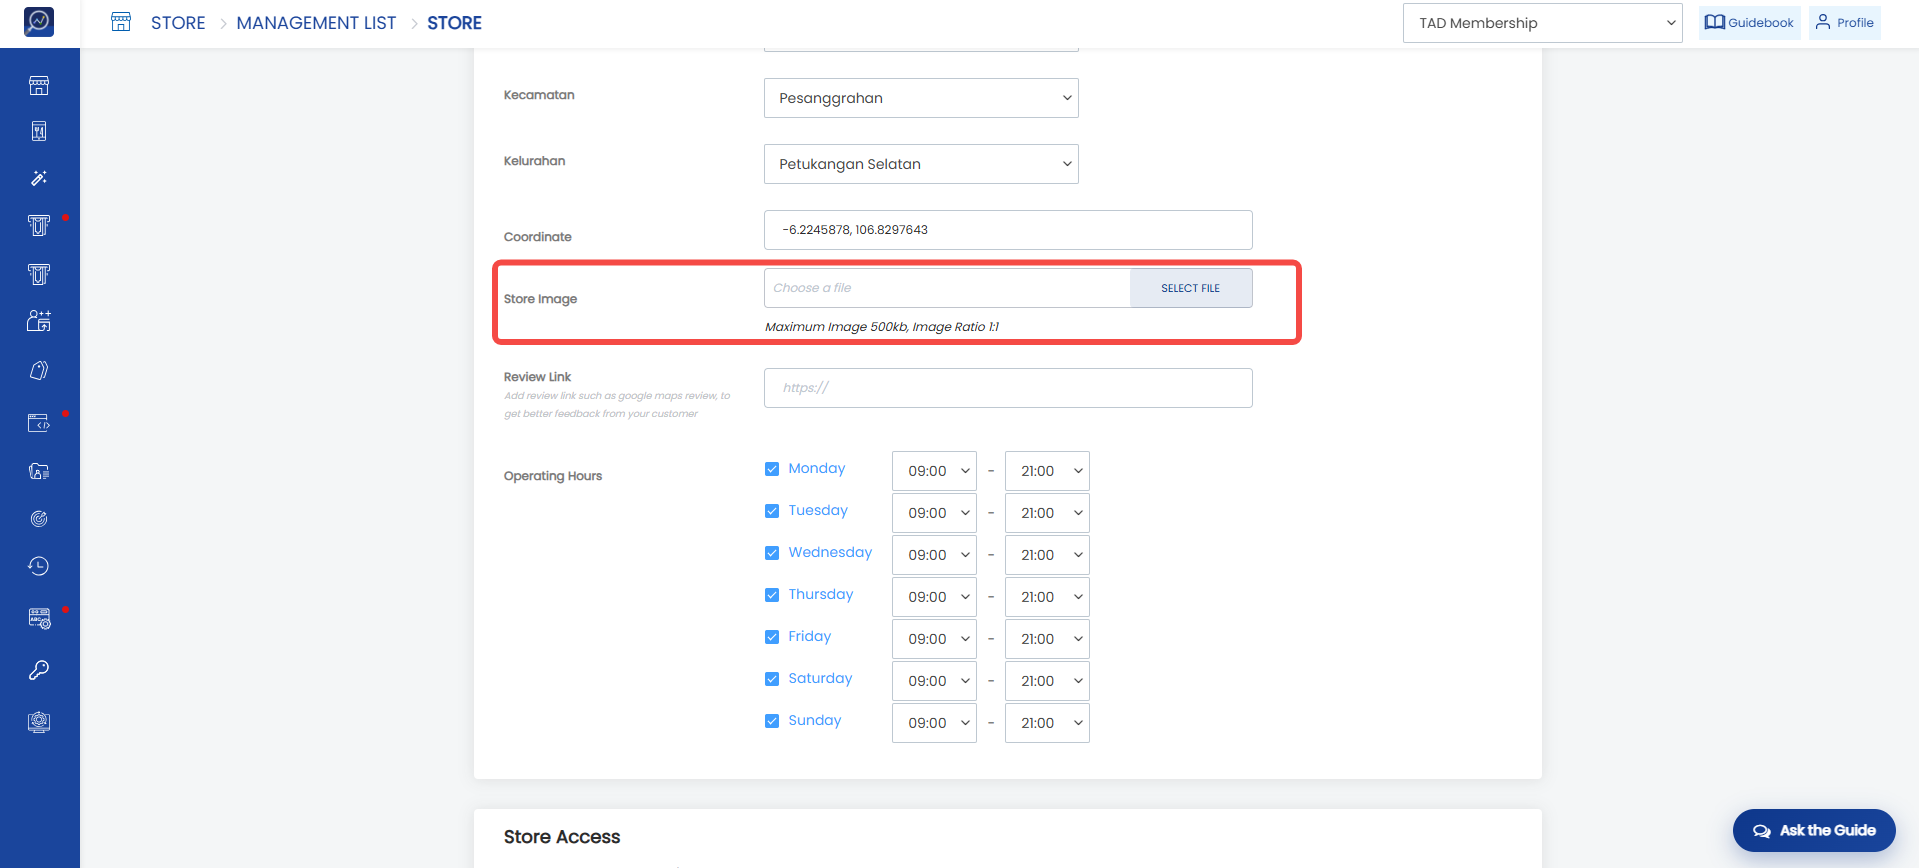 7. If the store has a Google Maps rating, users can enter the link in the “Review Link” field.
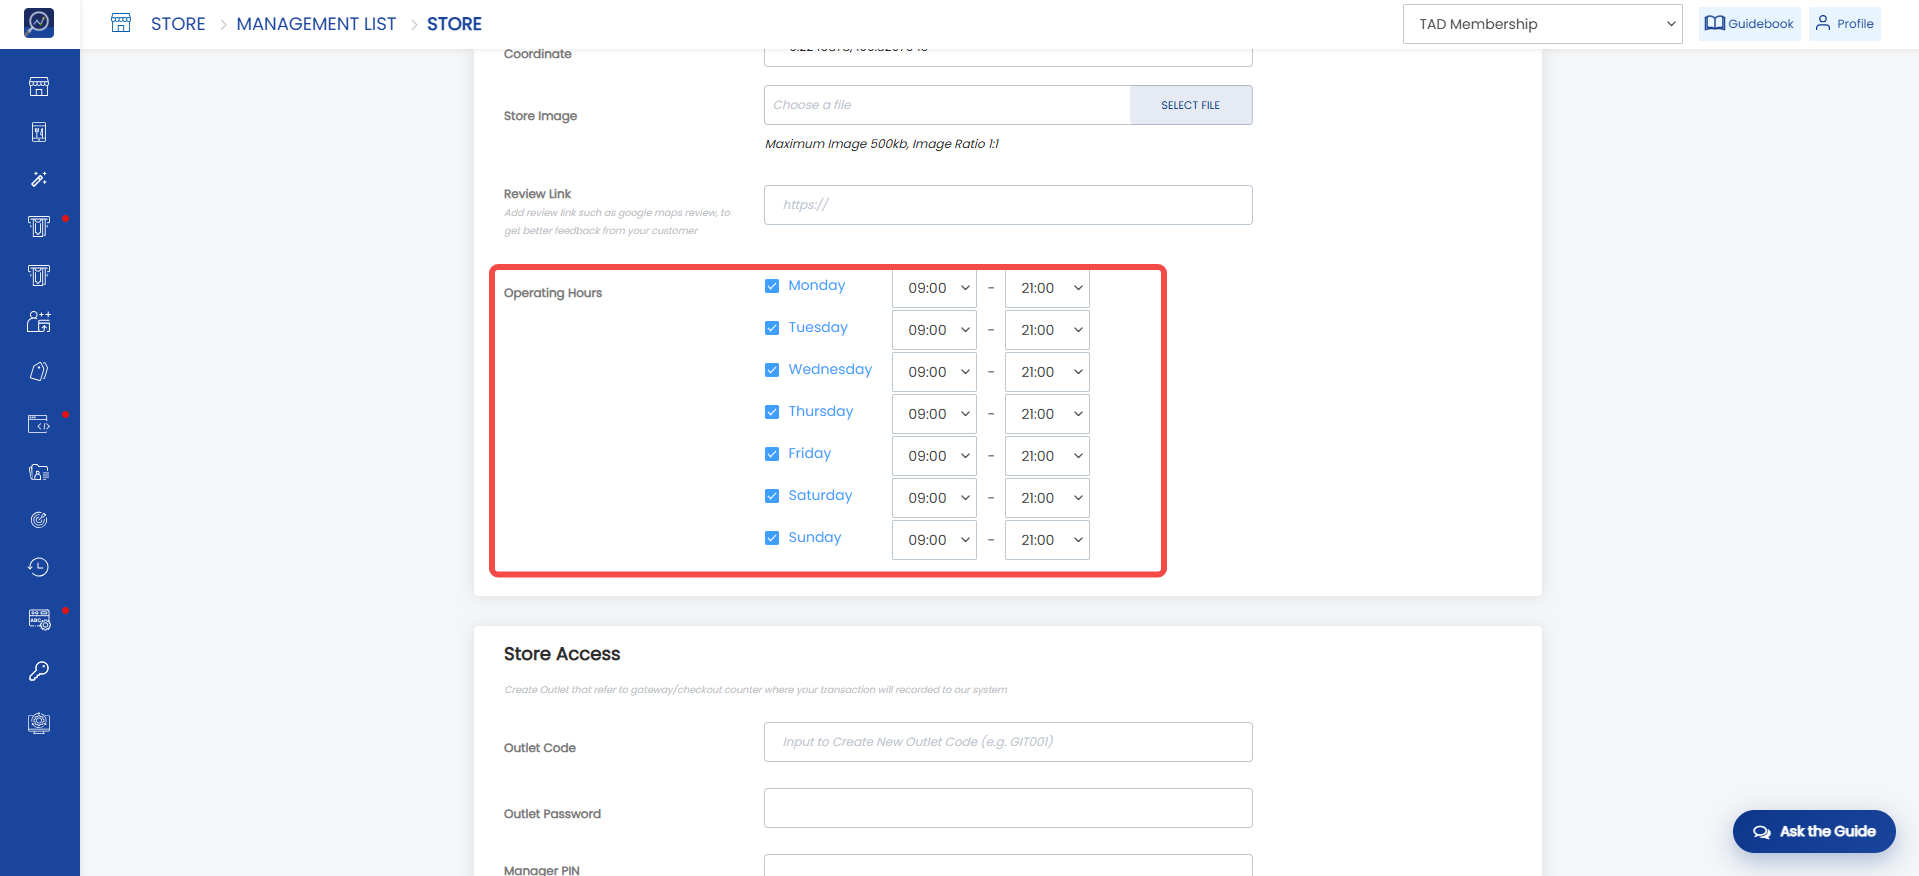
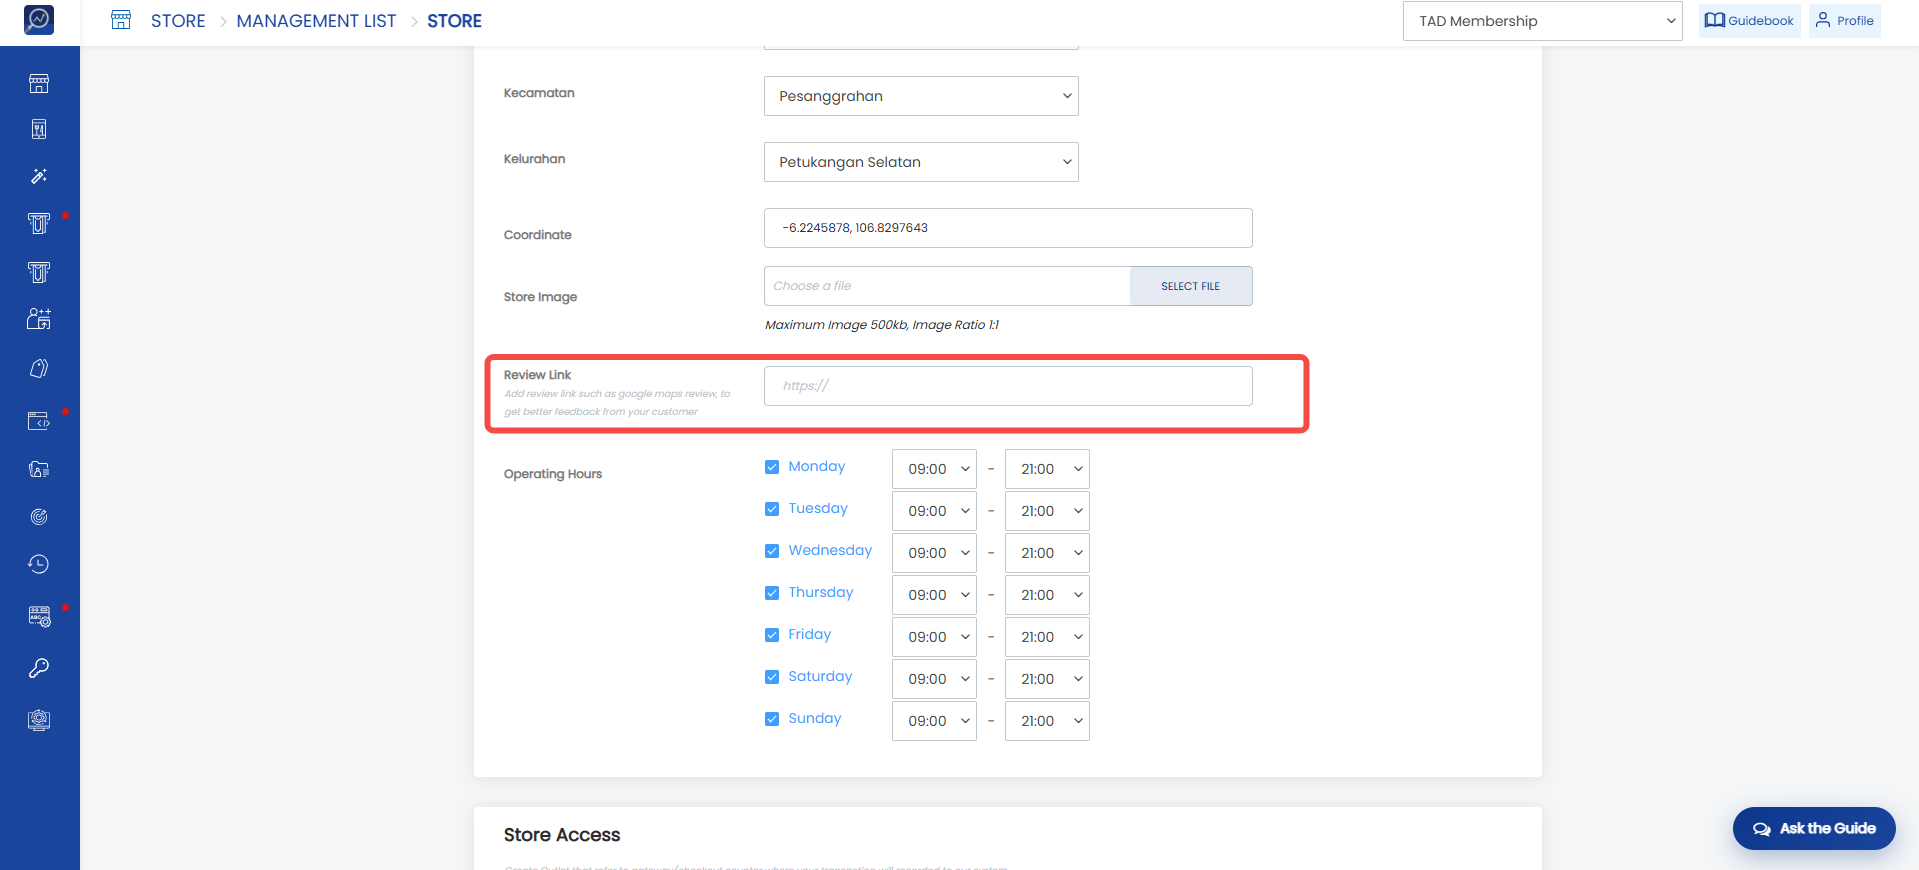 8. Enter the store's operating days and hours in the “Operational Hours” section. Days with checkmarks and completed operating hours indicate that the store is open. Remove the checkmark if the store is closed on that day.
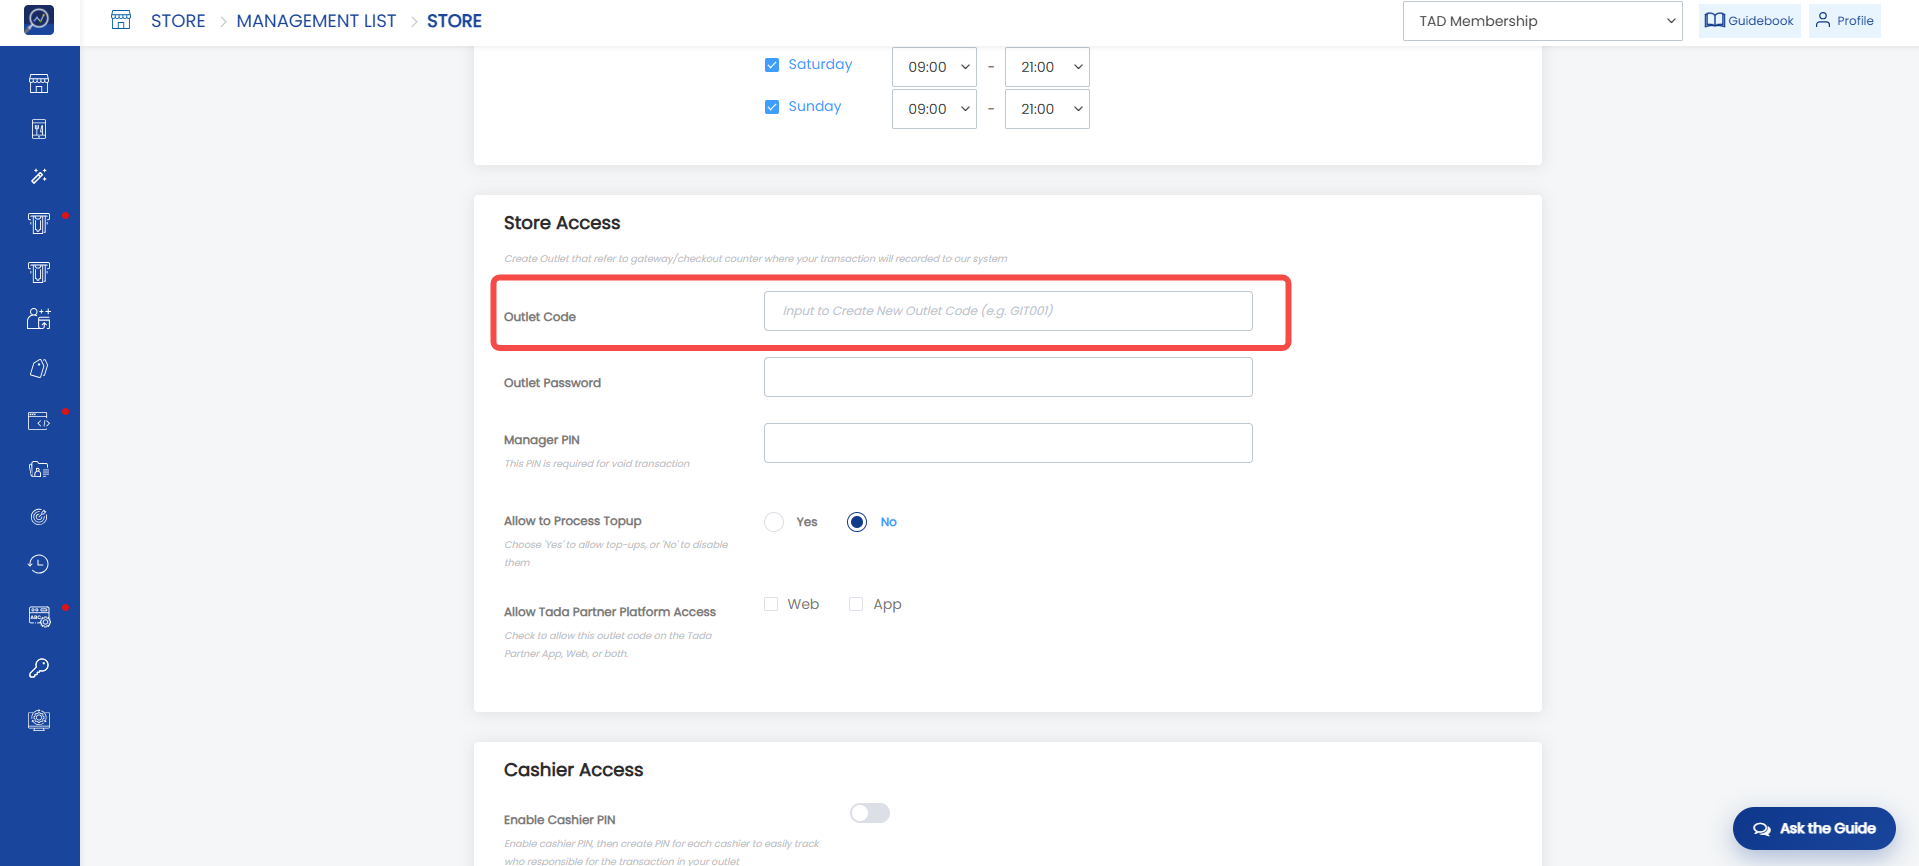
 9. Enter the outlet/store code in the “Outlet Code” field. This code will be used by the store to log in to Tada Partner. Make sure the code is unique.
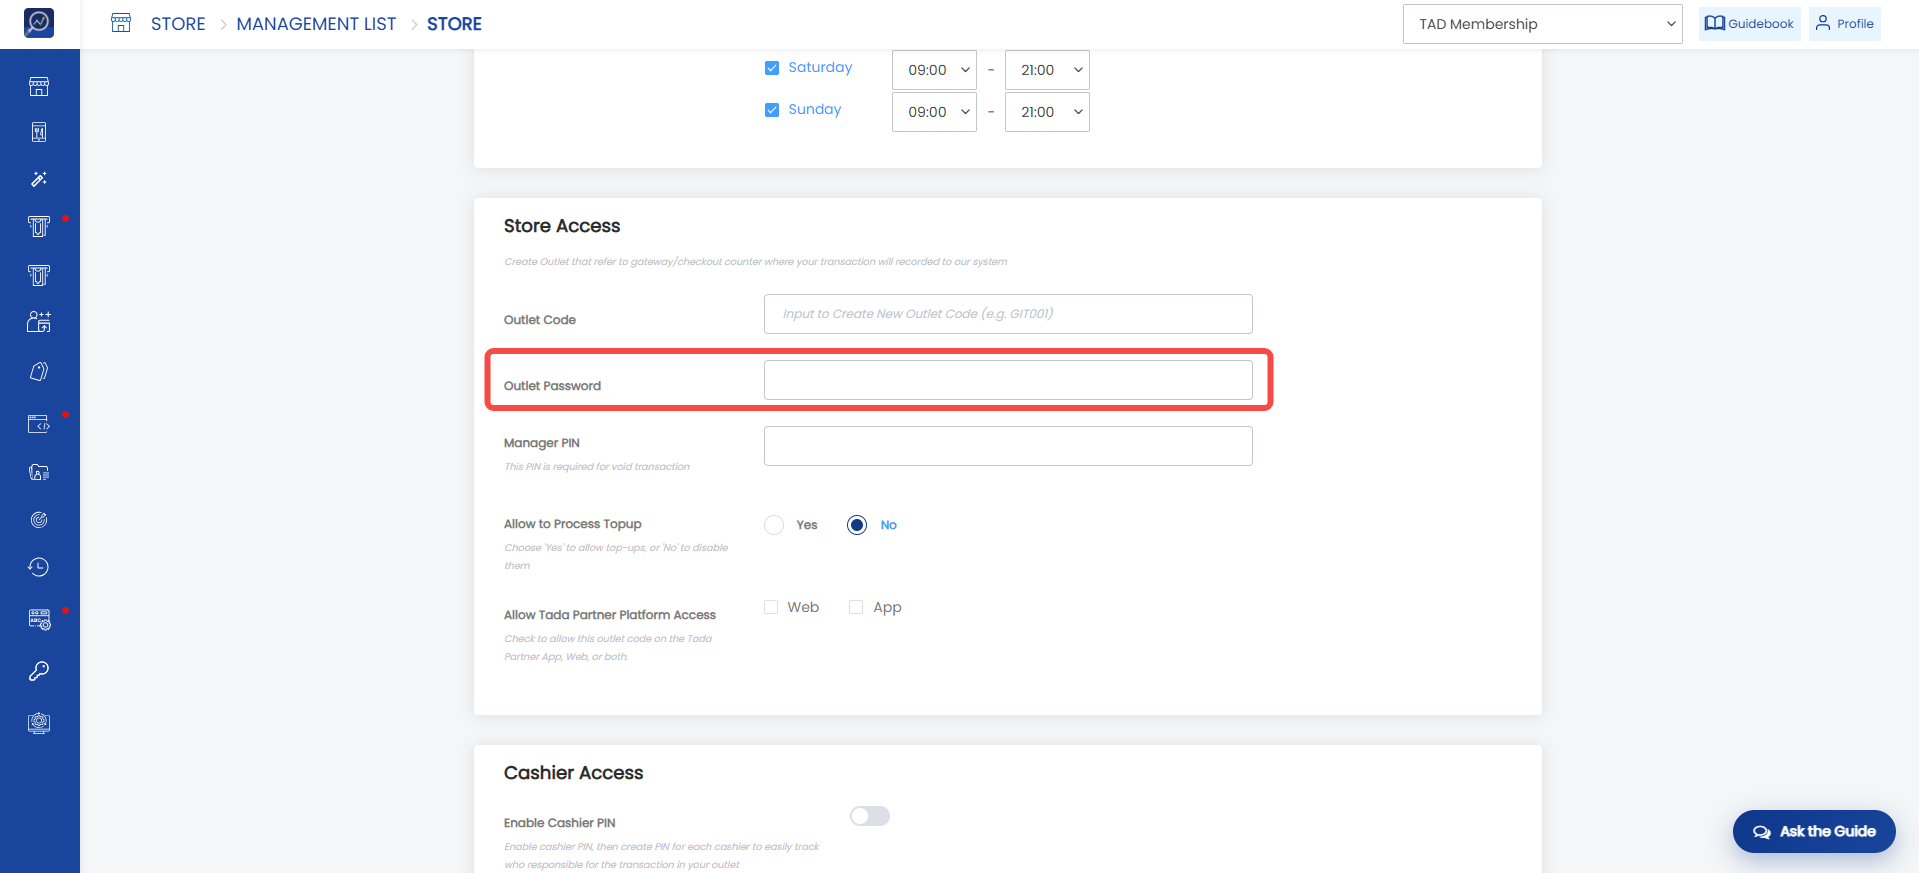
 10. Enter the outlet code password in the “Outlet Password” field. This password is used by the store to log in to Tada Partner. The password must be between 4 and 6 characters.
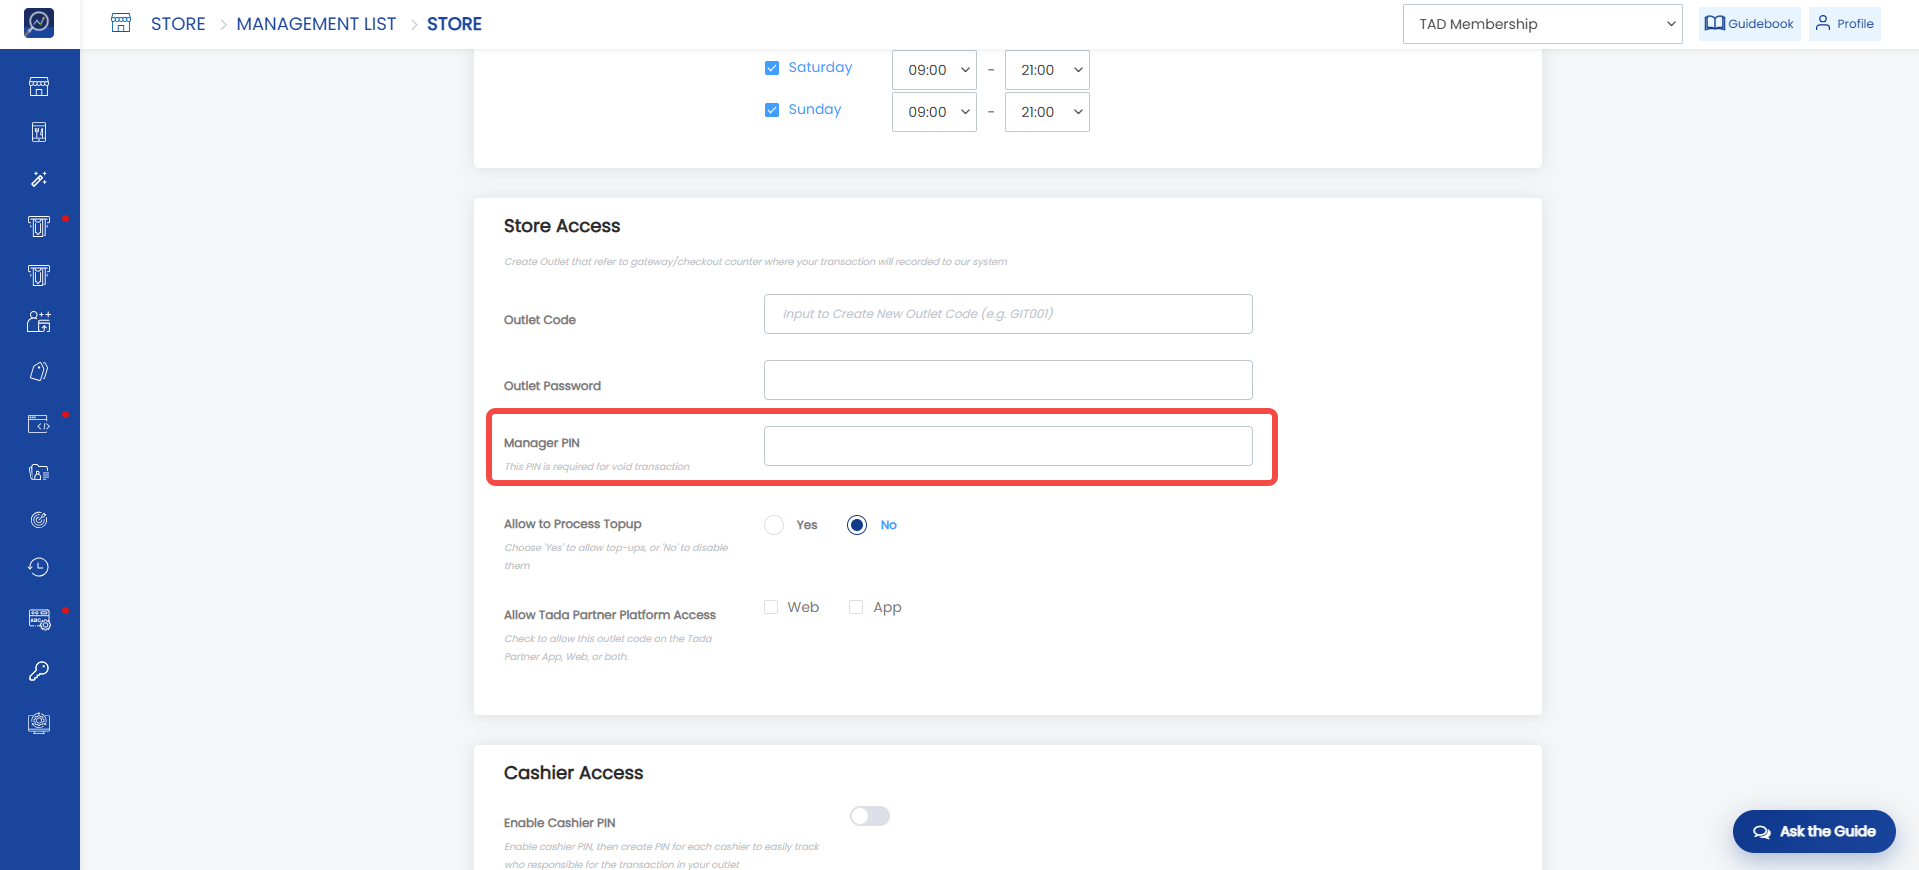
 11. Enter the “Manager PIN” that will be used when a transaction is voided through Tada Partner. The PIN consists of 4 numeric characters.
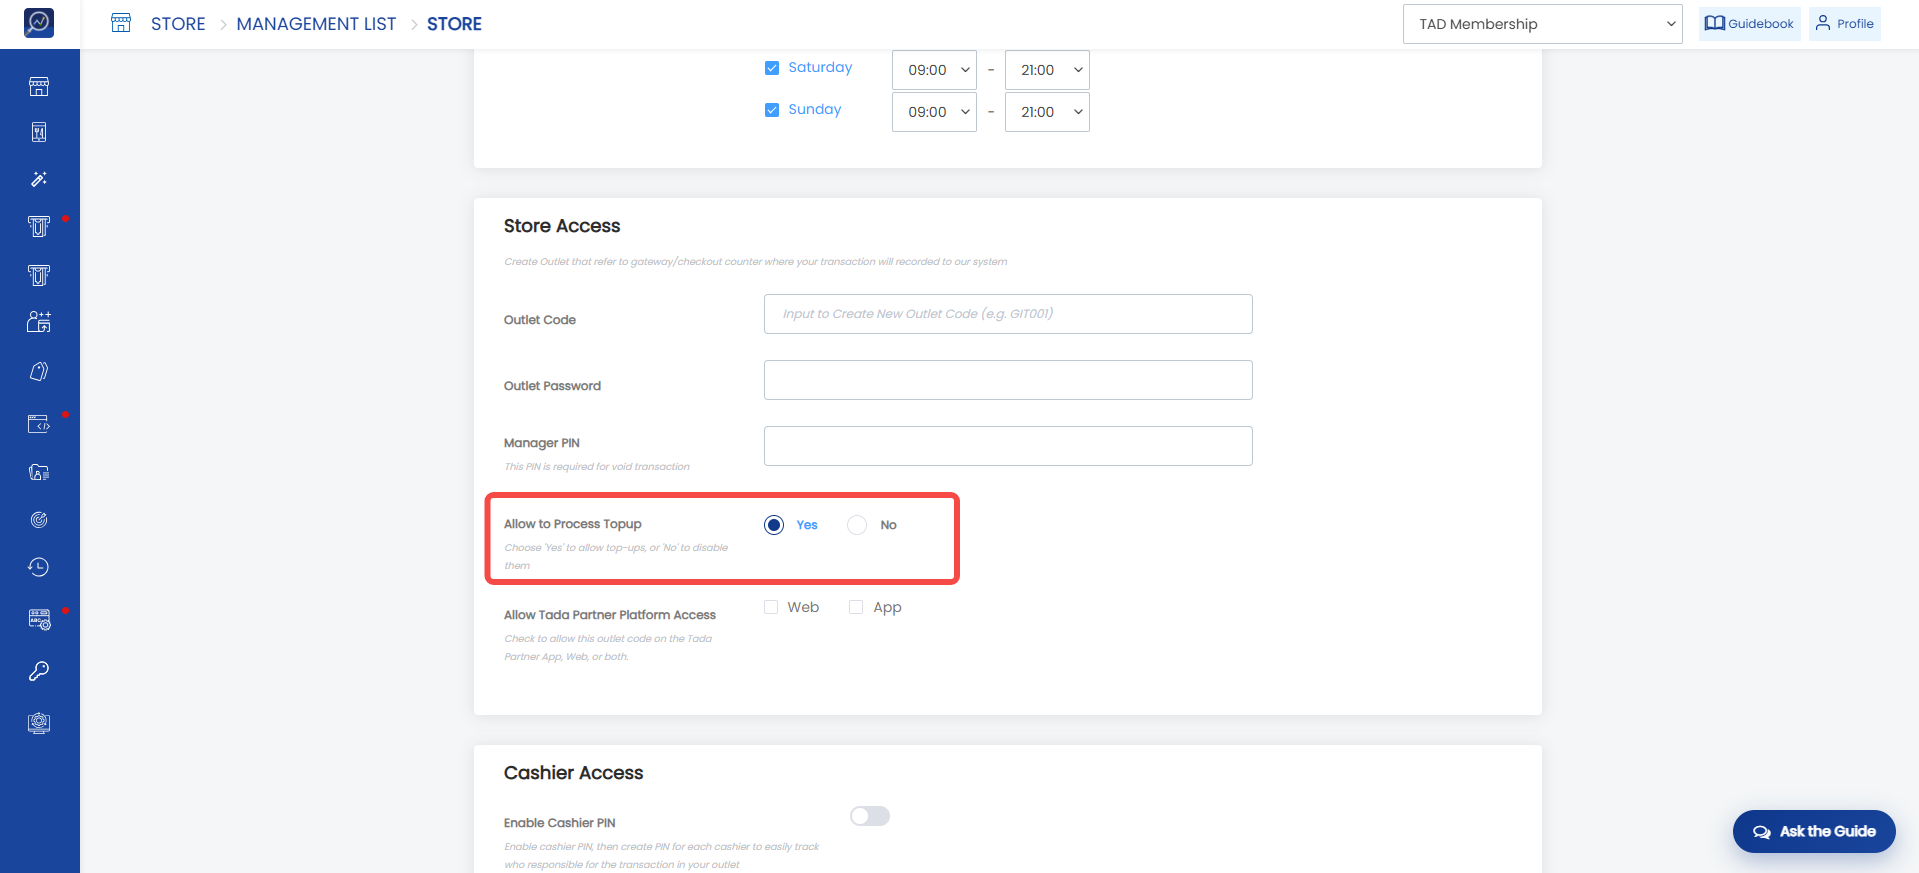
 12. Select “Yes” in “Allow to Process Topup Points” if you want to allow the store to process top-ups.
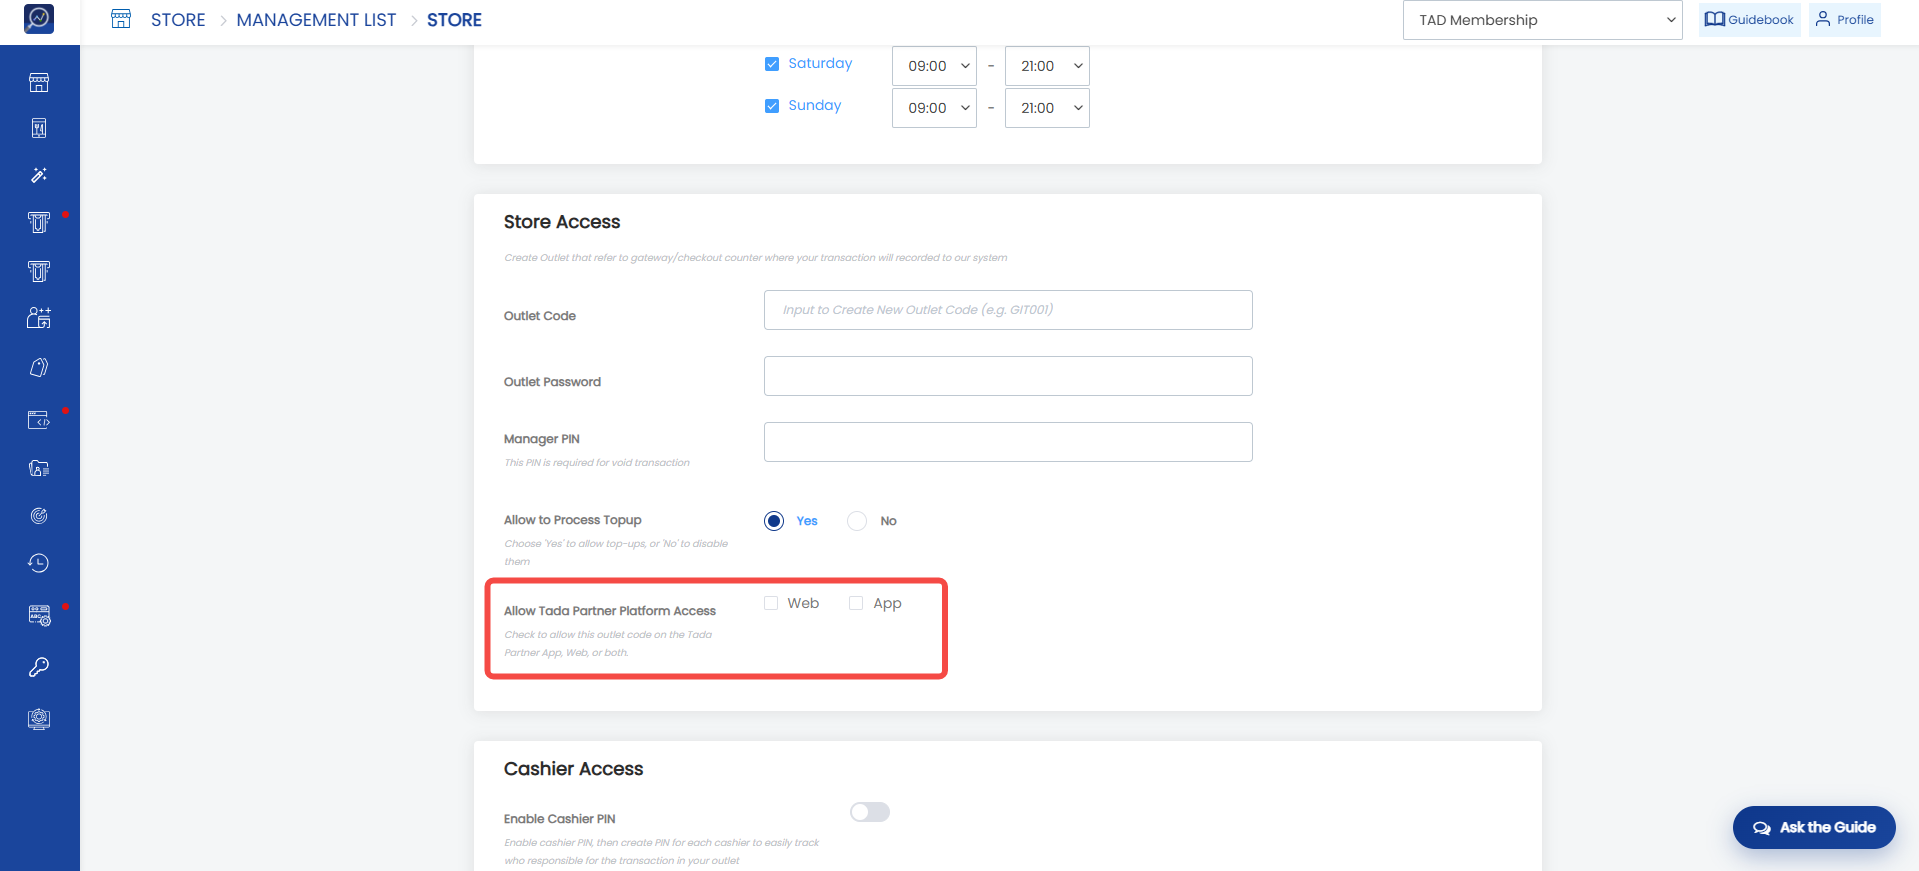
 13. Select Tada Partner Web or App in the “Allow Tada Partner Platform Access” section if the store uses Tada Partner.
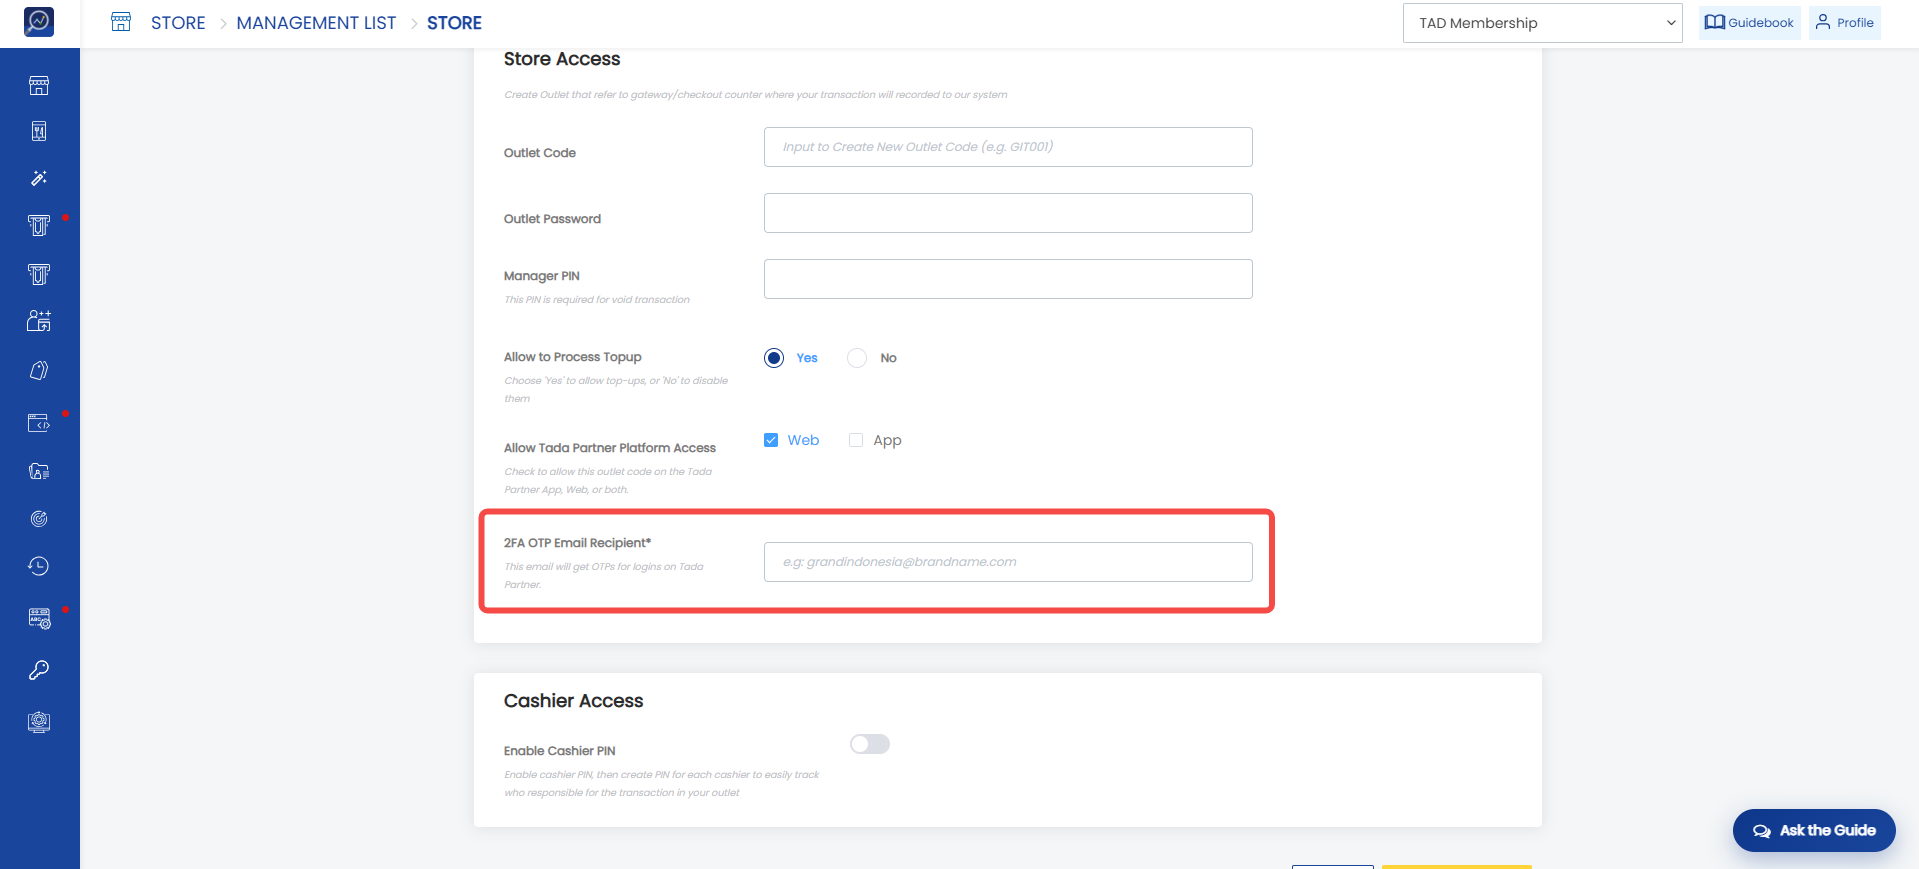
 14. Enter the “Verification Email”. The email entered will be used to send an OTP code when logging in to Tada Partner.
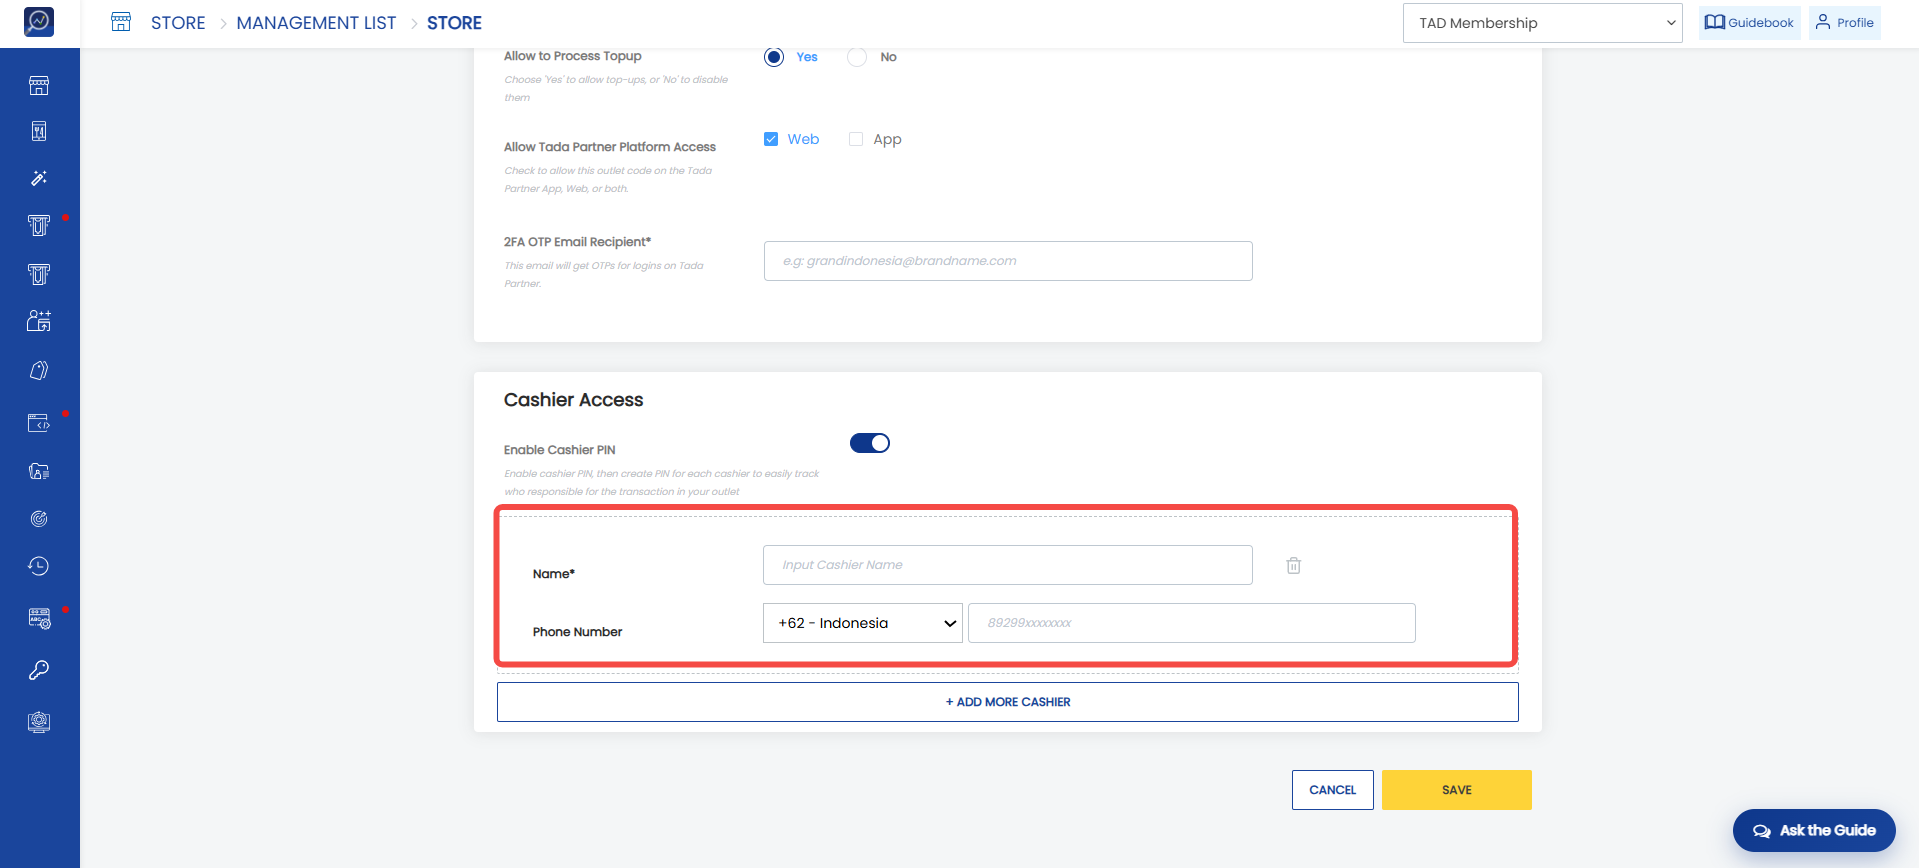
 15. Fill in Cashier Access (optional). If the brand wants to use this parameter, enable the “Cashier Access” toggle. The Cashier Access parameters consist of:
- Name: Enter the cashier's name
- Phone Number: Enter the cashier's phone number
To add another cashier, click “+Add More Cashier”.
 16. Click “Save” to save the created store.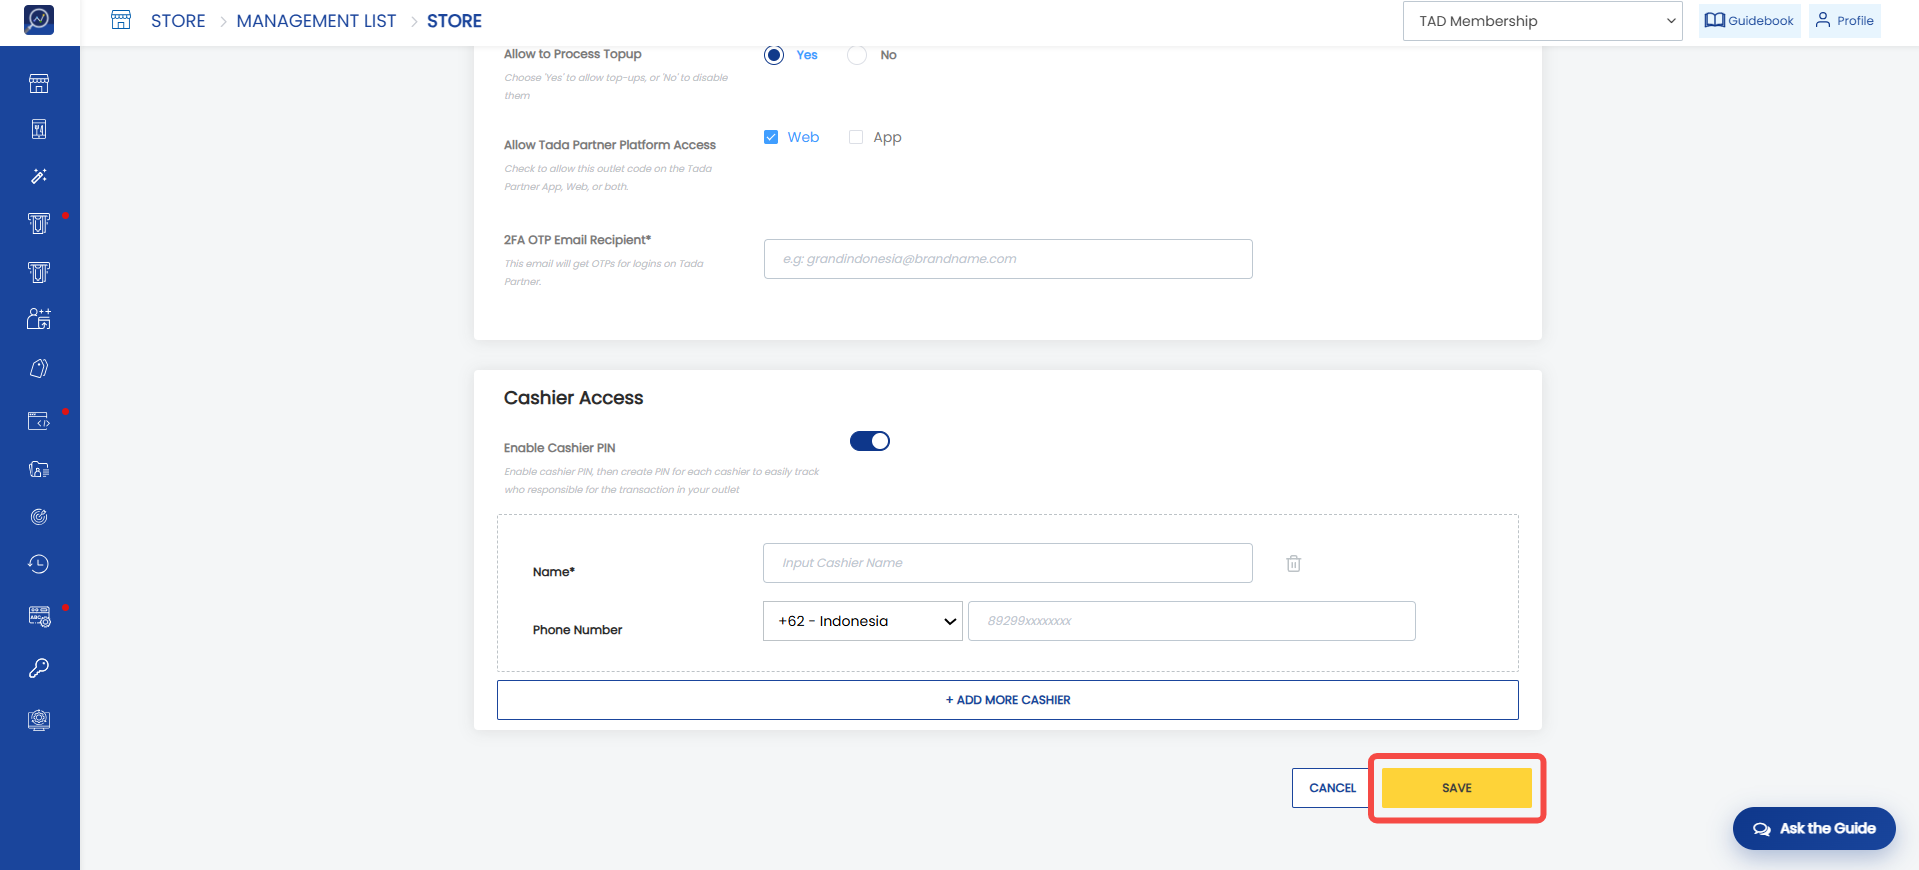
How to Create Stores in Bulk
1. Open the “Store” menu, then select the “Store Management” submenu.
2. On the “Store Info” tab, click “Add New Store”.
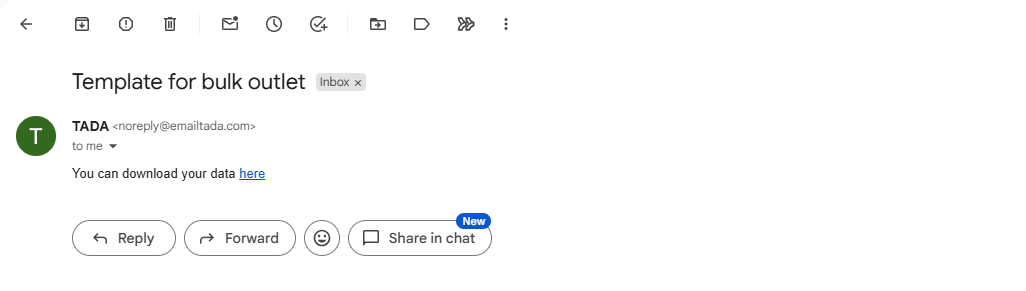
3. Select “Add Single Store”.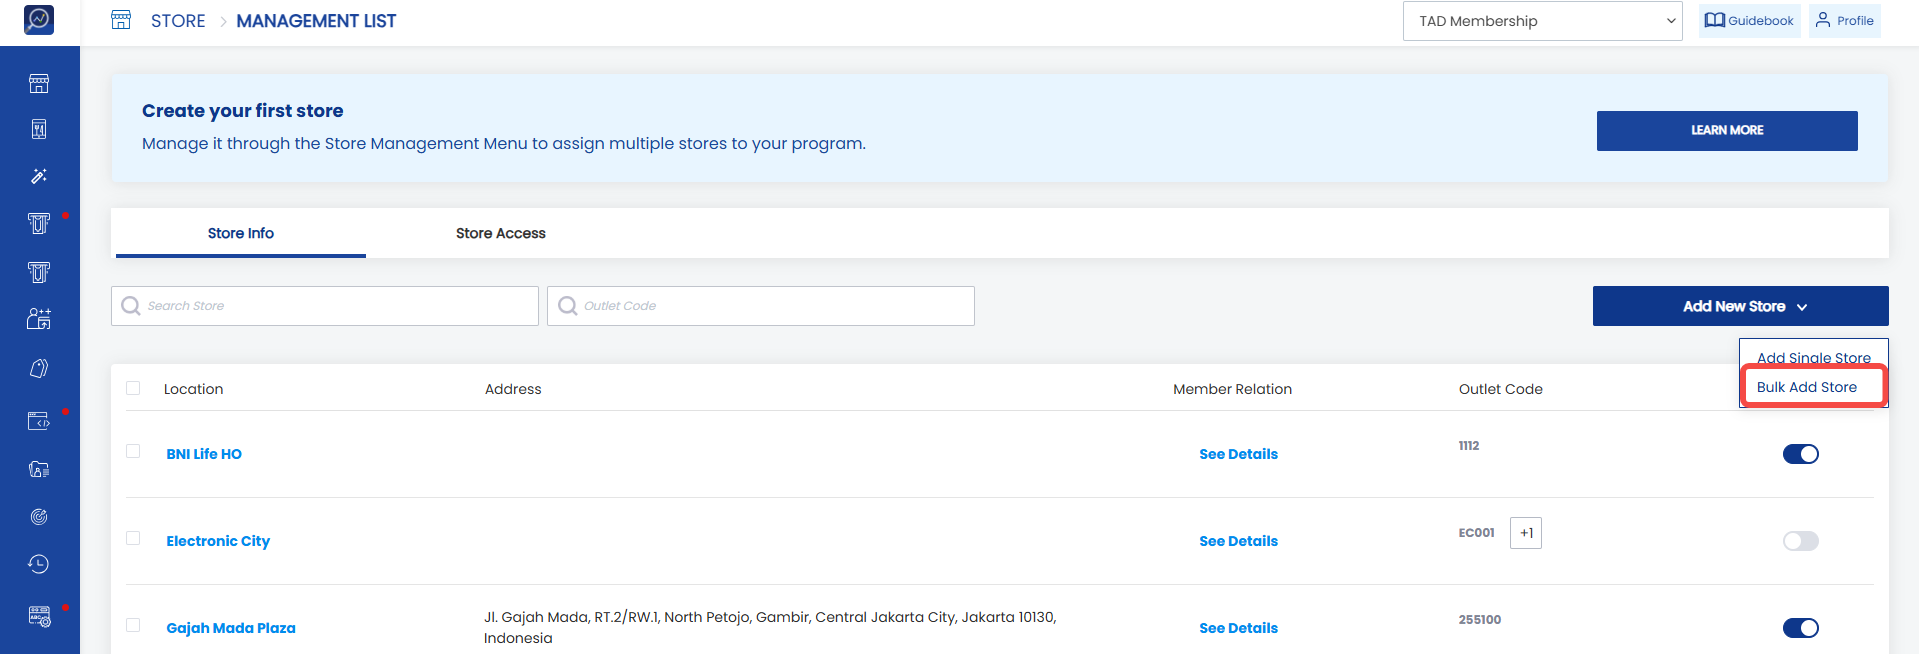 4. Click “Download Template” and the template will be sent to the email of the user who downloads it.
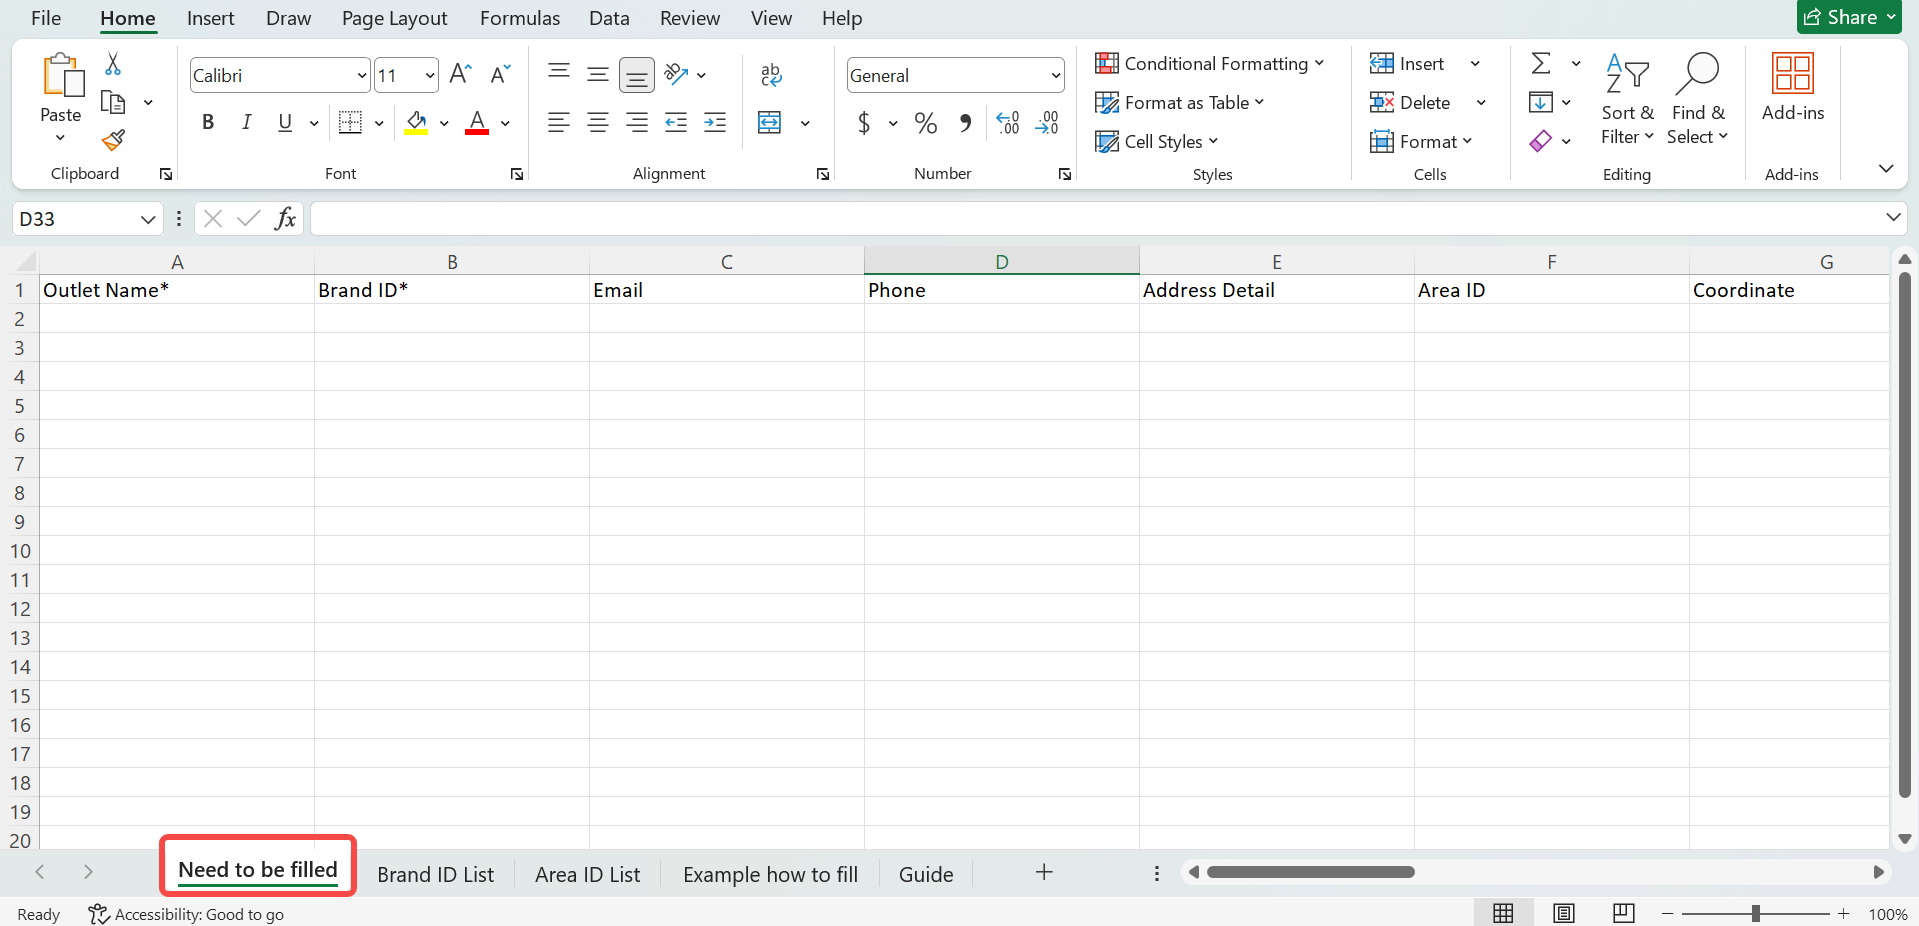
 5. Fill in all required parameters in the “Need to be Filled” sheet. Refer to the instructions in the “Guide” or “Example How to Fill” sheet.
 6. Once completed, upload the template by clicking “Upload File”. Select the completed file.
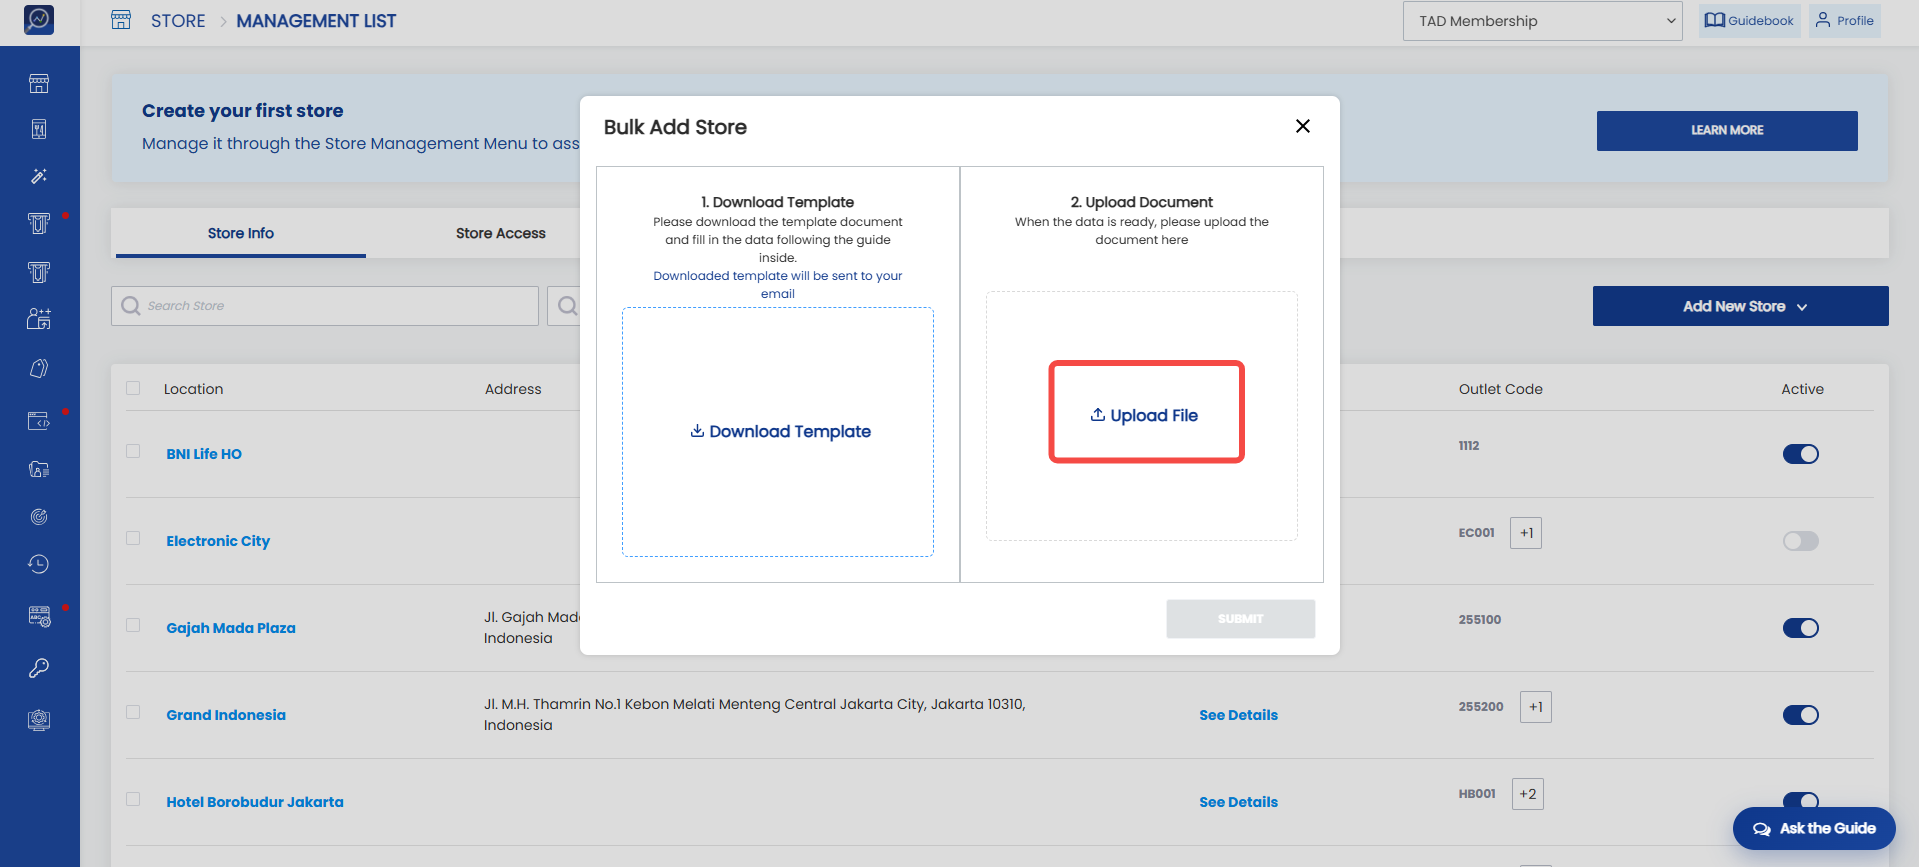 7. Click “Submit”. The result of the uploaded file will be sent via email. If the template is not filled correctly, the store creation process will fail, but the user can re-upload the store data.
How to Manage Store Status
1. Open the “Store” menu, then select the “Store Management” submenu.
2. Change the status by clicking the toggle in the “Active” column.
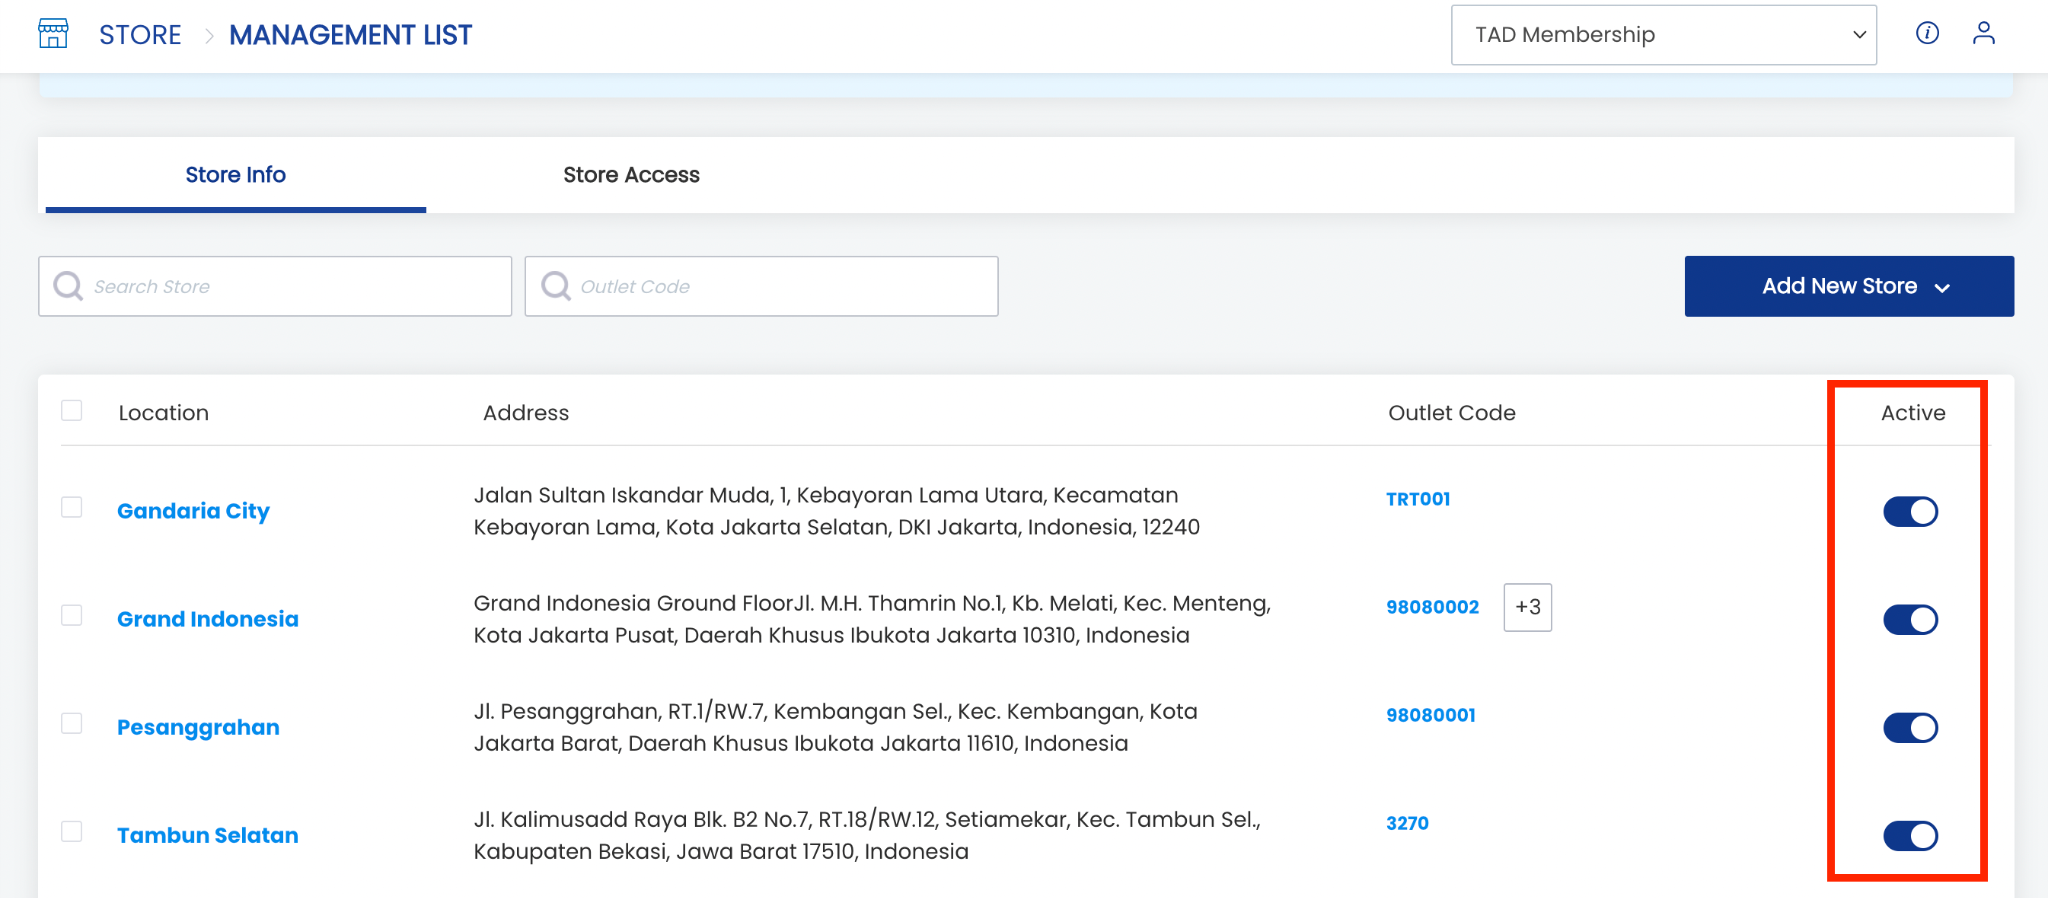 Note: If the toggle is turned off, the store will be closed and cannot be accessed or used for transactions.
How to Edit Store Data
1. Open the “Store” menu, then select the “Store Management” submenu.
2. Click one of the Store Locations in the store list.
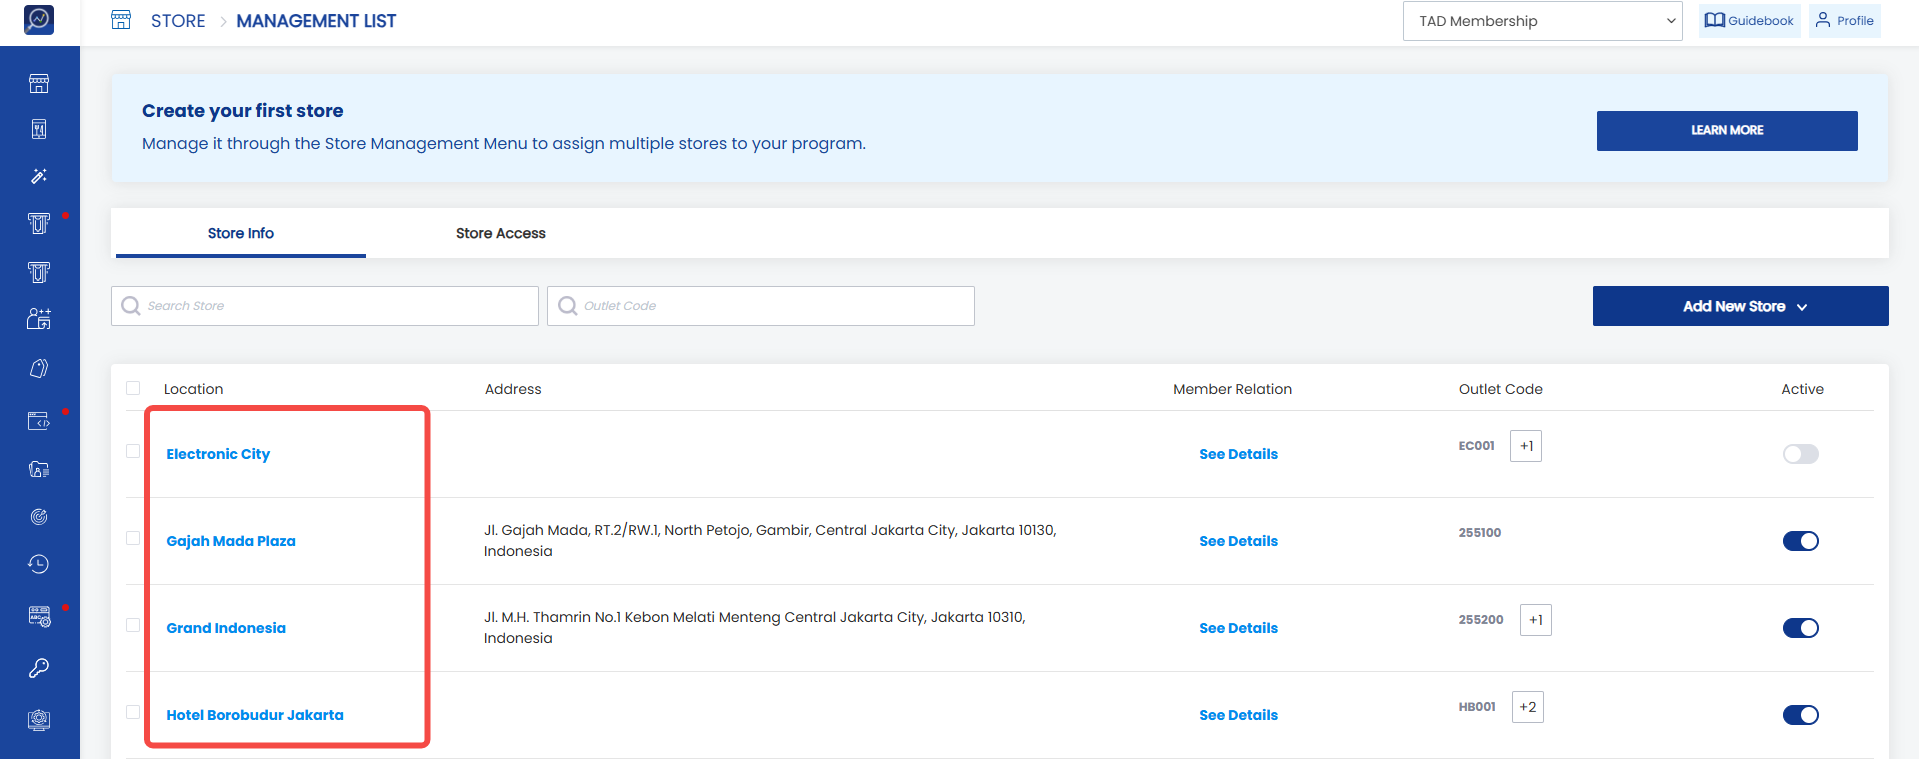 3. The system will open the store edit page.
4. Modify the required data.
5. Click “Update”.
How to Add Store Access/Outlet Code
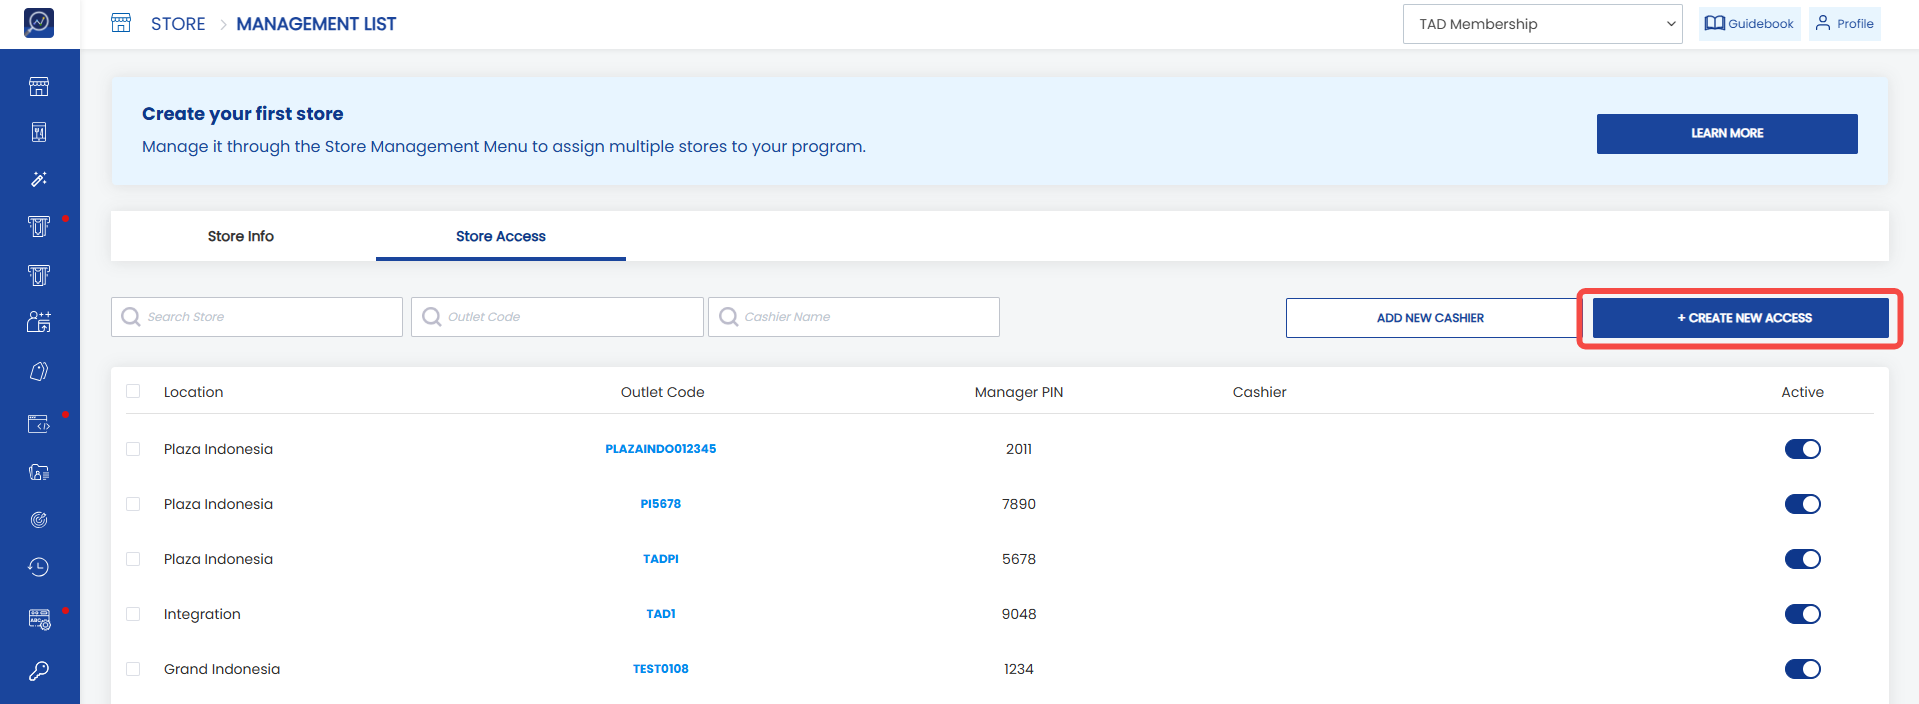
1. Open the “Store” menu, then select the “Store Access” submenu.
2. Click “Add New Access”.
 3. Select the store for which access will be added in the “Store” field.
Note: One store can have multiple outlet codes.
4. Enter the “Access Code”, also known as the Outlet Code. Make sure the code is unique.
5. Enter the “Access Password”, also known as the Outlet Password. The password must be between 4 and 6 characters.
6. Enter the “Manager PIN”. The PIN consists of 4 numeric characters.
7. Select “Yes” in “Allow to Process Topup Points” if you want to allow store access to process top-ups.
8. Select Tada Partner Web or App in the “Allow Tada Partner Platform Access” section if the store uses Tada Partner.
9. Enter the “Verification Email”. The email entered will be used to send an OTP code when logging in to Tada Partner.
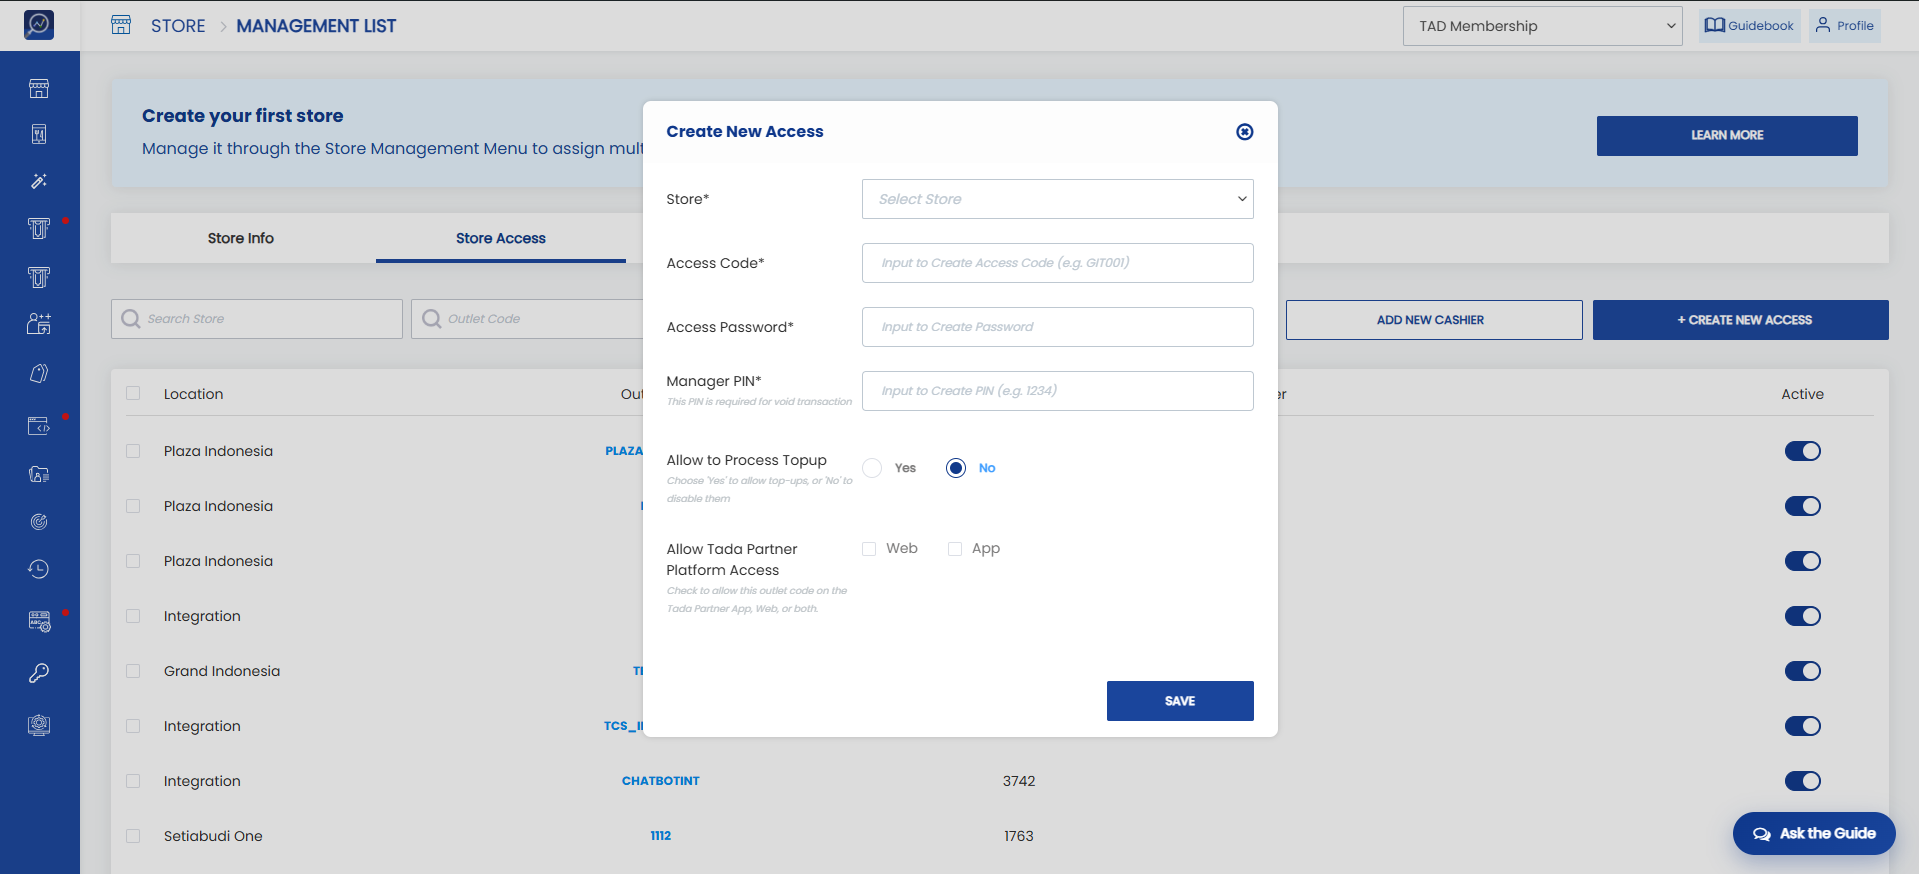 10. Click “Save” to save the created parameters.
How to Manage Store Access/Outlet Code Status
1. Open the “Store” menu, then select the “Store Access” submenu.
2. Change the status by clicking the toggle in the “Active” column.
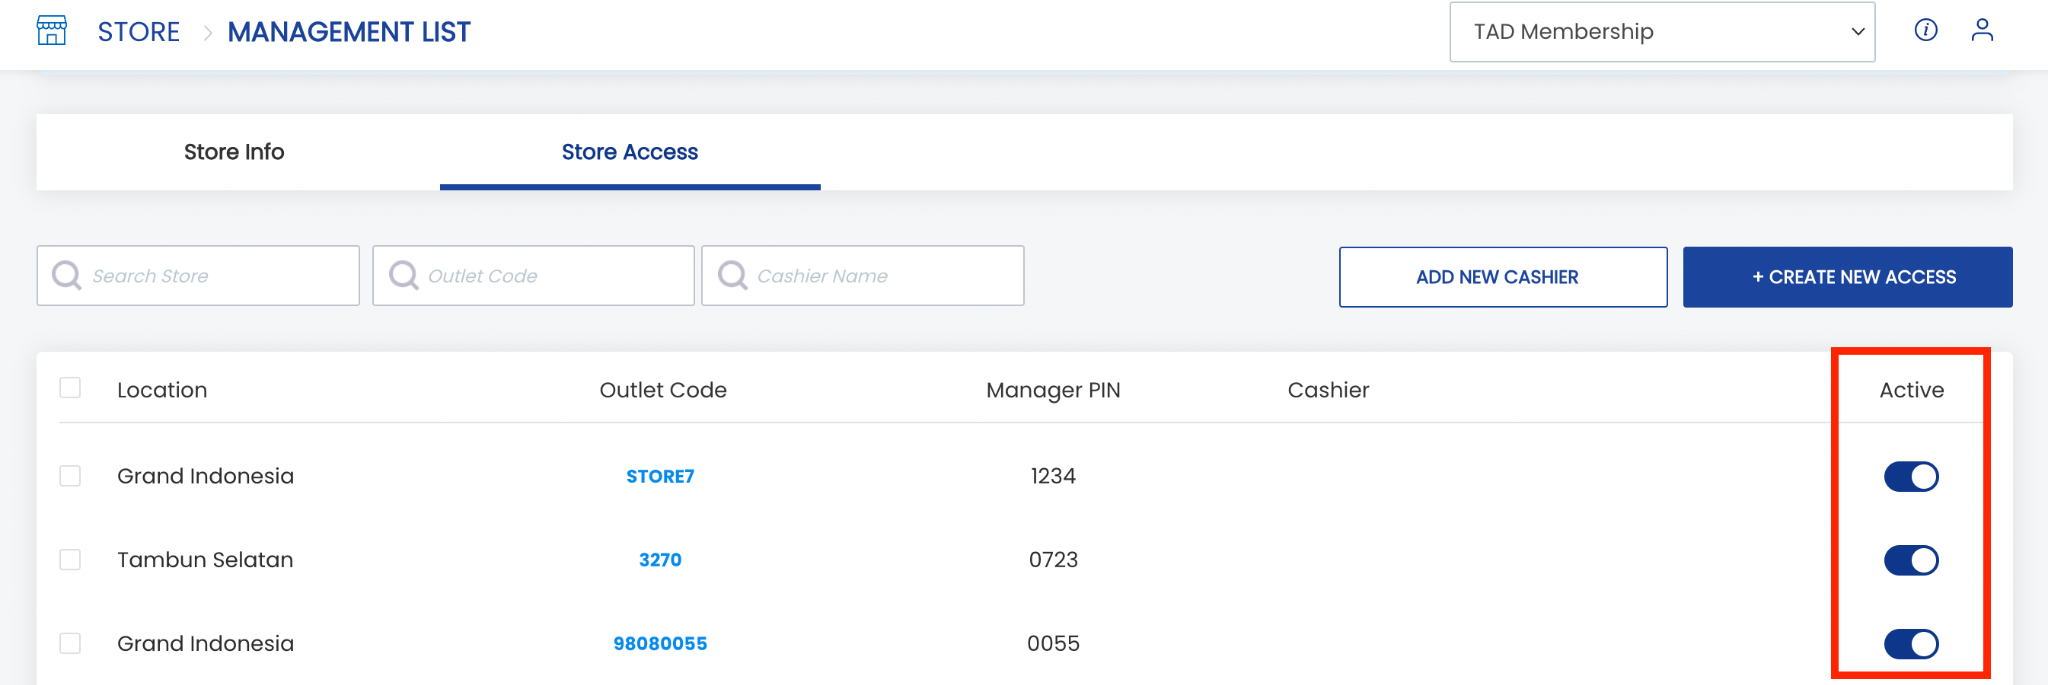 Note: If the toggle is turned off, the store access will be closed and cannot be accessed or used for transactions.
How to Create Cashier Access
1. Open the “Store” menu, then select the “Store Access” submenu.
2. Click “Add New Cashier”.
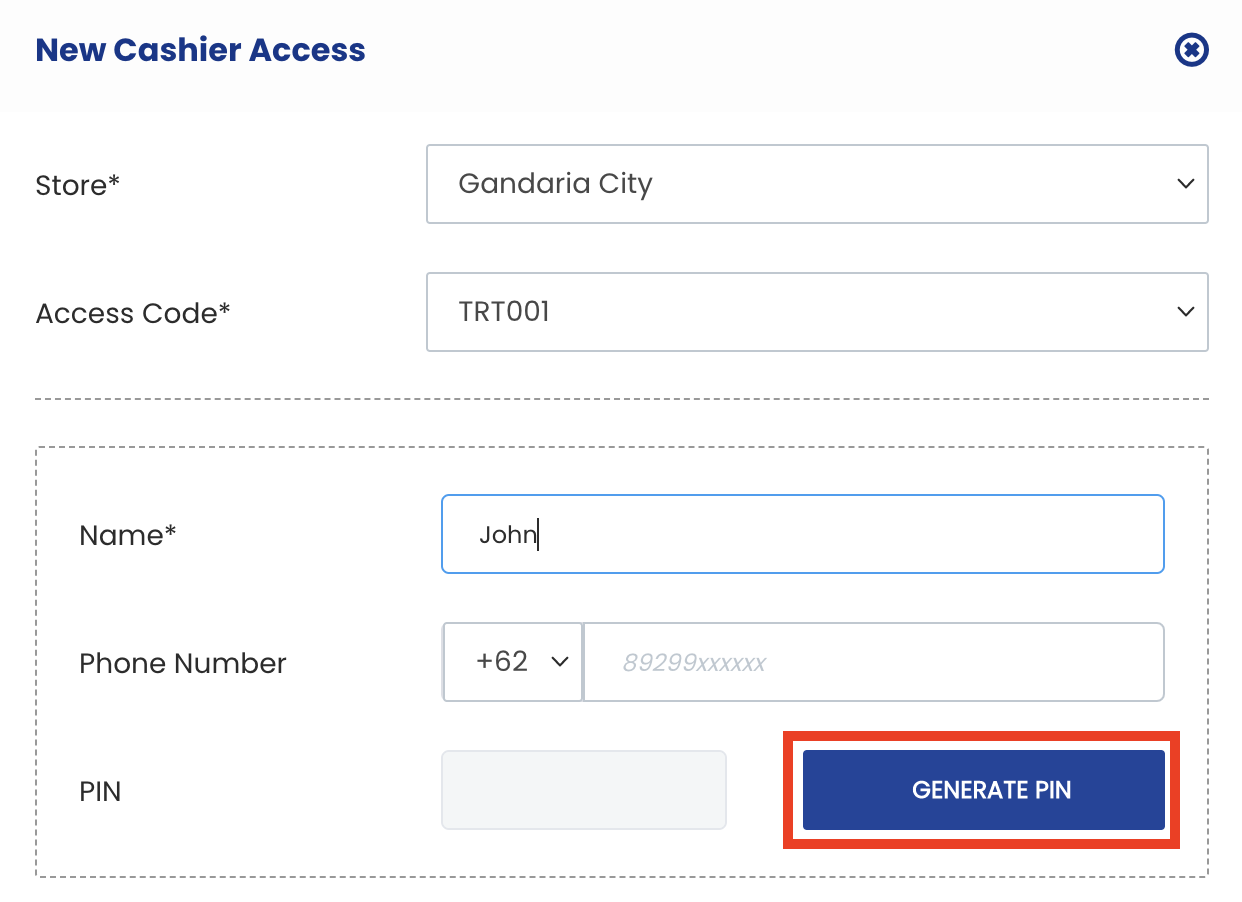
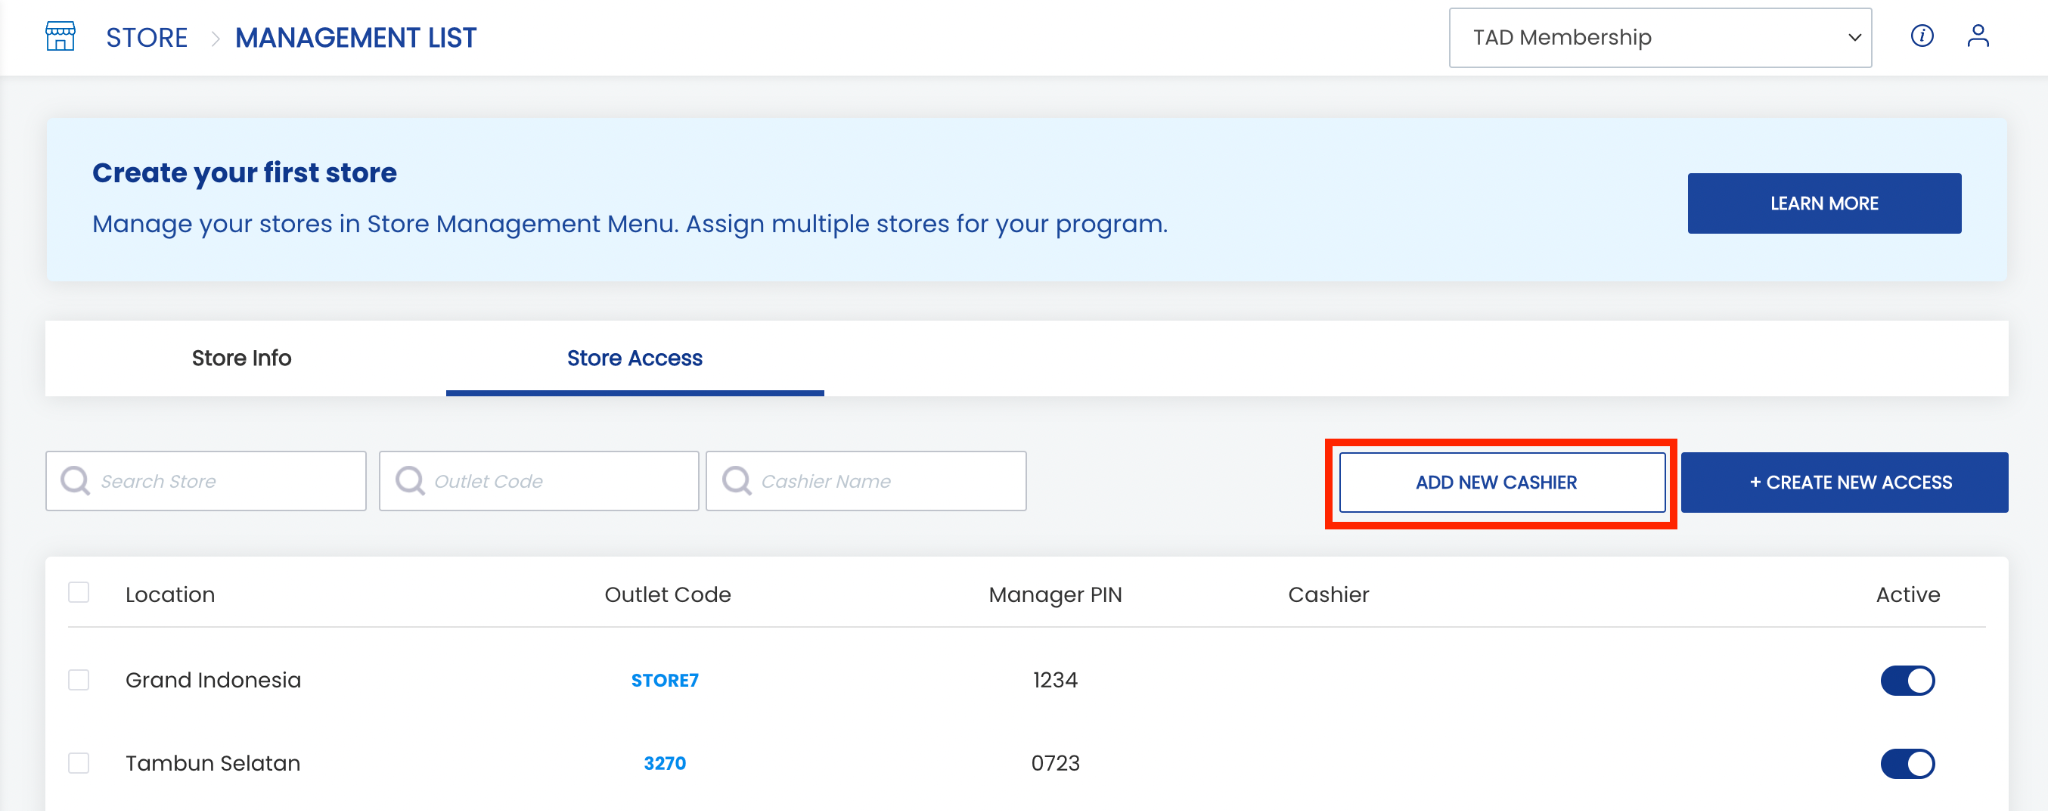 3. The system will display a pop-up. Select the store for which the cashier will be created in the “Store” field.
4. Select the outlet code for which the cashier will be created in the “Access Code” field.
Note: One outlet code can have more than one cashier.
5. Enter the cashier information consisting of:
- Name: Enter the cashier's name
- Phone Number: Enter the cashier's phone number
- PIN: Each cashier PIN will be generated automatically by the system. Click “Generate PIN” to generate the cashier PIN, and the system will display the PIN in the PIN field.
 6. The cashier data will appear in the Store Access list.
How to Download Store Ratings
1. Open the “Store” menu, then select the “Store Rating” submenu.
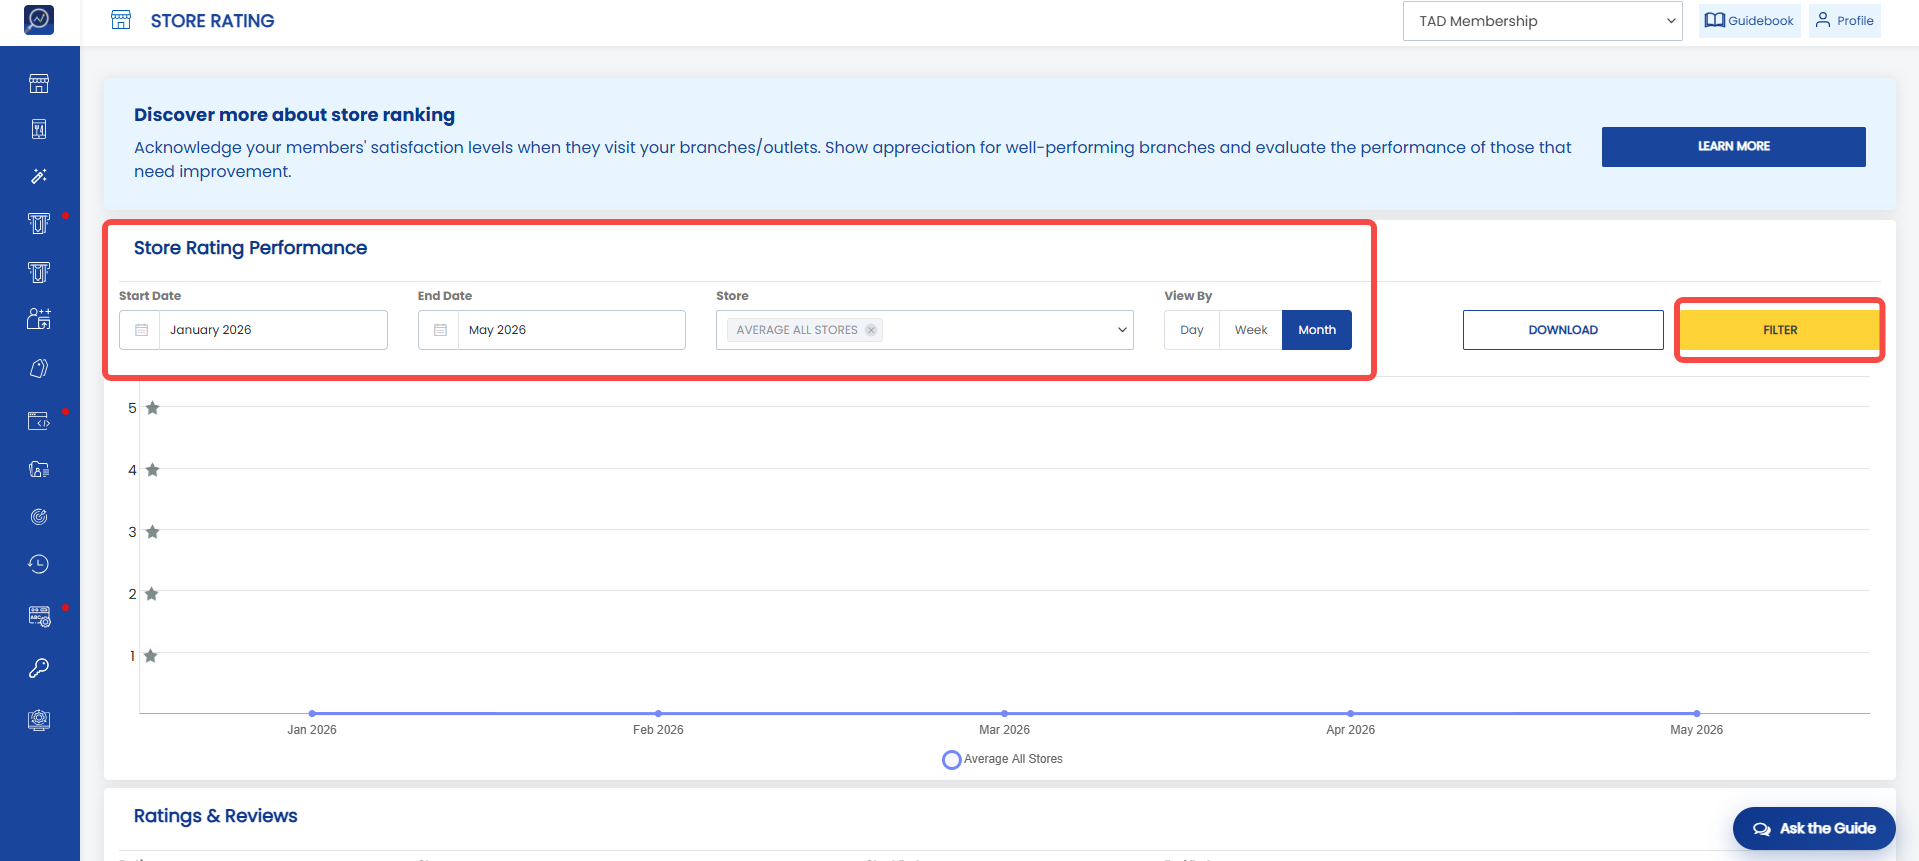
2. To download Store Rating Performance data, filter the data as needed in “Store Rating Performance”.
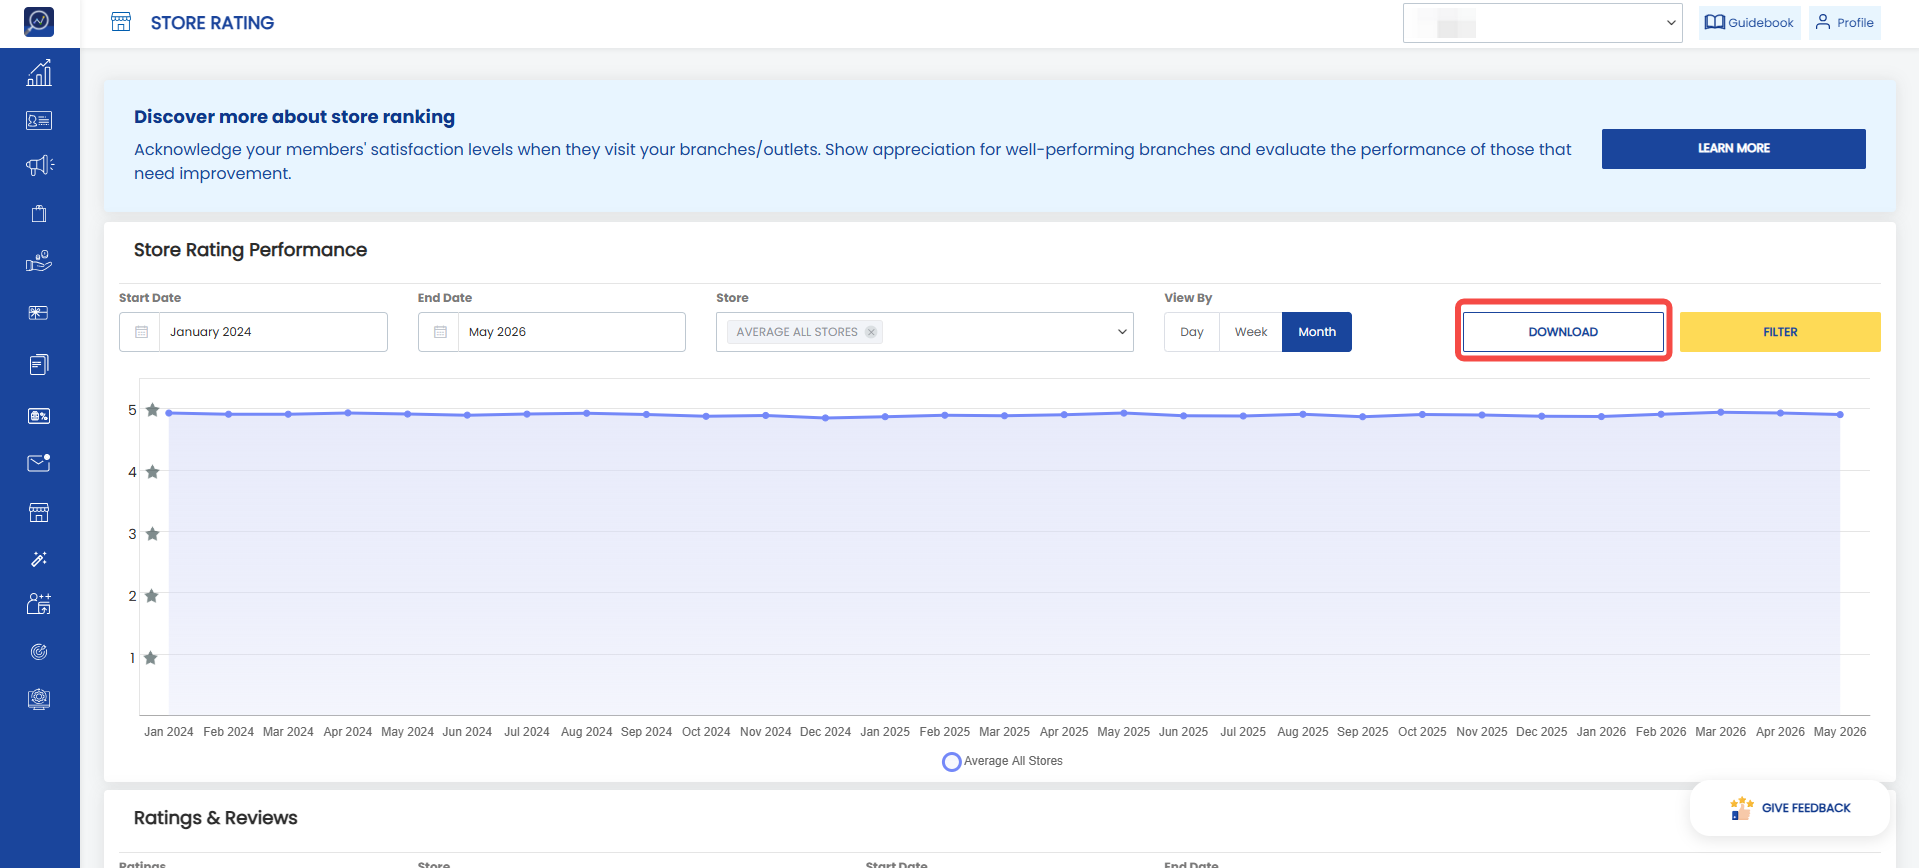
 3. Click “Download”
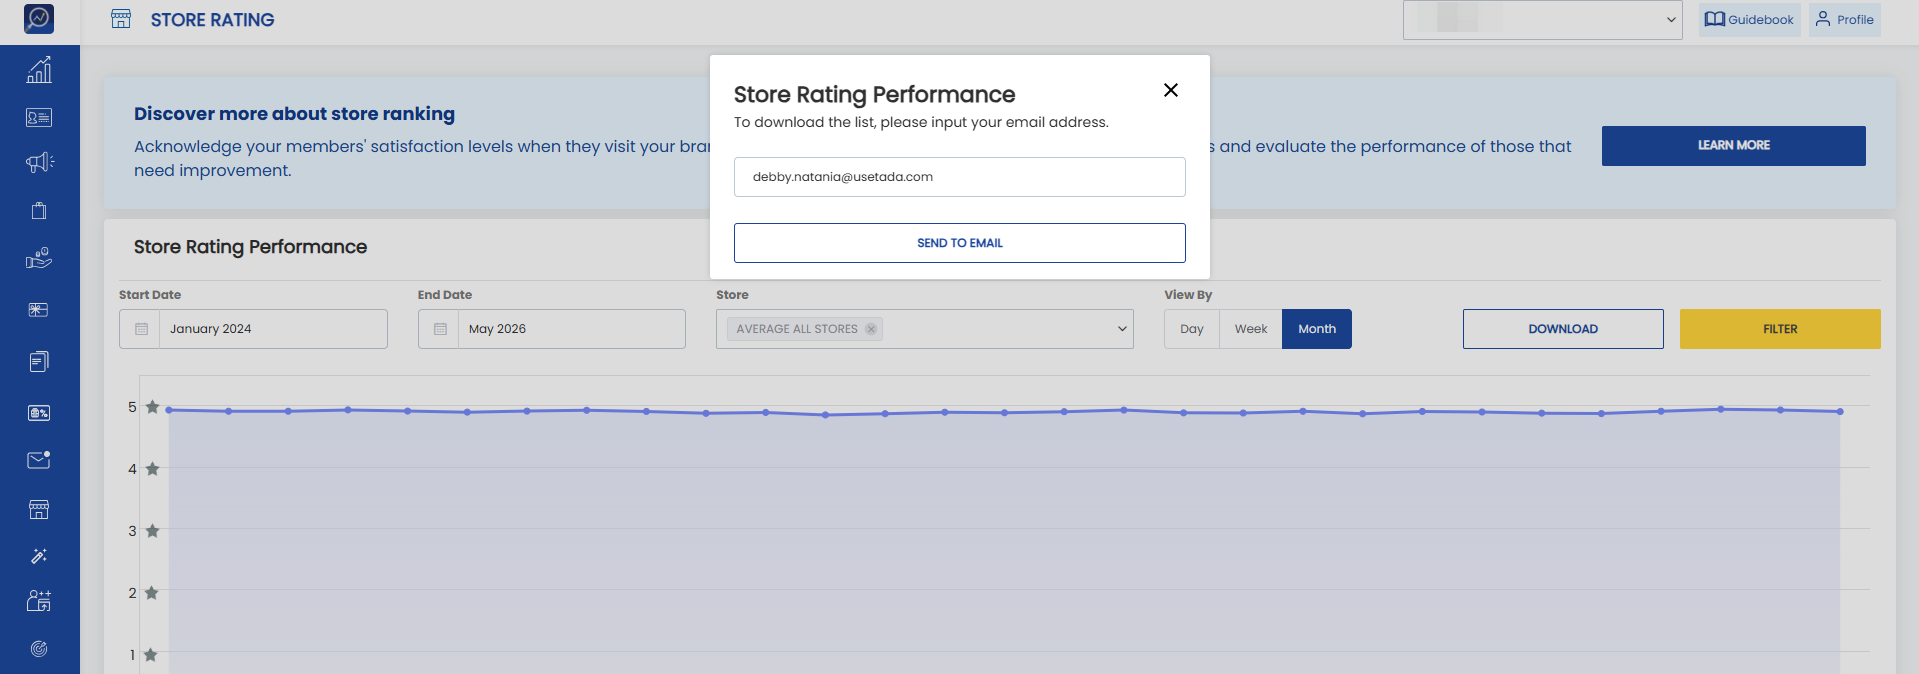
 4. Enter the report recipient email, then click “Send to Email”.
 5. To download Ratings & Reviews data, filter the data as needed, then click “Download”.
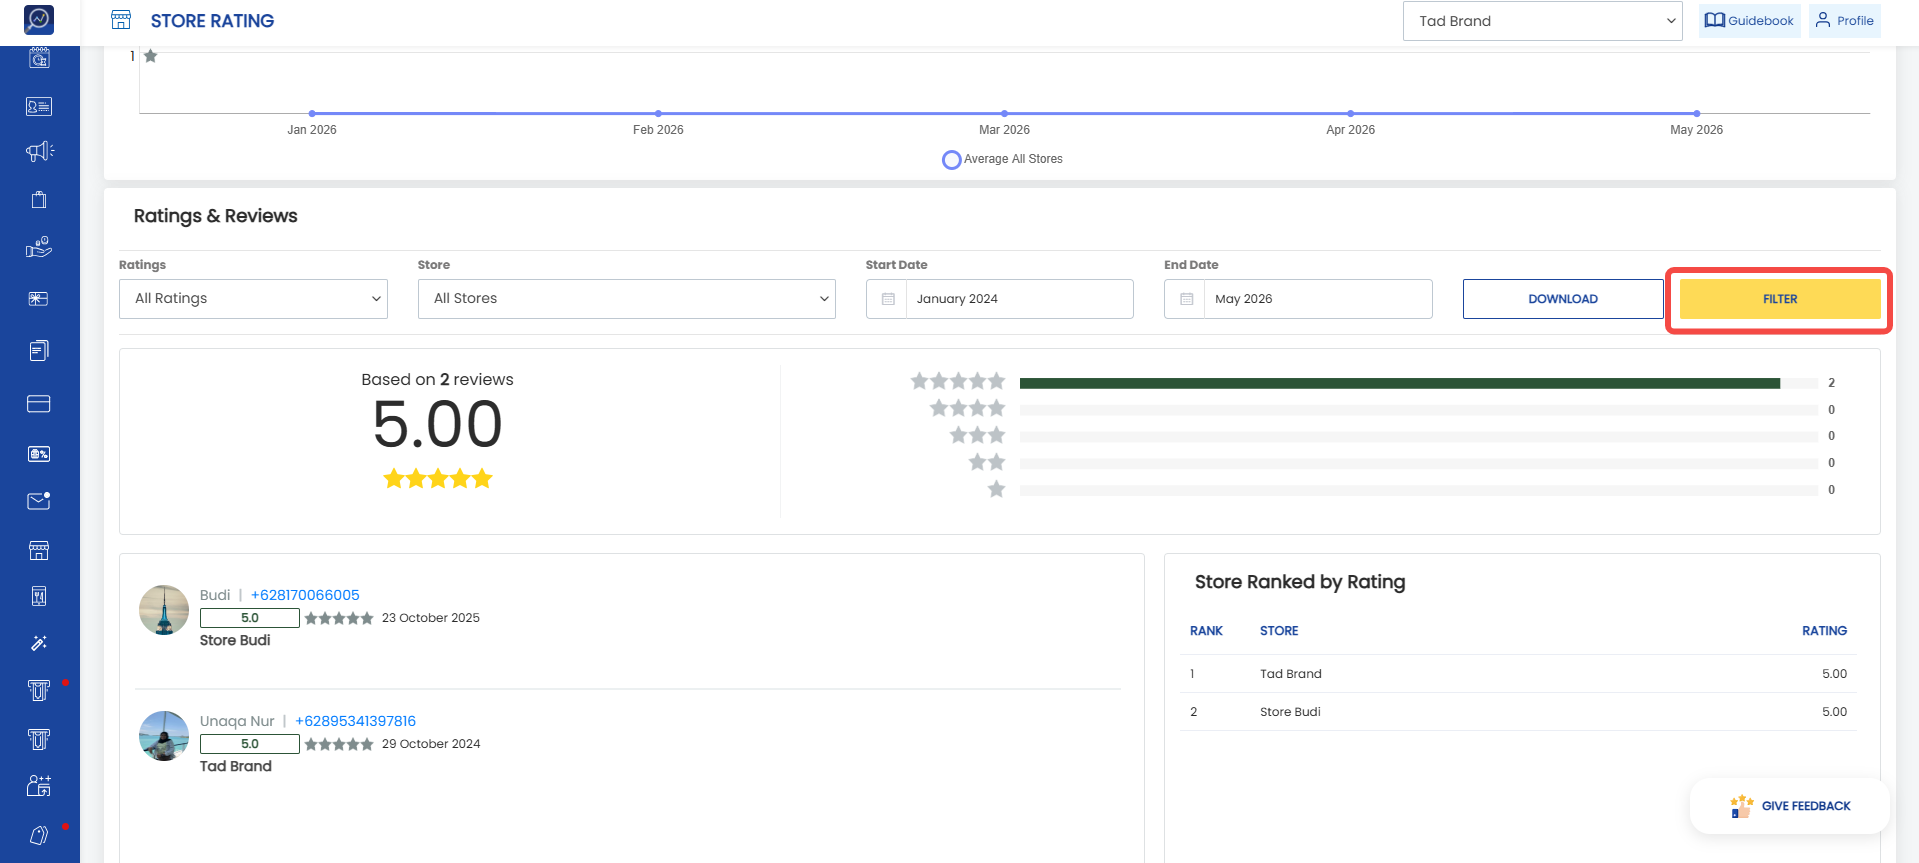 6. Enter the report recipient email, then click “Send to Email”.