Manage User ID
The User ID menu is used by brands that use a user number (user ID) as the primary member identifier, replacing phone numbers or email addresses. Through this menu, brands can perform bulk uploads of user IDs, reset PINs, edit user data, and activate or deactivate users.
How to View the User ID List
1. Open the "User ID" menu.
2. The list of user IDs will be displayed on the Dashboard page.
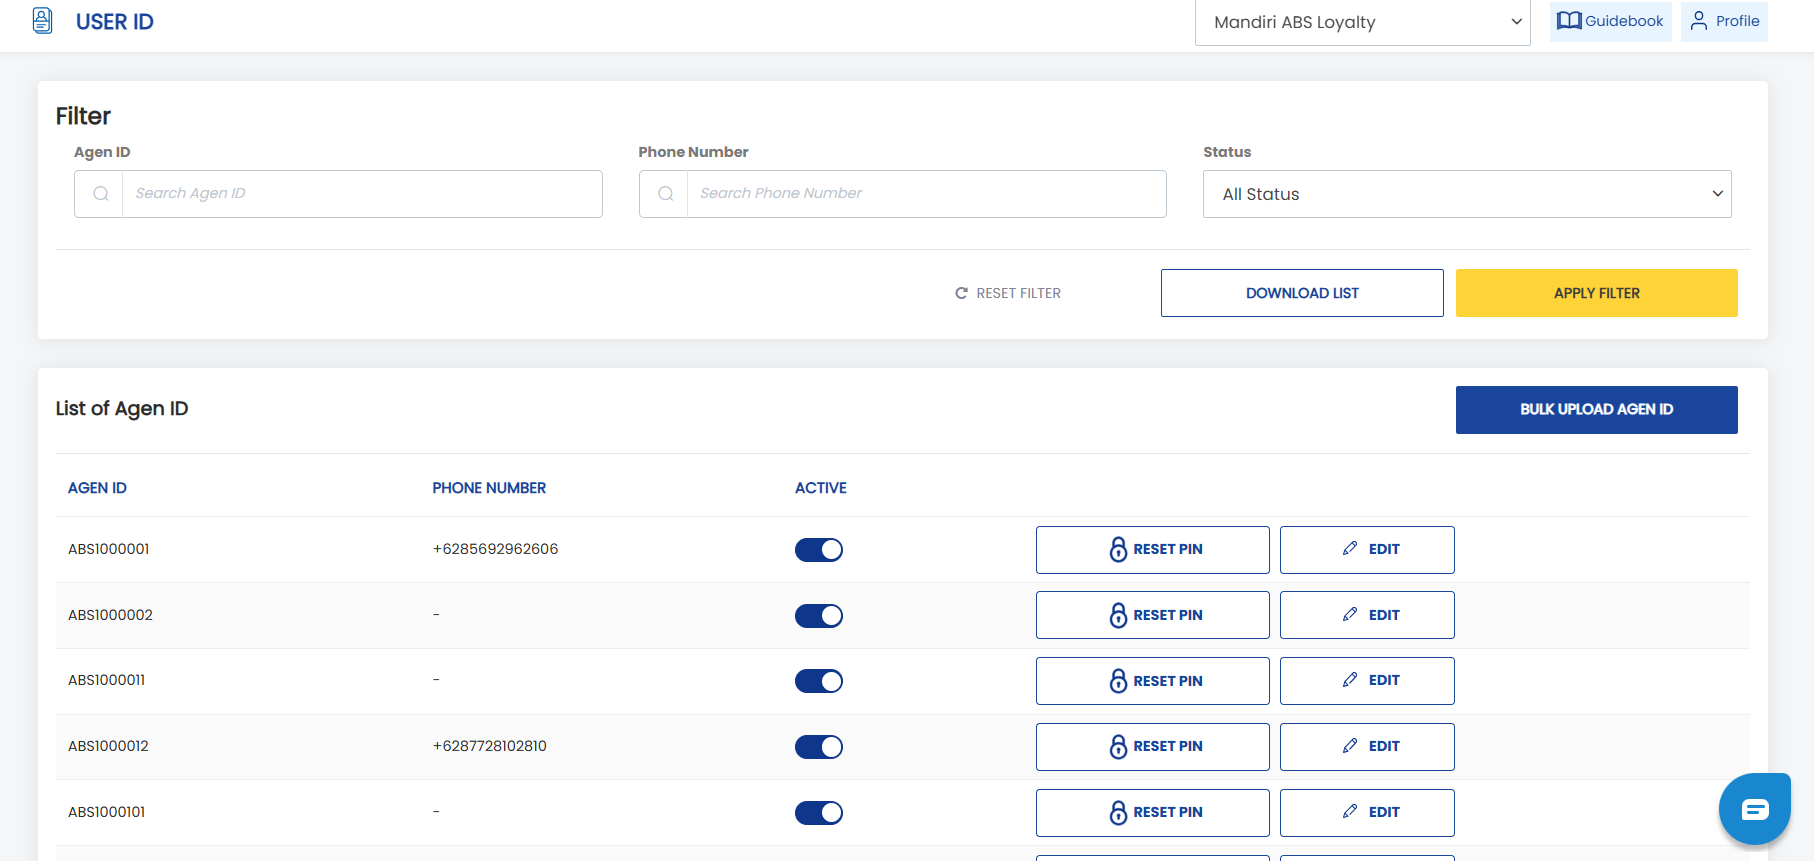
- User ID: The user number assigned to each user. The label for the user number can be customized according to the brand's preference. In the example above, the user number label uses the term Agent ID.
- Phone Number: The user's phone number. This is not the primary data. If the brand chooses not to provide phone numbers, this column will remain empty. Note: If the user has a phone number, they will be required to enter an OTP code during registration.
- Active: Brands can use the toggle button to deactivate or activate a user.
- Reset PIN: Brands can use this button to reset a user's PIN. The system will generate a new PIN and send it to the email address entered during the PIN reset process. Users must enter this PIN before creating a new PIN in the application.
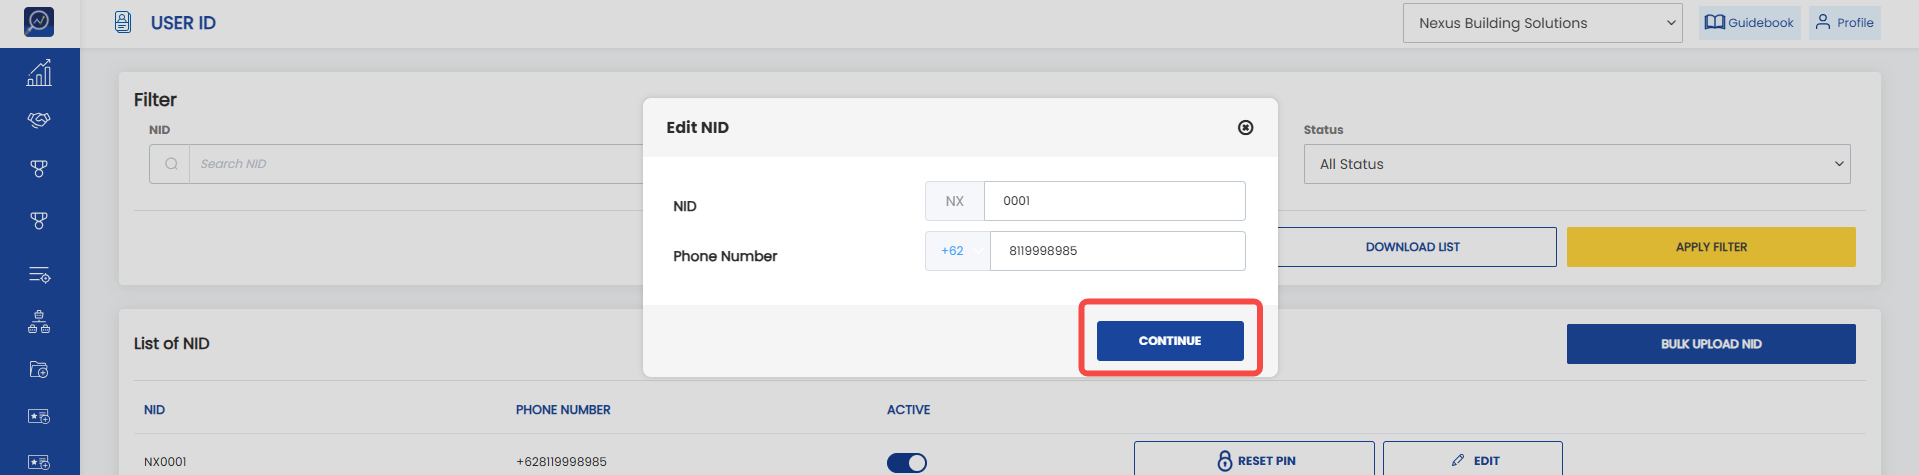
- Edit: Brands can update user data using this button. The editable data includes the user ID and phone number.
3. Use the filter feature to search for members based on "User ID", "Phone Number", or user "Status".

How to Perform a Bulk Upload of User IDs
1. Open the "User ID" menu.
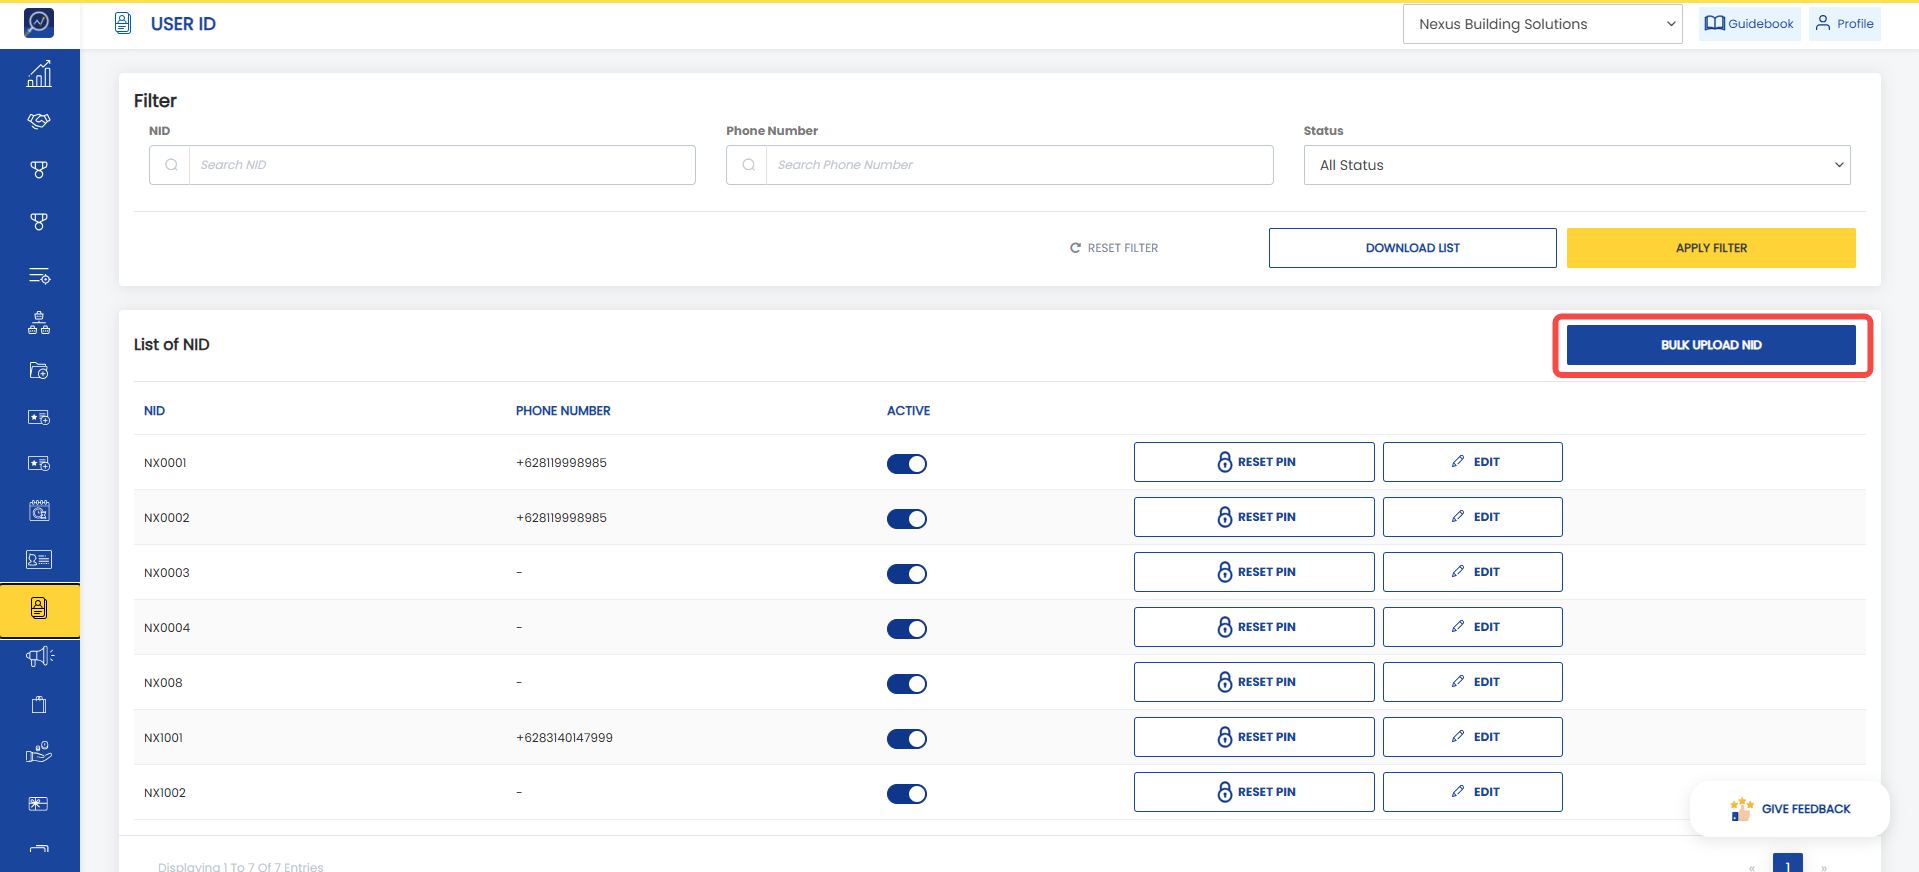
2. Click the "Bulk Upload User ID" button.
 3. Select a program from the "Select Program" dropdown.
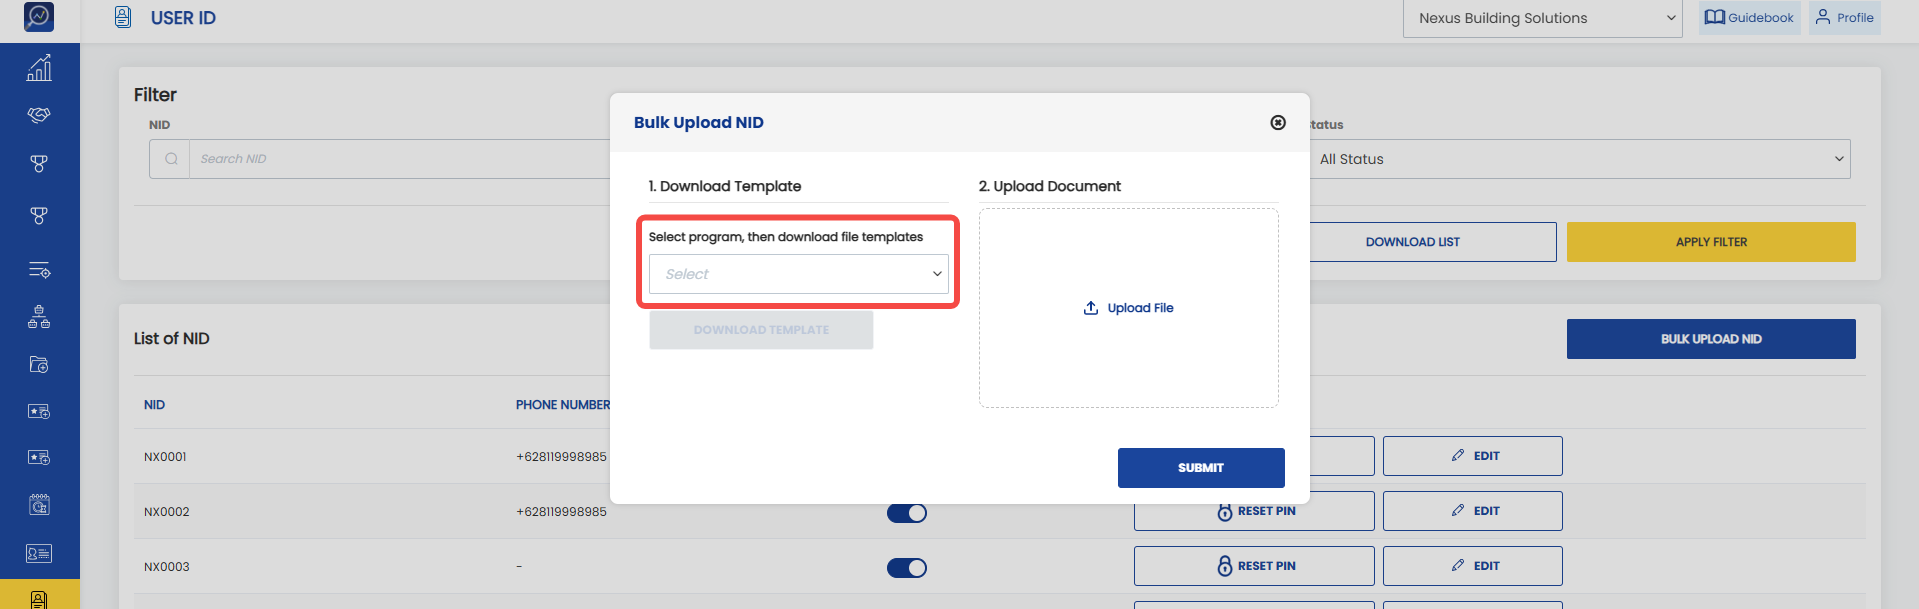 4. Download the template by clicking "Download Template". The downloaded template can be used to determine which users will receive top-ups and the amount to be given.
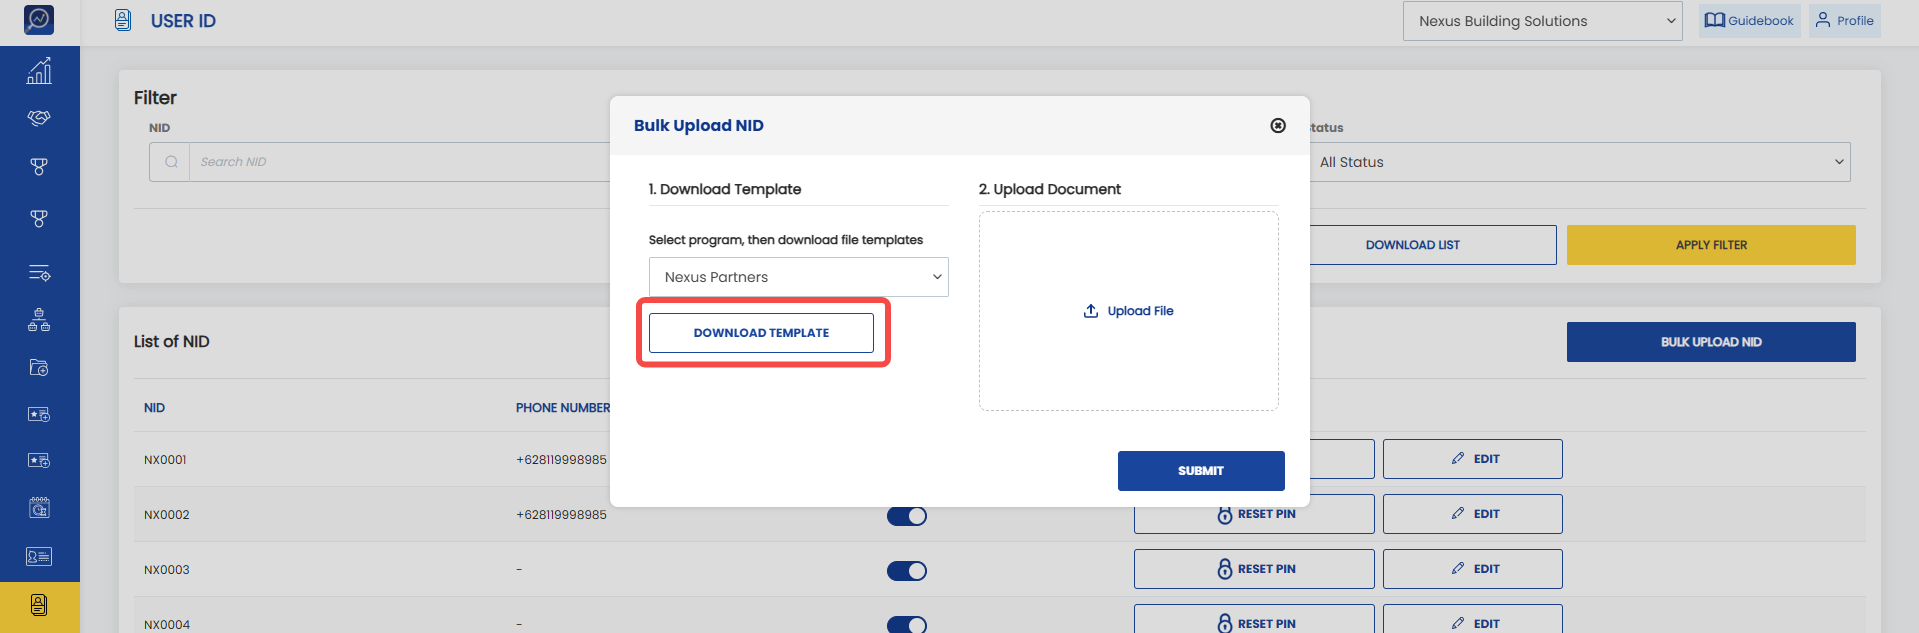 5. The downloaded template will look like the example below.
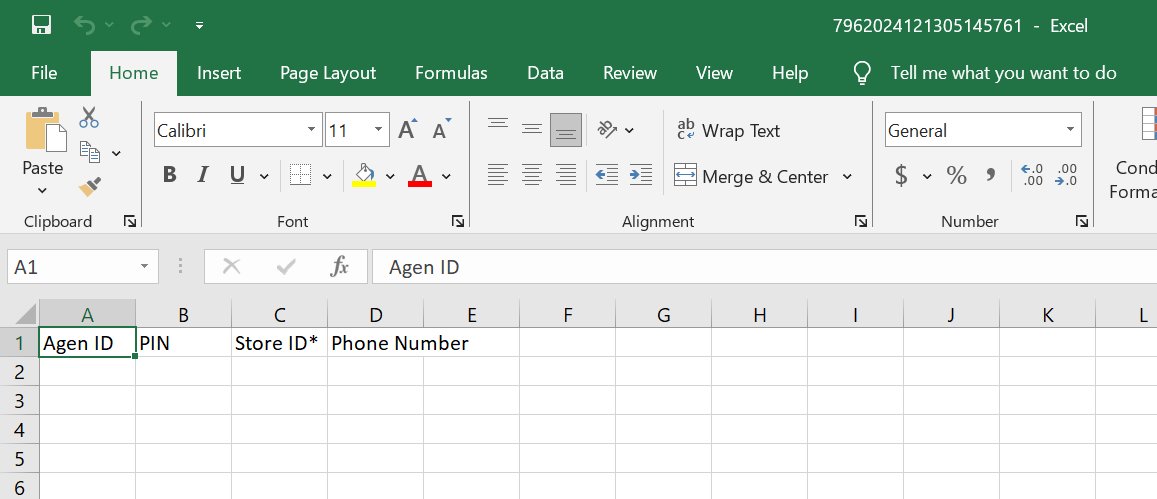
- User ID: Brands can enter a list of user IDs in this column.
- PIN: Brands may leave the PIN column blank if they want the system to generate the PIN automatically.
- Store ID: Brands can enter the merchant terminal ID.
- Phone Number: If the brand does not use phone numbers, this column may be left blank.
6. After completing the template, upload the file again by clicking "Upload File".
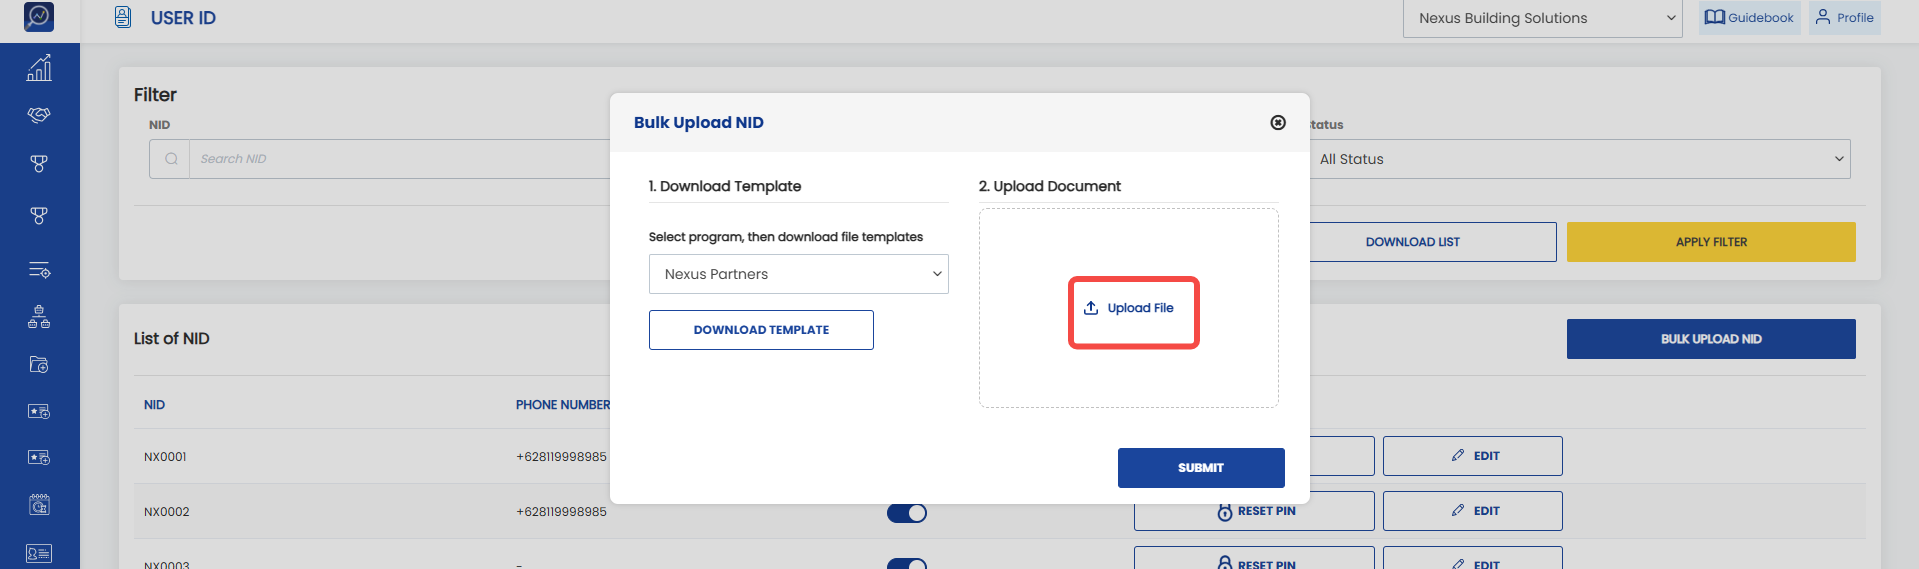 7. Click “Submit”.
How to Reset a User PIN
1. Open the "User ID" menu.
2. Click the "Reset PIN" button.
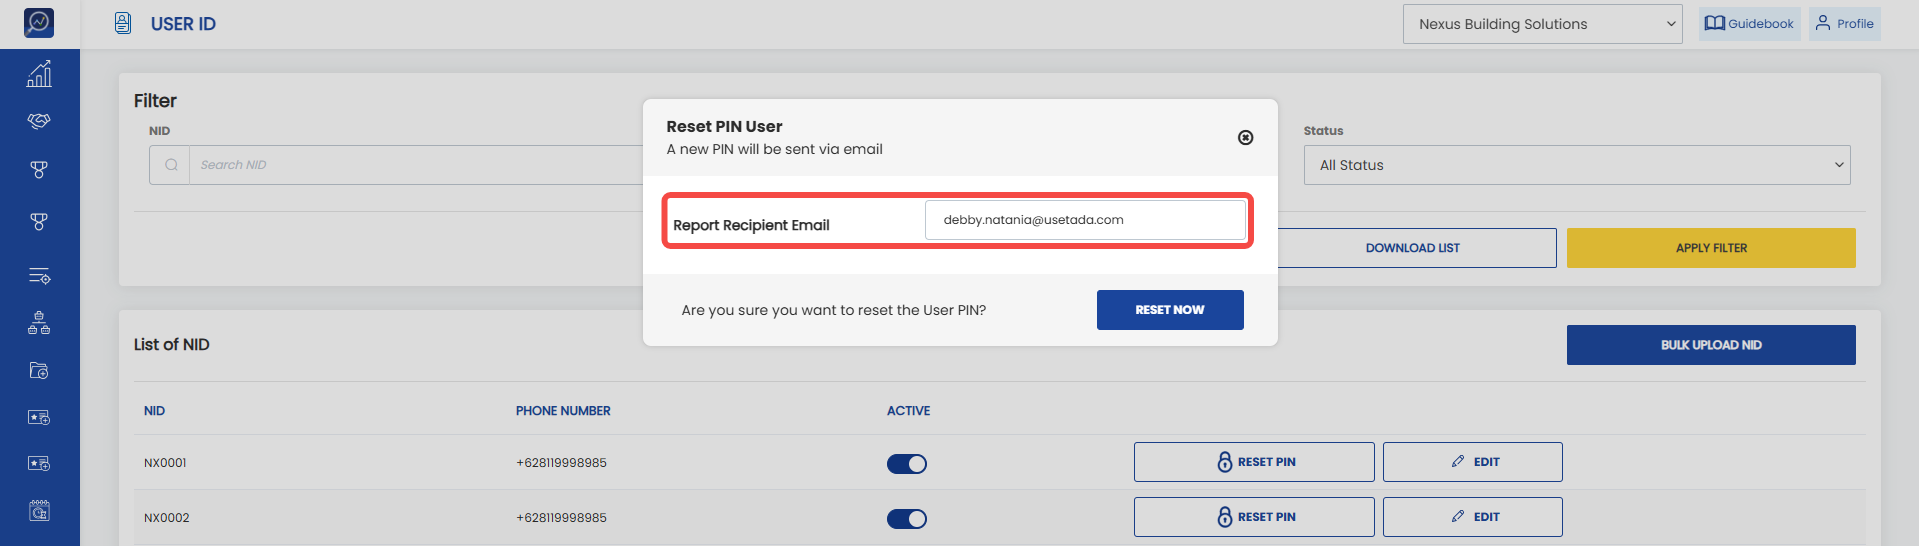
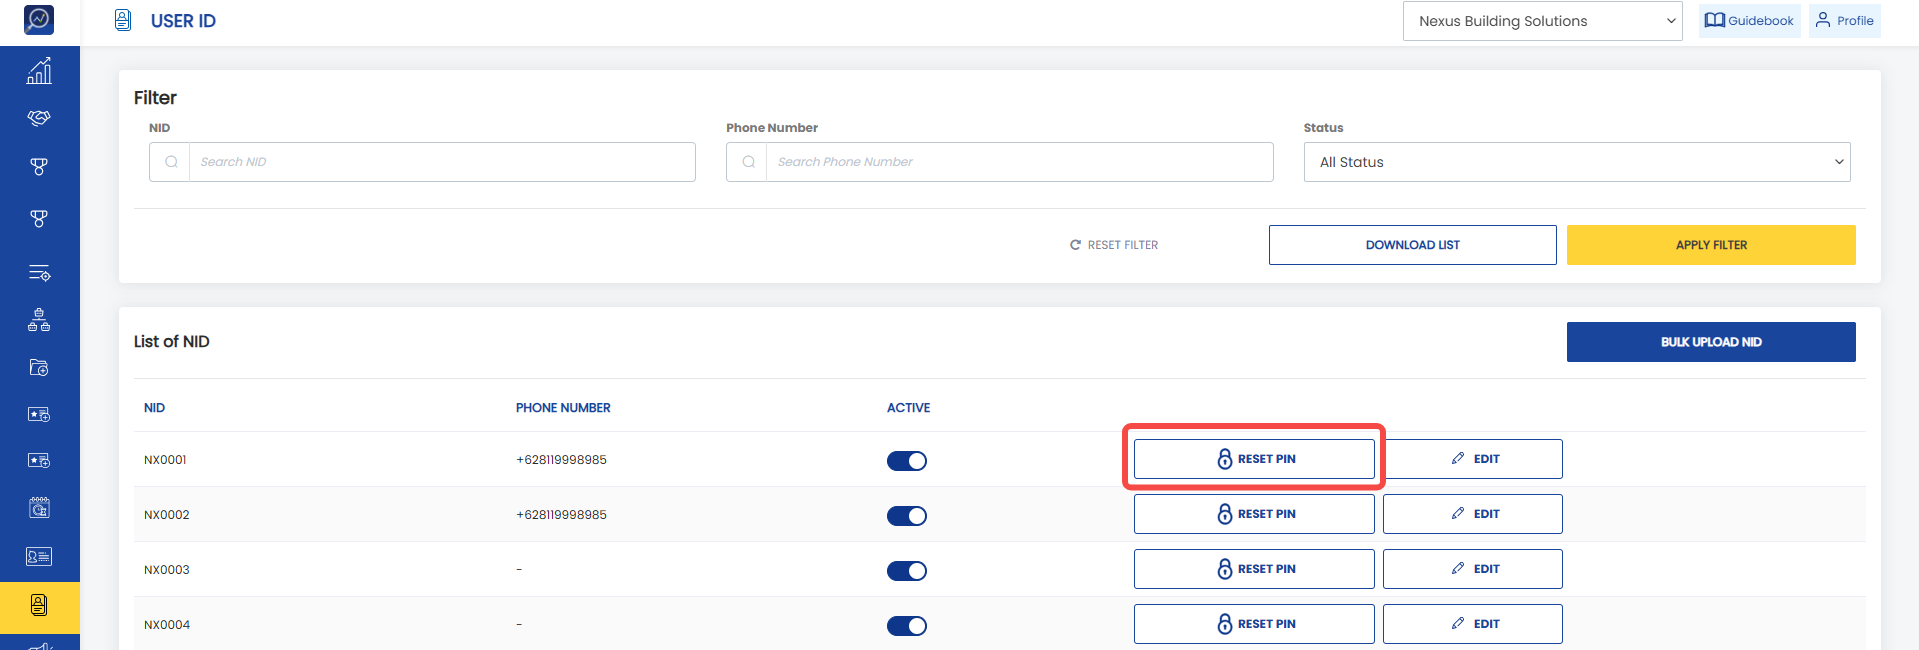 3. Enter the email address that will receive the new PIN from Tada.
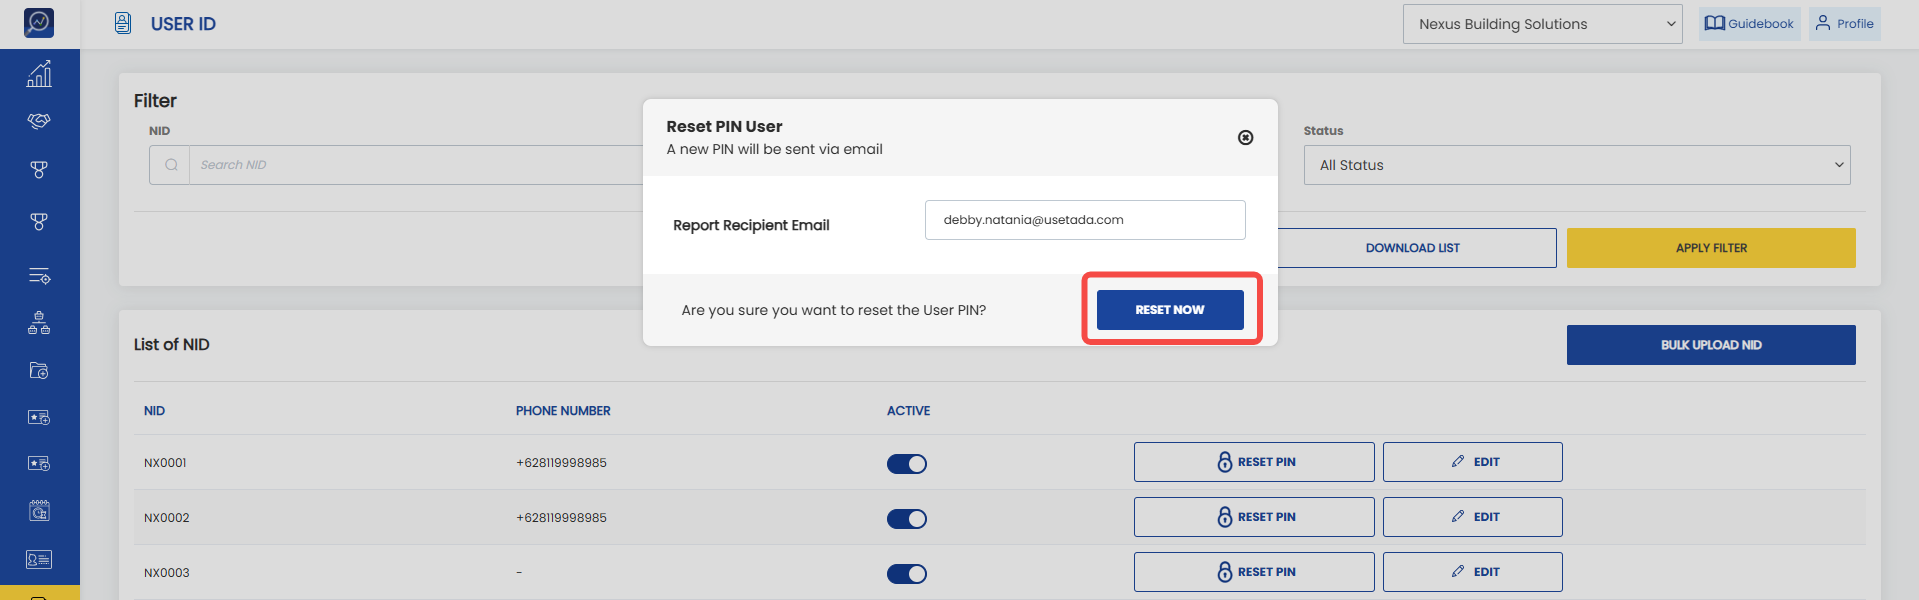
 4. Click “Reset Now”.
How to Deactivate a User
1. Open the "User ID" menu.
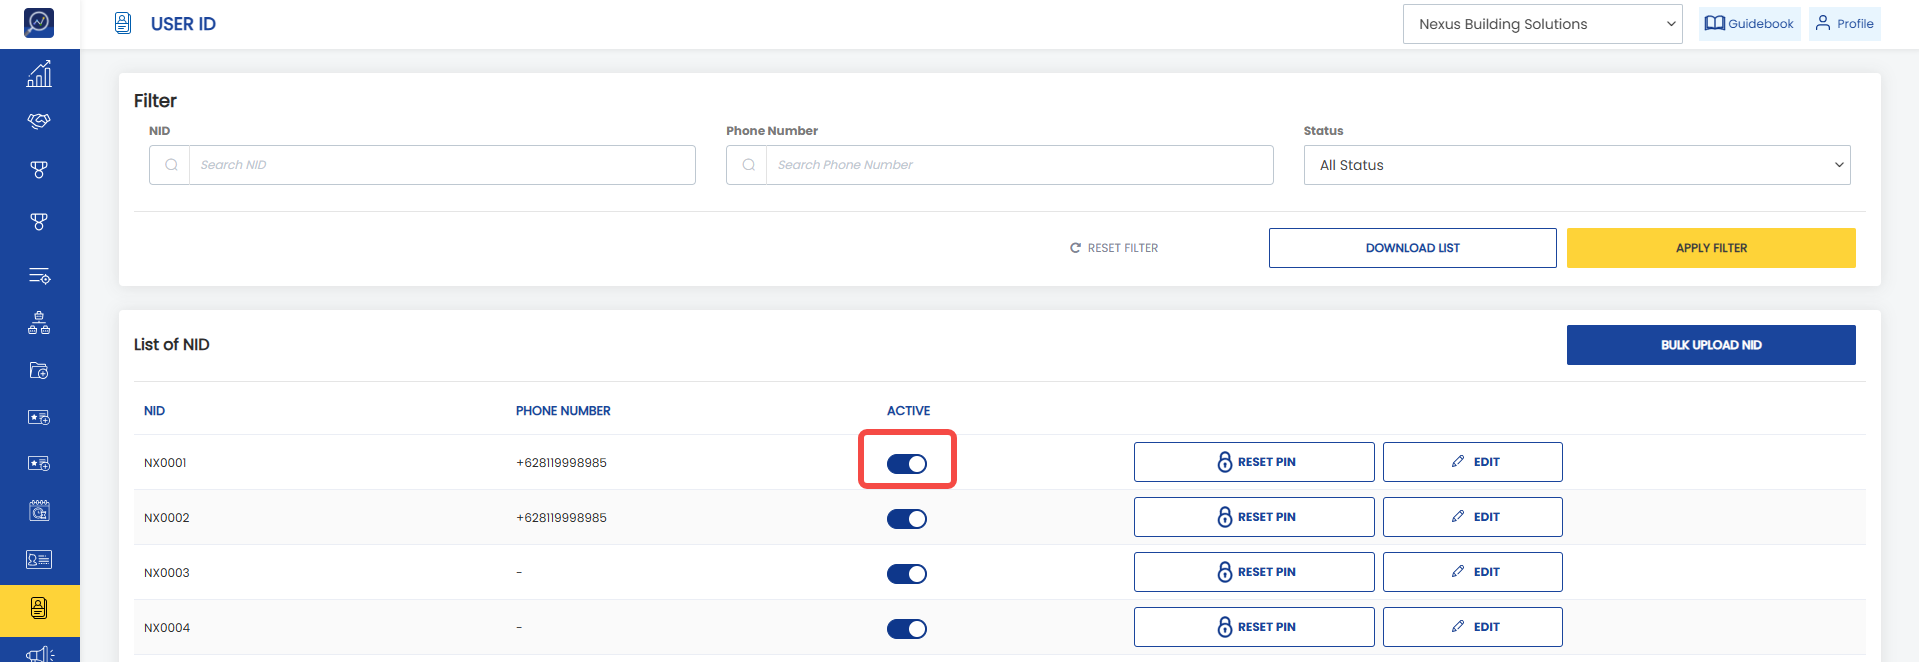
2. Click the toggle button under the "Active" column. When the toggle is turned off, the user will be deactivate
How to Update a User ID or Phone Number
1. Open the "User ID" menu.
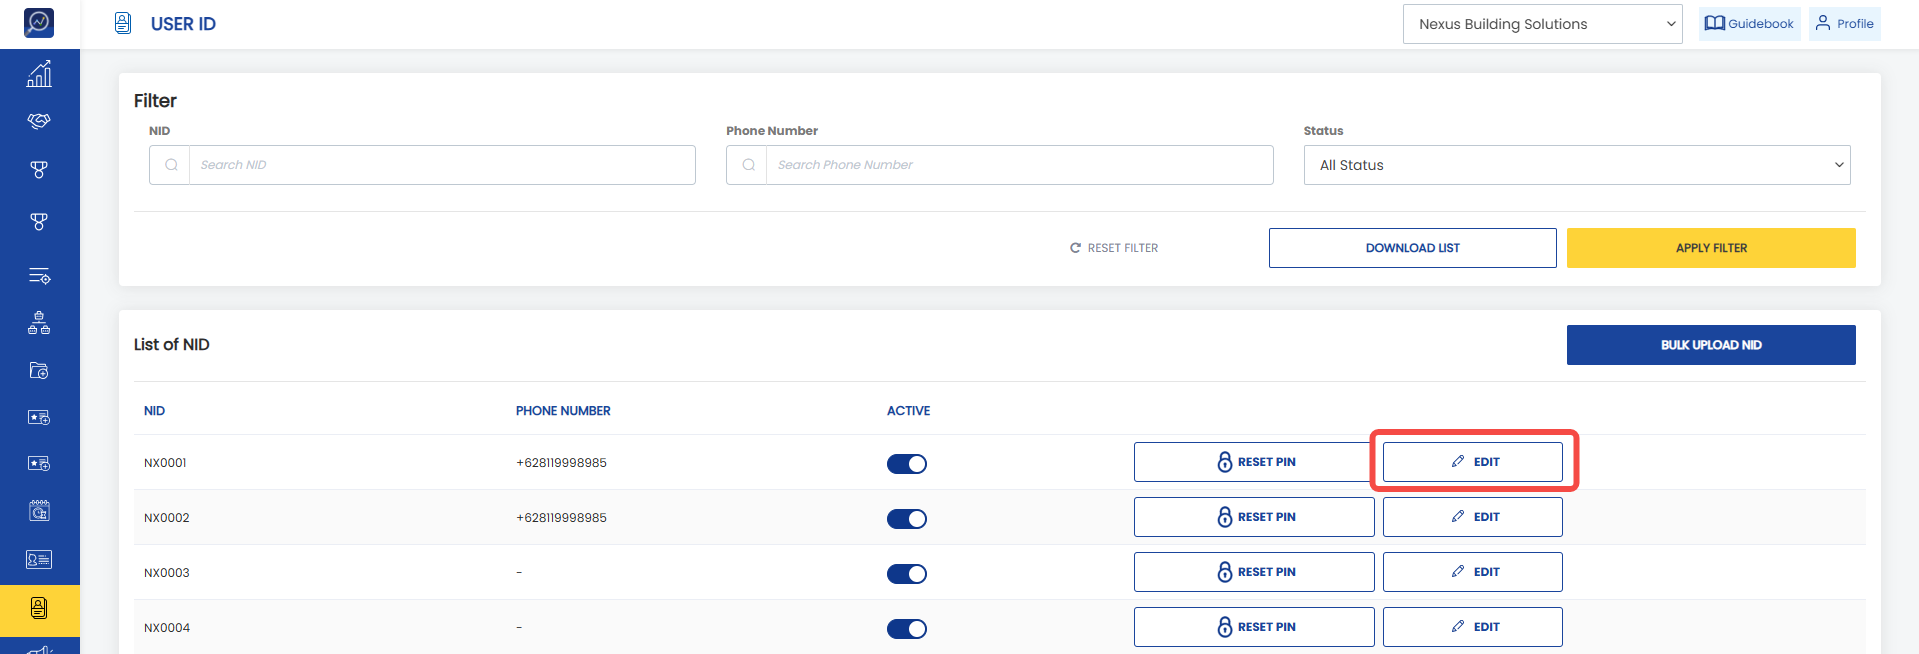
2. Click the "Edit" button.
 3. Enter the updated user ID and/or phone number.
Note: If the brand chooses not to use phone numbers, the phone number field can be left blank.
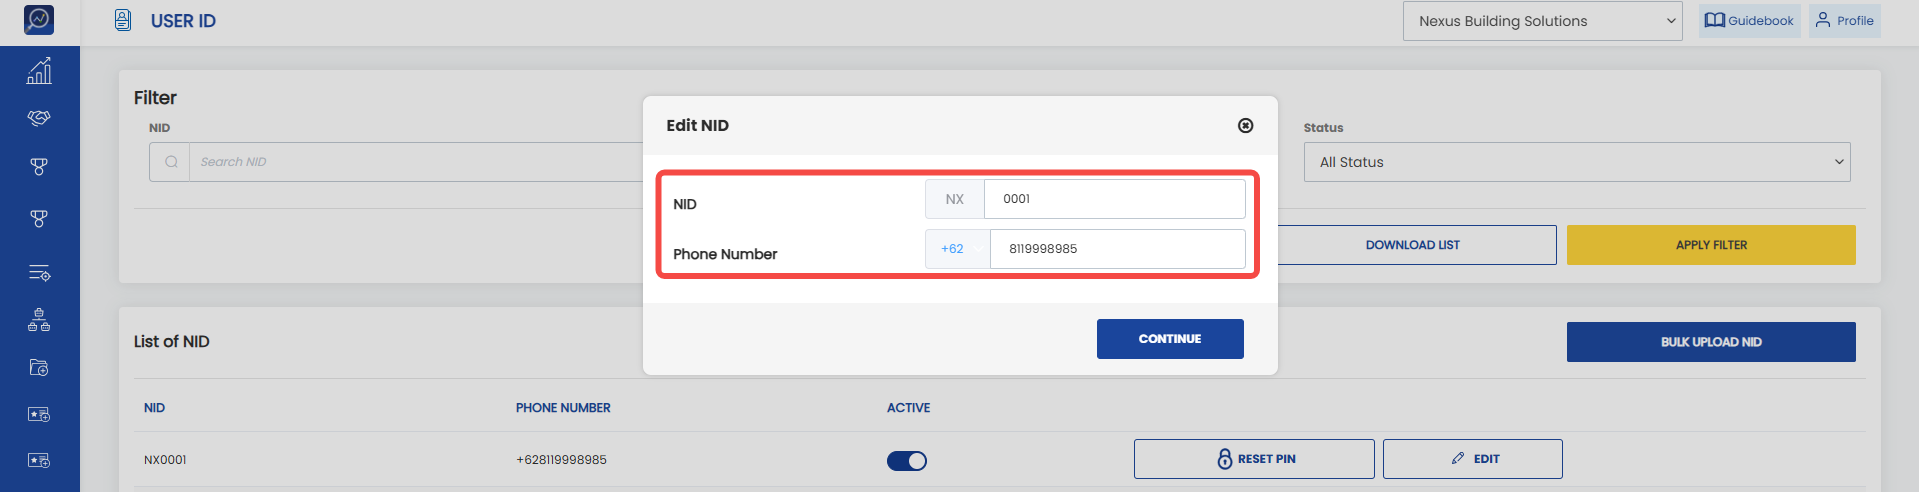 4. Click “Continue”.